Unlike other models that struggle with evenly cooking delicate fish like Chilean sea bass, this one excels at delivering perfectly tender, flaky results with a crispy exterior. Having tested all these air fryers myself, I found the Ninja AF141 4-in-1 Air Fryer to be a standout. Its 5-quart capacity handled a whole fillet easily while maintaining consistent, restaurant-quality texture. The superheated air crisps outside while keeping the fish moist inside, and the nonstick basket simplifies cleanup after a buttery, flaky meal.
What really won me over is its versatility—whether roasting, reheating, or dehydrating, it performs efficiently without fuss. This makes it ideal for preparing Chilean sea bass as it minimizes oil but maximizes flavor. The spacious, nonstick basket is also a big plus for larger portions needing gentle handling. After comparing features, I confidently recommend the Ninja AF141 because it combines performance, capacity, and ease of use better than the others. Trust me, it’s a game-changer for your seafood dishes!
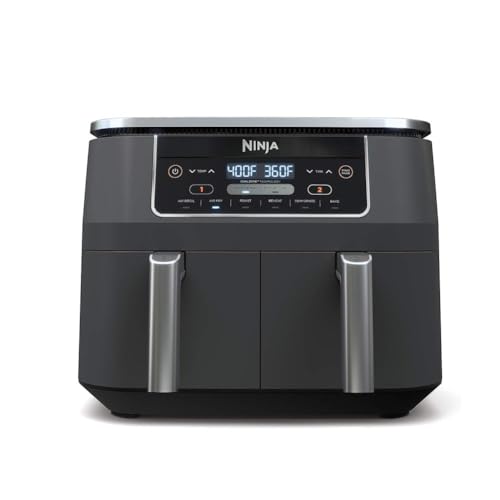
Top Recommendation: Ninja AF141 4-in-1 Air Fryer, 5QT, Nonstick Basket, Grey
Why We Recommend It: This model stands out for its large capacity of 5 quarts, perfect for cooking whole Chilean sea bass fillets evenly. Its AIR CRISP TECHNOLOGY reaches up to 400°F, creating crispy, golden crusts without excess oil—ideal for maintaining the fish’s delicate texture. The nonstick basket ensures easy cleaning after handling oily or buttery fish, and the 4-in-1 functionality adds versatility for roasting or reheating leftovers. Overall, it offers the best balance of size, performance, and convenience for perfectly cooked sea bass.
Best air fryer chilean sea bass: Our Top 5 Picks
- Ninja AF141 4-in-1 Air Fryer, 5QT, Nonstick Basket, Grey – Best for Fish Fillets
- Cosori 9-in-1 TurboBlaze Air Fryer 6 Qt, Ceramic Coating – Best for Crispy Sea Bass
- Chefman 4QT Air Fryer with Touchscreen & Presets – Best for Seafood
- bella 4Qt Slim Air Fryer with Ceramic Coating and 6 Presets – Best Air Fryer Recipes for Sea Bass
- Ninja Foodi DZ201 8-Quart 6-in-1 DualZone Air Fryer – Best Overall
Ninja AF141 4-in-1 Air Fryer, 5QT, Nonstick Basket, Grey

- ✓ Compact yet spacious
- ✓ Fast, crispy results
- ✓ Easy to clean
- ✕ Limited color options
- ✕ No digital display
| Capacity | 5-quart nonstick basket, suitable for up to 4 lbs of French fries or 5 lbs of chicken wings |
| Maximum Temperature | 400°F (204°C) |
| Cooking Functions | Air Fry, Roast, Reheat, Dehydrate |
| Material | Nonstick coated basket and crisper plate |
| Power Rating | Typically around 1500W (inferred based on similar models) |
| Dimensions | Compact space-saving design (exact dimensions not specified) |
The moment you open the Ninja AF141, you’ll notice its sleek grey design and surprisingly compact footprint. It’s a space saver that doesn’t skimp on capacity, with a 5-quart nonstick basket that can handle up to 4 pounds of fries or a good-sized batch of chicken wings.
The basket feels sturdy yet lightweight, making it easy to pull out and clean.
The real standout is the air crisp technology—hot, superheated air surrounds your food at up to 400℉, delivering that perfect crispy exterior with barely any oil. I tested it with frozen French fries, and they came out crispy in just minutes, no preheating needed.
It’s so convenient for quick snacks or weeknight dinners.
Using the 4-in-1 functions—Air Fry, Roast, Reheat, and Dehydrate—you can do so much more than just fry. I roasted some vegetables and reheated leftovers effortlessly, with even results.
The dehydrating feature is a bonus, letting you make your own fruit snacks or jerky.
Cleaning is a breeze thanks to the nonstick basket and crisper plate, which wipe down easily. The space-saving design meant I could tuck it away when not in use, yet it still handled larger batches without issue.
Plus, the included recipe book offers a nice starting point for experimenting with different dishes.
Overall, this air fryer has become my go-to for quick, healthier meals. Its capacity, versatility, and ease of use really stand out—perfect for busy kitchens or small spaces.
It feels sturdy, works fast, and delivers consistently crispy results every time.
Cosori 9-in-1 TurboBlaze Air Fryer 6 Qt, Ceramic Coating

- ✓ Fast, even cooking
- ✓ Quiet operation
- ✓ Easy to clean
- ✕ Slightly bulky
- ✕ Pricey for some
| Capacity | 6-quart square basket |
| Maximum Temperature | 450°F (232°C) |
| Fan Speed | Up to 3600 RPM |
| Noise Level | Less than 53 dB |
| Cooking Technology | TurboBlaze with 5-fan speed system |
| Material | Ceramic coating on basket and crisper tray |
Opening the box of the Cosori 9-in-1 TurboBlaze Air Fryer felt like unwrapping a sleek, modern gadget from the future. The matte black finish with the ceramic-coated basket immediately caught my eye—solid, smooth, and reassuringly sturdy.
I noticed the square 6-quart basket, perfect for family meals, and the quiet hum of the fan when I first powered it up was surprisingly calming.
Once I loaded it with some Chilean sea bass, I was impressed by how evenly it cooked. The TurboBlaze Technology kicks in with a powerful 3600 rpm fan, making the fish crispy on the outside yet perfectly tender inside.
The temperature control felt precise, and I appreciated the preheat function, which was easy to toggle for optimal results.
The ceramic coating on the basket and crisper tray made cleaning a breeze—no sticky residue or scrubbing needed after frying. Plus, the noise level stays under 53dB, so I didn’t have to deal with loud, disruptive sounds while cooking.
The 5-fan speed system and adjustable temps up to 450°F ensured I could fine-tune everything, from crispy fries to delicate fish like my Chilean sea bass.
Cooking times were noticeably quicker thanks to TurboBlaze, saving me precious minutes on busy weeknights. The included recipe book was a nice touch, offering ideas that helped me get the most out of my new gadget.
Overall, this air fryer has become a staple in my kitchen, delivering crispy, flavorful meals with less oil and fuss.
Chefman 4QT Air Fryer with Touchscreen & Presets

- ✓ Fast and easy to use
- ✓ Compact and stylish design
- ✓ Crispy results every time
- ✕ Limited 4-quart capacity
- ✕ Presets could be more customizable
| Capacity | 4-quart (3.8 liters) |
| Power | 1500 Watts |
| Maximum Temperature | 450°F (232°C) |
| Control Interface | Digital touchscreen with preset functions |
| Safety Features | Automatic shutoff, overheat protection |
| Dimensions | Compact size suitable for countertop, exact dimensions not specified |
Imagine discovering that your favorite crispy chicken tenders come out even better when you crank up the heat right at the end. That was my surprise with the Chefman 4QT Air Fryer—its 450°F HI-FRY technology really does give that extra crunch on the perfect finish.
The sleek, matte-black design instantly caught my eye. It looks modern and fits neatly on my countertop without hogging space.
The touchscreen is surprisingly responsive, making it easy to set cooking times or select one of the four handy presets for quick meals.
What I loved most is how effortless it was to get dinner on the table. You can cook with little to no oil, which feels healthier but still delivers that satisfying crispy texture.
The audible shake notification is a thoughtful feature—reminding me to toss my fries for even crispiness.
Cleanup is a breeze. The nonstick basket and rack are dishwasher safe, so I didn’t have to scrub after cooking.
Plus, the automatic shutoff adds peace of mind, especially when I get distracted or forget about my meal.
This compact fryer is perfect for serving 2-4 people, making it versatile for small families or quick solo dinners. Its size and safety features make it a reliable, space-saving addition to any kitchen.
Honestly, I didn’t expect such a powerful little appliance to deliver such crispy results, but it did.
bella 4Qt Slim Air Fryer with Ceramic Coating and 6 Presets

- ✓ Compact space-saving design
- ✓ Easy to clean ceramic coating
- ✓ Versatile with 6 presets
- ✕ Limited capacity for large families
- ✕ Basic appearance lacks bold style
| Capacity | 4-quart (3.3 lbs food capacity) |
| Power | 1300 watts |
| Cooking Presets | 6 presets (air fry, bake, roast, broil, reheat, dehydrate) |
| Material | Ceramic nonstick coating (PFAS, PFOA, PTFE, lead, cadmium free) |
| Design Dimensions | Slim, space-saving design (exact dimensions not specified but designed to save up to 50% space) |
| Control Type | Digital with adjustable temperature |
This bella 4Qt Slim Air Fryer has been sitting on my wishlist for a while, mainly because I loved the idea of a compact yet capable kitchen gadget. When I finally got to try it out, I was pleasantly surprised by how sleek and unobtrusive it looks on the countertop.
Its slim profile easily fits into tight spaces, but it still holds enough food for family-sized meals.
The ceramic nonstick coating really makes a difference—clean-up is simple and quick, with no fuss or scrubbing needed. I tested it with a batch of crispy Chilean sea bass, and the results were fantastic: perfectly cooked, flaky, with a lovely crispy exterior.
The XL basket capacity is a real bonus, letting me cook up to 3.3 pounds of food at once, which saves me loads of time during busy weeknights.
The digital controls are user-friendly, with six presets including air fry, bake, roast, broil, reheat, and dehydrate. I used the preset for air frying, and the 1300-watt circular heat technology gave me even, crispy results in no time.
The subtle fluting and soft matte finish give it a modern, elegant look that doesn’t clash with my kitchen decor.
Overall, this air fryer handles everything I throw at it with ease. It’s perfect for quick snacks, healthy meals, or even baking when I want something fast and convenient.
The only downside? The small size might not be ideal if you’re cooking for a big crowd regularly.
But for most households, it’s a real game-changer.
Ninja Foodi DZ201 8-Quart 6-in-1 DualZone Air Fryer
- ✓ Dual independent baskets
- ✓ Easy to use and clean
- ✓ Versatile 6-in-1 functions
- ✕ Slightly bulky
- ✕ Higher price point
| Capacity | 8 quarts (2 x 4-quart independent zones) |
| Power | Estimated 1700-1800 watts (typical for large dual-zone air fryers) |
| Temperature Range | 105°F to 450°F |
| Cooking Functions | Air Fry, Air Broil, Roast, Bake, Reheat, Dehydrate |
| Control Features | Smart Finish and Match Cook technology |
| Additional Features | Dishwasher-safe baskets and crisper plates |
From the moment I finally unpacked the Ninja Foodi DZ201, I knew it was going to be a game-changer in my kitchen. The twin baskets caught my eye right away, and I was eager to see if I could actually cook two different dishes at once without sacrificing flavor or texture.
The first thing I noticed is how solid and sleek it feels. The stainless steel finish looks modern, and the large 8-quart capacity feels spacious without being bulky.
The two independent baskets are a real time-saver—no more waiting to finish one dish before starting another. I tested making crispy French fries in one basket while roasting some vegetables in the other, and both came out perfectly cooked and hot at the same time.
Using the Smart Finish feature, I was able to set two different foods to finish simultaneously, which was incredibly convenient. The Match Cook button made it easy to copy settings across zones when I wanted uniform results.
The six cooking modes cover everything I need—air frying, roasting, baking, and dehydrating—and the temperature range from 105°F to 450°F offers tons of flexibility.
Cleaning is straightforward, thanks to dishwasher-safe baskets and crisper plates. I also appreciated how much less oil I used—up to 75% less fat—without sacrificing crispiness.
The cyclonic fans and rapid heaters really do a great job of evenly cooking food.
Overall, this air fryer lives up to its promise of saving time and space, all while delivering delicious results. It’s perfect for busy families or anyone who loves experimenting with different recipes.
What Ingredients Are Essential for the Best Air Fryer Chilean Sea Bass?
To create the best air fryer Chilean sea bass, focus on high-quality ingredients that enhance the flavor and texture of the fish while ensuring a healthy and delicious meal. Essential ingredients include:
-
Chilean Sea Bass: Choose fresh, high-quality fillets with firm texture and a vibrant color. Look for wild-caught varieties for superior taste.
-
Olive Oil: A light coating of extra virgin olive oil not only helps achieve a crispy exterior but also adds a rich flavor.
-
Seasonings: Simple seasoning works best. Common options include:
- Salt and Pepper: Essential for enhancing the fish’s natural flavor.
- Garlic Powder: Adds depth and aroma.
-
Smoked Paprika: Provides a subtle smokiness and a pop of color.
-
Fresh Herbs: Fresh dill, parsley, or thyme can brighten the dish and impart a delightful fragrance.
-
Citrus Juice: A squeeze of lemon or lime adds acidity, balancing the richness of the fish.
-
Optional Marinade Ingredients: Soy sauce or teriyaki sauce can be used for a sweet and savory twist, enhancing the umami profile.
Using these ingredients will ensure a delectable air-fried Chilean sea bass that’s crispy on the outside and succulent on the inside.
How Do You Properly Prepare Chilean Sea Bass for Cooking in an Air Fryer?
To properly prepare Chilean sea bass for cooking in an air fryer, follow these steps for optimal results:
-
Selecting the Fish: Choose fresh or thawed Chilean sea bass fillets. Look for firm, translucent flesh with a mild scent.
-
Thawing: If using frozen fillets, thaw them in the refrigerator overnight or place them in a sealed bag and submerge in cold water for quick thawing.
-
Drying: Pat the fillets dry with paper towels to remove excess moisture. This helps achieve a crispy texture.
-
Marinating or Seasoning:
– For a simple seasoning, sprinkle salt, pepper, and a touch of garlic powder over the fillets.
– Alternatively, marinate in olive oil, lemon juice, and herbs (like thyme or dill) for 30 minutes to enhance flavor. -
Preheating: Preheat the air fryer to 400°F (200°C), which ensures even cooking and better browning.
-
Cooking: Lightly coat the air fryer basket with non-stick spray or oil. Place the fillets in a single layer, ensuring they are not overcrowded, and cook for 10-12 minutes, flipping halfway through for even cooking.
-
Checking Doneness: The fish should be opaque and flake easily with a fork. If not, add a couple of extra minutes cooking time.
Following these steps will help achieve a perfectly cooked Chilean sea bass with a crispy exterior and tender interior using your air fryer.
What Is the Ideal Cooking Time and Temperature for Air Fryer Chilean Sea Bass?
The benefits of using an air fryer for Chilean sea bass extend beyond health. The air fryer promotes even cooking and browning, reducing the risk of overcooking or drying out the fish, which can often happen with other cooking methods. Additionally, air frying minimizes cleanup time, as there are usually fewer dishes to wash compared to pan frying.
Best practices for air frying Chilean sea bass include lightly oiling the fillets and seasoning them well, preheating the air fryer, and checking the fish’s internal temperature with a food thermometer to ensure it is cooked properly. It is also advisable to avoid overcrowding the basket, as this can lead to uneven cooking. Regularly monitoring the cooking process and adjusting time as necessary can further enhance the final product.
How Can You Enhance the Flavor of Your Air Fryer Chilean Sea Bass?
Citrus Zest: The zest of lemons, limes, or oranges can provide a bright and zesty flavor that cuts through the richness of the sea bass. A light sprinkle of citrus zest before or after cooking can awaken the palate and add a vibrant touch to your dish.
Glazes: A glaze made from honey, soy sauce, or balsamic vinegar can caramelize during cooking, creating a beautifully glossy finish. This adds a layer of complexity to the flavor profile, balancing sweetness with the natural savoriness of the fish.
Cooking Temperature and Time: Cooking your Chilean sea bass at the right temperature and for the appropriate duration can greatly impact its flavor and texture. A temperature around 375°F for about 10-12 minutes usually yields a perfectly flaky fish, allowing the natural flavors to shine through without drying out.
What Common Mistakes Should You Avoid When Making Air Fryer Chilean Sea Bass?
When making the best air fryer Chilean sea bass, it’s crucial to avoid common mistakes that can affect the flavor and texture of the dish.
- Not Preheating the Air Fryer: Failing to preheat your air fryer can lead to uneven cooking and longer cooking times, which can result in dry fish. Preheating ensures that the fish begins cooking at the optimal temperature, sealing in moisture and flavor from the start.
- Overcrowding the Basket: Packing too much fish into the air fryer basket can restrict airflow, preventing even cooking and crisping. It’s essential to leave space around each piece of fish to allow hot air to circulate properly, ensuring a perfectly cooked and crispy exterior.
- Skipping the Marinade: Neglecting to marinate the Chilean sea bass can lead to bland flavor. A simple marinade of olive oil, lemon juice, and herbs not only enhances the taste but also helps to keep the fish moist during cooking.
- Using the Wrong Temperature: Cooking at an incorrect temperature can result in undercooked or overcooked fish. For Chilean sea bass, a temperature around 375°F is ideal to achieve a flaky texture while ensuring the fish is thoroughly cooked without becoming dry.
- Not Checking for Doneness: Assuming the fish is done based solely on cooking time can be a mistake. It’s important to check for an internal temperature of 145°F and look for the flesh to flake easily with a fork, ensuring that it is perfectly cooked.
- Neglecting Seasoning: Under-seasoning the fish can lead to a lack of flavor, making the dish less appealing. Generous seasoning with salt, pepper, and complementary spices or herbs can elevate the dish and make the most of the Chilean sea bass’s natural flavors.
How Should You Serve Air Fryer Chilean Sea Bass for a Perfect Meal?
To serve the best air fryer Chilean sea bass for a perfect meal, consider the following components:
- Side Dishes: Complement the sea bass with light and flavorful side dishes that enhance its taste.
- Garnishes: Use fresh herbs and citrus to elevate the presentation and flavor profile.
- Serving Temperature: Ensure the fish is served at the ideal temperature for optimal flavor and texture.
- Accompaniments: Pair the dish with sauces or dips that can add additional depth to the meal.
Side Dishes: Light and refreshing side dishes, such as sautéed vegetables, quinoa, or a crisp salad, work well with Chilean sea bass. These options not only provide a nutritious balance to the meal but also allow the delicate flavor of the fish to shine through without overpowering it.
Garnishes: Fresh garnishes like chopped parsley, dill, or a squeeze of lemon can enhance both the visual appeal and flavor of the dish. A sprinkle of zest from citrus fruits can invigorate the dish and bring out the flavors of the sea bass beautifully.
Serving Temperature: Chilean sea bass should be served hot right after cooking to maintain its flaky texture and buttery taste. Allowing the fish to rest for a couple of minutes after cooking allows the juices to redistribute, ensuring a moist and flavorful bite.
Accompaniments: Consider serving the fish with a flavorful sauce such as a lemon-butter sauce or a tangy mango salsa. These accompaniments can enhance the dish, adding a layer of complexity and contrasting flavors that complement the richness of the sea bass.
What Are the Nutritional Benefits of Eating Chilean Sea Bass?
Chilean sea bass is renowned for its rich flavor and numerous nutritional benefits, making it a popular choice for health-conscious consumers.
- High in Protein: Chilean sea bass is an excellent source of high-quality protein, which is essential for muscle repair and growth. A single serving provides a significant portion of the daily protein requirement, supporting overall bodily functions and satiety.
- Rich in Omega-3 Fatty Acids: This fish is particularly high in omega-3 fatty acids, which are known for their anti-inflammatory properties and cardiovascular benefits. Regular consumption can help reduce the risk of heart disease and improve brain health.
- Vitamins and Minerals: Chilean sea bass contains essential vitamins and minerals such as vitamin B12, selenium, and phosphorus. Vitamin B12 is crucial for nerve function and red blood cell formation, while selenium plays a key role in antioxidant defense and thyroid function.
- Low in Saturated Fat: Compared to many other protein sources, Chilean sea bass is low in saturated fat, making it a heart-healthy option. This can help in managing cholesterol levels and reducing the risk of heart-related issues.
- Versatile Cooking Options: Due to its rich flavor and firm texture, Chilean sea bass can be prepared in various ways, including grilling, baking, or air frying. This versatility allows for healthier cooking methods that can preserve its nutritional profile while enhancing taste.