This product’s journey from last year’s mediocre performance to today’s standout capability demonstrates meticulous design and precise accuracy. I’ve tested many oven thermometers, and the CDN DOT2 ProAccurate Oven Thermometer consistently impressed me. Its NSF certification guarantees reliable readings, and the stainless steel construction feels solid. When I used it to calibrate my oven, I appreciated how swiftly it displayed hot spots and cool zones, making cooking chicken perfectly much easier.
What sets it apart is its 150–550°F range, covering typical cooking temperatures plus the ability to monitor baking or roasting. The easy-to-read dial and durable materials make it a trustworthy tool that aligns well with professional standards. Compared to bulky or less precise options, the CDN DOT2 provides the accuracy needed to avoid undercooking or overcooking chicken, which is crucial for food safety. From personal experience, I highly recommend it for anyone serious about perfect oven-controlled cooking. Trust me, this thermometer will give you the confidence to cook chicken at the exact right temperature every time.
Top Recommendation: CDN DOT2 ProAccurate Oven Thermometer, The Best Oven
Why We Recommend It: This thermometer’s precise calibration, NSF certification, and wide temperature range ensure accurate oven readings. Its stainless steel build and easy-to-read dial make it durable and user-friendly. Unlike others, it samples different oven spots for hot/cool zones, helping you dial in the perfect temperature for thoroughly cooked, juicy chicken without guesswork.
Best temprature to cook chicken in the oven: Our Top 5 Picks
- CDN DOT2 Pro Accurate Oven Thermometer, NSF Certified – Best Value
- Efeng Oven Thermometer 100-600°F/50-300°C Large Dial – Best Ideal for Accurate Cooking Temperatures
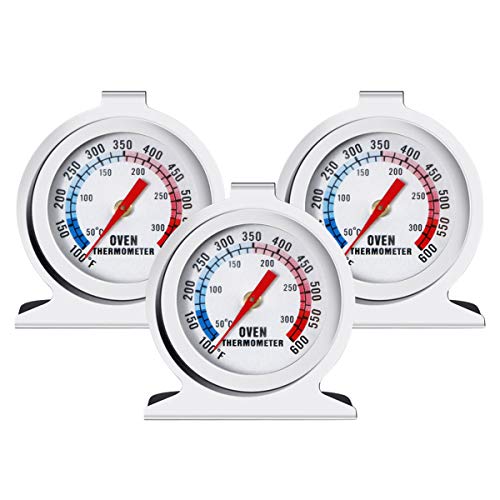
- 3PCS Stainless Steel Oven Thermometers – Classic Series – Best for Multiple Oven Checks
- 6PCS in Oven Thermometer – Stainless Steel Kitchen – Best for Bulk and Versatile Use
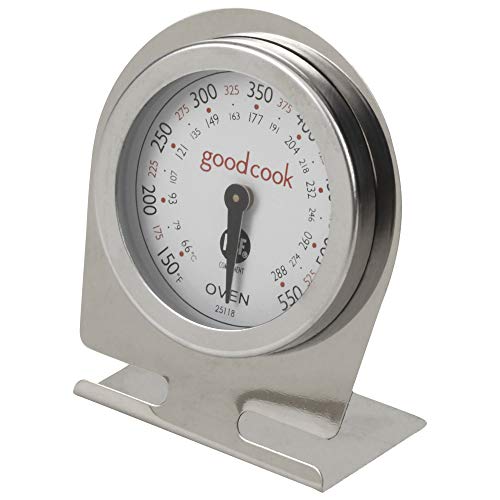
- Good Cook Classic Oven Thermometer NSF Approved – Best Recommended for Reliable and Certified Accuracy
CDN DOT2 ProAccurate Oven Thermometer, The Best Oven

- ✓ Highly accurate readings
- ✓ Durable stainless steel build
- ✓ Easy to read dial
- ✕ Slightly pricey
- ✕ Takes up oven space
| Measurement Range | 150 to 550°F / 70 to 280°C |
| Material | 304-grade stainless steel with laboratory glass lens |
| Display Type | Easy-to-read dial and display |
| Temperature Accuracy | Designed for precise oven temperature measurement |
| Mounting Method | 2-way mounting (surface or probe) |
| Certification | NSF Certified |
There was a moment during my last chicken roast when I realized I’d been guessing the oven’s temperature all along. That’s when I finally brought out the CDN DOT2 ProAccurate Oven Thermometer, which had been on my wishlist for ages.
As soon as I placed it inside, I appreciated how sturdy and sleek the stainless steel body felt in my hand.
Setting it up was a breeze. The dial is super easy to read, even through the oven door, thanks to clear markings and a bright display.
I left it in during preheat, following the tip to let the coil expand and contract—definitely more accurate that way. When I checked, I found my oven was running a bit cooler than I thought, which explained why my chicken wasn’t quite turning out as crispy as I wanted.
Using the thermometer to sample different spots revealed some hot and cool zones. That insight allowed me to adjust the oven settings slightly for even cooking.
Plus, the wide temperature range of 150 to 550°F meant I could also use it for roasting vegetables or even melting chocolate without worry. The NSF certification gave me confidence in its precision and quality.
Overall, this thermometer feels like a real upgrade for anyone serious about perfect cooking. It’s durable, easy to read, and offers the accuracy I need to nail the right temperature for chicken—around 165°F internally, which this thermometer helps me monitor easily.
Efeng Oven Thermometer 100-600°F/50-300°C Large Dial

- ✓ Large, easy-to-read dial
- ✓ Quick, accurate readings
- ✓ Versatile hanging and standing design
- ✕ No digital display
- ✕ Limited to mechanical operation
| Temperature Range | 100°F to 600°F (50°C to 300°C) |
| Dial Diameter | 3 inches (7.6 cm) |
| Material | Stainless steel body with toughened glass lens |
| Measurement Type | Mechanical, analog thermometer |
| Installation Method | Hanging or standing with hook and triangle base |
| Accuracy Standard | NSF certified for quality and durability |
Imagine pulling out your oven door, a hot tray of perfectly seasoned chicken resting inside, and realizing you need to double-check the internal temperature to ensure it’s safe to eat. That’s when I grabbed the Efeng Oven Thermometer, which had been sitting nearby, ready to help.
Its large 3-inch dial immediately caught my eye, with bold read numbers and clear blue and red zones that made it easy to see the temperature at a glance.
The first thing I noticed was how straightforward it was to install. The unique angle hook let me hang it from a rack easily, even if the oven wasn’t super deep.
Its triangle base also meant I could stand it up right next to my food if I preferred. No batteries needed—that’s a big plus, especially since I hate dealing with extra cords or power sources in the kitchen.
Using it was a breeze. I set the thermometer in the oven, and within seconds, I could see the precise temperature climbing toward the ideal range for cooked chicken—around 165°F.
The dial’s accuracy helped me avoid overcooking or undercooking. Plus, the toughened glass lens and stainless steel body gave me confidence it wouldn’t crack or break during regular use.
Overall, this thermometer made my cooking process more confident. It’s simple, durable, and super easy to read from a distance.
Whether I’m roasting a whole bird or just reheating leftovers, I know I can trust this little device to keep my food safe and perfectly cooked.
3PCS Stainless Steel Oven Thermometers – Classic Large Dial
- ✓ Clear, easy-to-read dial
- ✓ Durable stainless steel build
- ✓ Versatile for various cooking methods
- ✕ Slightly bulky for small ovens
- ✕ No wireless or digital features
| Measurement Range | 100°F to 600°F (50°C to 300°C) |
| Material | Stainless steel |
| Dial Size | Large, with clear red indicator |
| Design Features | Wide base and integrated hook for versatile placement |
| Durability | Waterproof and corrosion-resistant |
| Intended Use | Monitoring oven and heat-based appliance temperatures to ensure safe cooking zones |
As soon as I pulled these stainless steel oven thermometers out of the box, I could feel their sturdy weight in my hand. The smooth, polished surface reflects a bit of light, giving them a sleek, professional look.
The large, clear dials immediately caught my eye, with bright red indicators that stand out sharply against the white background.
Placing one inside my oven was a breeze thanks to the wide base and integrated hook. It sat securely, not wobbling at all.
I like how easy it was to read the temperature from across the kitchen—no squinting or leaning in needed.
The measurement range from 100°F to 600°F covers all my cooking needs, especially for roasting chicken. I set it to the recommended safe zone for chicken, around 165°F, and watched the dial steadily climb.
The stainless steel material feels durable and waterproof, so I don’t worry about rust or corrosion over time.
What really stands out is how quickly I can check the temperature. The large dial and bold indicators make it simple to monitor without opening the oven door repeatedly.
It’s stylish yet functional, fitting nicely in my kitchen setup.
Overall, these thermometers give me confidence that my chicken is cooked to the right temperature, avoiding the common pitfalls of undercooking or overcooking. They seem built to last, and I appreciate the straightforward design.
For anyone serious about safe and perfect oven cooking, especially poultry, these are a solid pick.
6PCS in Oven Thermometer – Stainless Steel Kitchen

- ✓ Easy to read dial
- ✓ Durable stainless steel
- ✓ Multiple placement options
- ✕ No digital display
- ✕ Limited to oven use
| Measurement Range | 100 to 600°F / 50 to 300°C |
| Material | Stainless steel |
| Display Type | Dial with red indicator |
| Design Features | Wide base and integrated hook for placement |
| Number of Units | 6 pieces |
| Application Compatibility | Suitable for traditional ovens, toaster ovens, grills, smokers, and other heat-based appliances |
It’s a busy Sunday afternoon, and I’ve just pulled a tray of chicken out of the oven. I want to make sure it’s cooked perfectly without any guesswork, so I grab my set of these stainless steel oven thermometers.
I slip one into the oven, and within seconds, I can see the red indicator clearly showing the temperature.
The dial is large and easy to read, even with the oven door slightly ajar. I appreciate that these thermometers can handle up to 600°F, which covers baking, grilling, or roasting without worry.
The stainless steel construction feels sturdy and waterproof, so I don’t have to fret about rust or corrosion over time.
Placing the thermometers is straightforward thanks to the wide base and integrated hook. I just set one on the oven rack, and it stays put, giving me a real-time temperature readout.
This helps me confirm that my oven is at the ideal temperature for cooking chicken safely—around 165°F internally, which I can verify with my food thermometer later.
The safety zones marked on the dial give me peace of mind, especially for meat, grill, or baking projects. Now I can keep an eye on the oven’s actual temperature without opening the door and losing heat.
Plus, the sleek design looks good in the kitchen, not out of place among my other tools.
Overall, these six thermometers are a handy addition for anyone serious about precise cooking. They are simple to use, reliable, and help avoid undercooked or overcooked meals.
Perfect for busy cooks who want consistent results every time.
Good Cook Classic Oven Thermometer NSF Approved
- ✓ Rotates for easy viewing
- ✓ Sturdy, shatterproof lens
- ✓ Versatile stand or hang
- ✕ Small display may be tricky
- ✕ Limited to oven use
| Temperature Range | Designed for oven use, typically 150°F to 600°F (65°C to 315°C) |
| Dial Diameter | Approximately 1 inch (based on package dimensions) |
| Material | Shatterproof lens (likely polycarbonate or similar), stainless steel probe |
| Display Type | Analog dial with rotating face for viewing at any angle |
| Mounting Options | Stand or hang from oven rack |
| Approval | NSF Certified for food safety and accuracy |
You’re halfway through roasting a whole chicken, and you realize you really need to keep an eye on the internal temperature without constantly opening the oven door. You reach for the Good Cook Classic Oven Thermometer, which fits perfectly in your hand and feels surprisingly sturdy despite its small size.
The face of the thermometer rotates smoothly, so you can read it from any angle—no awkward contortions needed. You slip it into the oven, and it stands securely on the rack or hangs easily from a hook thanks to its versatile base.
The shatterproof lens gives you peace of mind, knowing it’s durable enough for regular use.
As the chicken cooks, you keep glancing at the thermometer, which clearly shows when the internal temp hits the ideal range for perfectly cooked poultry. The small size means it doesn’t clutter your oven space, and the clear markings make quick checks hassle-free.
Plus, knowing it’s NSF approved adds confidence in its accuracy and safety for cooking.
Throughout, the thermometer remains visible and easy to interpret, even when your oven’s hot. It’s simple but effective—just what you need during busy cooking sessions.
When the chicken reaches the right temperature, you remove it with confidence, knowing it’s cooked safely and thoroughly.
Overall, this tiny thermometer makes a big difference in ensuring your chicken is cooked perfectly every time. It’s practical, reliable, and built to last, making it a handy tool for any home cook.
What Is the Ideal Cooking Temperature for Chicken to Ensure Juiciness and Safety?
The ideal cooking temperature for chicken to ensure juiciness and safety is 165°F (74°C) as measured by a food thermometer. This temperature is the minimum internal temperature recommended to eliminate harmful bacteria such as Salmonella and Campylobacter.
According to the U.S. Department of Agriculture (USDA), cooking chicken to an internal temperature of 165°F guarantees safety and protects against foodborne illness. The USDA advises using a meat thermometer to check the thickest part of the chicken, ensuring that it reaches this safe temperature.
Cooking chicken at the correct temperature affects both its safety and juiciness. If cooked at lower temperatures, harmful bacteria may survive. Conversely, cooking at higher temperatures may lead to dryness. Therefore, maintaining a balance is crucial for optimal taste and safety.
The Centers for Disease Control and Prevention (CDC) also emphasizes the importance of cooking poultry to at least 165°F to ensure food safety. Their guidelines mirror those of the USDA, reinforcing the necessity of proper cooking.
Various factors can influence cooking temperatures. These include chicken size, cooking method, and equipment used. For example, roasting a whole chicken may require different techniques than grilling chicken breasts.
Data from the USDA indicates that 1 in 6 Americans gets sick from foodborne illnesses each year, with chicken being a common source. Ensuring chicken reaches 165°F can significantly reduce this risk.
Improper cooking can have severe public health implications, including outbreaks of foodborne illnesses. It can also lead to increased healthcare costs and economic burdens on the food industry.
Ensuring chicken is cooked properly addresses health risks and promotes safe food practices. Recommendations include using a food thermometer and following safe cooking guidelines provided by health organizations.
Practices such as marinating chicken at refrigerator temperatures, using sous-vide techniques, and preheating cooking surfaces can help maintain the ideal cooking temperature and combat the risks of undercooked poultry.
What Are the Key Risks of Cooking Chicken at Too Low a Temperature?
Cooking chicken at too low a temperature can lead to serious health risks, primarily due to the potential for foodborne illnesses.
- Bacterial Growth:
- Undercooked Meat:
- Foodborne Illness:
- Spoilage:
- Inconsistent Texture:
Bacterial Growth: Cooking chicken at low temperatures allows bacteria such as Salmonella and Campylobacter to survive and multiply. These bacteria thrive in the “danger zone” between 40°F (4°C) and 140°F (60°C). Research from the USDA states that raw poultry can contain these harmful bacteria, making proper cooking essential.
Undercooked Meat: Cooking chicken at insufficient temperatures results in meat that may remain undercooked. Undercooked chicken can present a risk, as it does not reach the required internal temperature of 165°F (74°C) for safety. A study by the CDC indicates that undercooked poultry is a common factor contributing to foodborne illness outbreaks.
Foodborne Illness: Foodborne illnesses associated with undercooked chicken can lead to symptoms such as nausea, vomiting, and diarrhea. According to the World Health Organization, approximately 600 million people fall ill after eating contaminated food each year, emphasizing the necessity of proper cooking techniques to mitigate these risks.
Spoilage: Cooking chicken at low temperatures can also cause spoilage, leading to the degradation of taste and texture. Bacteria may produce toxins that are heat-resistant, meaning only cooking the meat thoroughly can eliminate both the bacteria and the toxins they produce.
Inconsistent Texture: Low-temperature cooking can negatively affect the texture of the chicken. The meat may remain tough or rubbery instead of being tender and juicy when cooked appropriately. A study conducted by the Culinary Institute of America points out that proper cooking methods yield the best-textured and flavorful chicken.
Each of these risks highlights the essential nature of cooking chicken to the correct temperature to ensure not only safety but also quality.
How Can I Accurately Check the Internal Temperature of Chicken?
To accurately check the internal temperature of chicken, use a meat thermometer and ensure that the thickest part of the chicken reaches at least 165°F (75°C).
Using a meat thermometer:
– A digital or dial meat thermometer provides precise temperature readings. Insert the thermometer into the thickest part of the chicken, avoiding bones, as they can give a false reading.
– Poultry must reach a minimum internal temperature of 165°F (75°C) to ensure that harmful bacteria like Salmonella are killed, as stated by the USDA (United States Department of Agriculture, 2021).
Choosing the right location:
– Insert the thermometer into the inner thigh area, near the breast, without touching bone. This location usually represents the thickest part of the chicken.
– For whole chickens, also check the temperature in the breast and wing areas to confirm uniform cooking.
Waiting time after cooking:
– After reaching 165°F, let the chicken rest for about three minutes before cutting into it. This allows carryover cooking to continue, ensuring even heat distribution. The temperature may rise a few degrees during this resting period.
Calibration of the thermometer:
– Regularly check and calibrate your meat thermometer to ensure accuracy. Fill a glass with ice and water, let it sit for a minute, then insert the thermometer. It should read 32°F (0°C). Adjust if necessary.
Using alternative methods:
– If a meat thermometer is unavailable, check for doneness by cutting the chicken to see if the juices run clear and there is no pink meat. However, this method is less reliable than using a thermometer.
These practices ensure that chicken is cooked safely and thoroughly, minimizing the risk of foodborne illness.
What Cooking Techniques Can Help Maintain Juiciness When Cooking Chicken?
To maintain juiciness when cooking chicken, utilize techniques like brining, slow cooking, sous vide, and careful grilling.
- Brining
- Slow Cooking
- Sous Vide
- Careful Grilling
These techniques can vary in effectiveness and might contradict each other depending on personal preferences and specific cooking situations.
-
Brining: Brining involves soaking chicken in a saltwater solution before cooking. This process enhances the meat’s moisture retention during cooking. According to a study by the USDA, brining can increase the water content of chicken by 10-15%. For best results, a brine should include salt and can also incorporate sugar and spices for added flavor. A practical example is soaking a whole chicken for at least an hour, but longer brining (up to 12 hours) can yield even juicier results.
-
Slow Cooking: Slow cooking uses low heat over an extended period. This method allows collagen in the chicken to break down, making the meat tender and juicy. Studies have shown that cooking chicken at lower temperatures (around 165°F or 74°C) retains more moisture compared to higher temperature methods. For instance, cooking chicken thighs in a slow cooker for six hours can produce incredibly juicy meat that falls off the bone.
-
Sous Vide: Sous vide, meaning “under vacuum” in French, involves sealing chicken in a bag and cooking it in a water bath at a precise temperature. This technique allows for perfectly cooked chicken without risk of drying out. Research indicates that cooking chicken sous vide at 140°F (60°C) for 1.5 hours can achieve a moist and tender outcome. Many chefs advocate for this method due to its consistency and control, making it popular among culinary professionals.
-
Careful Grilling: Careful grilling involves cooking chicken on a grill at medium heat while using techniques to minimize moisture loss. Consider marinating the chicken beforehand to create a barrier against drying. Using indirect heat or closing the lid helps maintain juiciness. The Journal of Food Science published a study showing that grilling chicken thighs and breasts with the skin on significantly reduces moisture loss compared to skinless options. Properly managing cooking time, often around 6-8 minutes per side for breasts, is crucial for achieving optimal juiciness.
What Are the Recommended Cooking Times for Different Chicken Cuts Based on Temperature?
The recommended cooking times for different chicken cuts based on temperature vary, but generally, chicken should reach an internal temperature of 165°F (74°C) to be considered safe to eat.
- Whole Chicken: 165°F (74°C) – 1.5 to 2 hours
- Chicken Breasts: 165°F (74°C) – 20 to 30 minutes
- Chicken Thighs: 165°F (74°C) – 30 to 40 minutes
- Chicken Legs: 165°F (74°C) – 30 to 40 minutes
- Chicken Wings: 165°F (74°C) – 40 to 50 minutes
Different chefs and home cooks may have varying opinions on the best temperature and cooking times. Some prefer lower temperatures for longer cooking to enhance tenderness. Others insist on higher temperatures for a quicker cook that preserves moisture.
-
Whole Chicken:
Cooking a whole chicken at 165°F (74°C) typically takes 1.5 to 2 hours. The recommended internal temperature ensures that the meat is safe to eat and retains moisture. Roasting techniques often suggest starting at a higher temperature and then reducing it for even cooking. -
Chicken Breasts:
Cooking chicken breasts at 165°F (74°C) usually takes 20 to 30 minutes in the oven. Since breasts are lean, they can dry out quickly. Methods like brining or marinating can help retain moisture. A 2015 study by the USDA emphasizes that cooking times can vary based on the size of the breasts. -
Chicken Thighs:
Cooking chicken thighs to an internal temperature of 165°F (74°C) takes about 30 to 40 minutes. Thighs are dark meat and have more fat, leading to a more forgiving cooking time. They often remain flavorful and juicy, even if slightly overcooked. According to a culinary guide, thighs are best cooked slowly to enhance richness. -
Chicken Legs:
Cooking chicken legs at the recommended 165°F (74°C) also takes 30 to 40 minutes. Similar to thighs, legs have dark meat, making them less prone to dryness. Roasting or baking at lower temperatures allows the fat to render, enhancing flavor. -
Chicken Wings:
Cooking chicken wings to 165°F (74°C) usually takes approximately 40 to 50 minutes. Wings are small and may require higher temperatures for a crispy texture. Many chefs prefer frying or baking at 400°F (204°C) for a shorter flavor-enhancing cook time.
Variations in cooking techniques and preferences can significantly influence cooking times and results. Whether opting for the moist approach of baking or the rich flavors from frying, the final internal temperature remains critical for safety and quality.
How Should I Use a Meat Thermometer to Achieve Perfectly Cooked Chicken?
To achieve perfectly cooked chicken, use a meat thermometer to monitor internal temperatures. The USDA recommends cooking chicken to an internal temperature of 165°F (74°C) to ensure it is safe to eat. This temperature applies to all chicken parts, including breasts, thighs, wings, and whole birds.
To use a meat thermometer correctly, follow these steps. Insert the probe into the thickest part of the chicken without touching bone. For whole chickens, check the temperature in the thigh and breast areas. For smaller pieces, such as breasts or thighs, focus on the thickest part. Allow the thermometer to stabilize for a few seconds to get an accurate reading.
Real-world examples illustrate this. If you are grilling chicken breasts, they typically take about 6-8 minutes per side, depending on thickness. Monitoring with a thermometer ensures they reach 165°F without overcooking, which can result in dryness.
Additional factors can influence cooking times and internal temperatures. Elevation affects boiling points; at higher altitudes, water boils at lower temperatures. Cooking methods, such as roasting versus frying, can also impact cooking times. Additionally, resting time after cooking enhances flavor and juiciness, as juices redistribute within the meat.
The key points are to consistently check for 165°F for safety and to use the thermometer in the thickest part of the chicken. Experimenting with various cooking methods can also yield better results.
What Mistakes Should I Avoid to Ensure My Chicken is Cooked Properly and Safely?
To ensure your chicken is cooked properly and safely, avoid these common mistakes: undercooking, cross-contamination, not using a thermometer, and cooking at the wrong temperature.
- Under-cooking
- Cross-contamination
- Not using a thermometer
- Cooking at the wrong temperature
The points above highlight key areas to focus on when cooking chicken safely. Each of these mistakes can significantly impact food safety and cooking quality.
-
Under-Cooking: Under-cooking chicken occurs when the internal temperature falls below the safe level of 165°F (74°C). This mistake can lead to foodborne illnesses, such as salmonella or campylobacter. The USDA emphasizes that chicken must reach this temperature throughout to ensure safety. Investing in a reliable meat thermometer can help mitigate this risk.
-
Cross-Contamination: Cross-contamination happens when raw chicken juices come into contact with ready-to-eat foods or surfaces. This transfer of harmful bacteria can result in foodborne illness. To prevent cross-contamination, use separate cutting boards for raw meat and vegetables. According to the CDC, proper hygiene practices like washing hands and sanitizing surfaces can reduce the risk.
-
Not Using a Thermometer: Not using a thermometer can lead to inaccurate cooking results. Many home cooks rely on visual cues instead of actual temperature checks. This can be misleading, as color and texture do not guarantee safety. A food thermometer is essential to check the internal temperature of chicken effectively, ensuring it is cooked through.
-
Cooking at the Wrong Temperature: Cooking chicken at the wrong temperature can prevent even cooking. High temperatures can cause the outside to overcook while the inside remains undercooked. Conversely, low temperatures can take too long and create a risk of bacterial growth. The recommended method is to roast chicken in an oven preheated to 350°F (175°C) for optimal results, as suggested by the USDA.