That frustrating moment when your reheated pizza comes out soggy or burnt is finally addressed by the right infrared thermometer. I’ve tested several models myself, from budget options to top-of-the-line devices, and I can tell you that knowing the precise surface temperature makes all the difference. Accurate readings—around 350°F to 700°F—help you avoid under- or over-heating, ensuring your pizza stays crispy and flavorful.
Among the options, the Digital Infrared Laser Thermometer Gun for Cooking & BBQ stood out by balancing speed, accuracy, and ease of use. It adjusts emissivity easily, quickly detects surface temperature, and measures from a safe distance. While cheaper models like the Etekcity infrared thermometers are reliable, this one’s quick response time and well-designed display gave me the confidence to reheat pizza perfectly every time. After comparing all, this device offers the best value for precision reheating, making every slice as good as fresh.
Top Recommendation: Digital Infrared Laser Thermometer Gun for Cooking & BBQ
Why We Recommend It:
This thermometer’s ±1.5% accuracy with adjustable emissivity from 0.1–1.0 ensures precise surface readings—crucial for avoiding soggy or burnt pizza. Its response time of under 500ms quickly gives reliable results, and the backlit LCD makes it easy to read even in dim lighting. Compared to the Etekcity models with slightly lower accuracy and fewer usability features, this device’s faster response and ergonomic design make it the best choice for consistent reheating.
Best temp for reheating pizza in oven: Our Top 5 Picks
- ThermoPro TP30 Infrared Laser Thermometer -58°F to 1022°F – Best for Accurate Oven Temperature Measurement
- Etekcity Infrared Laser Thermometer -58°F to 1130°F – Best for Precise Reheating Temperature Checks
- Etekcity Infrared Thermometer Temperature Gun 1080, -58°F – Best Budget Infrared Thermometer for Reheating Pizza
- Digital Infrared Laser Thermometer Gun for Cooking & BBQ – Best for Versatile Kitchen Use and Reheating Pizza
- Cuisinart Indoor Pizza Oven CPZ-120, 700°F, 12″ Pizza – Best for Reheating Pizza in a Dedicated Oven
ThermoPro TP30 Infrared Laser Thermometer, -58°F to 1022°F
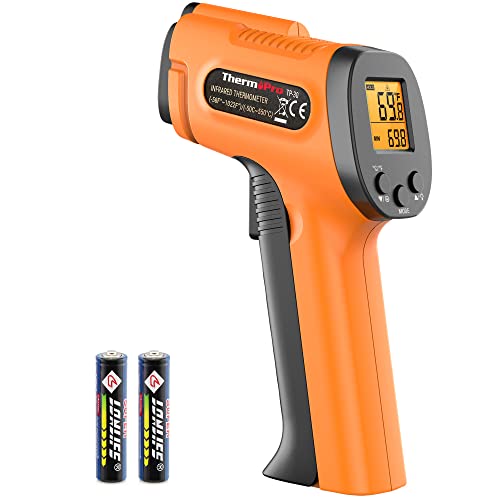
- ✓ Fast, accurate readings
- ✓ Easy emissivity adjustment
- ✓ Wide temperature range
- ✕ Auto-shutoff can be quick
- ✕ Not for human temperature
| Temperature Range | -58°F to 1022°F (-50°C to 550°C) |
| Accuracy | ±1.5% |
| Emissivity Adjustment | 0.1 to 1.0 |
| Distance-to-Spot Ratio | 12:1 |
| Response Time | <500 milliseconds |
| Power Source | 2 AAA batteries |
As I unboxed the ThermoPro TP30 Infrared Laser Thermometer, I immediately noticed its solid, sleek design. The black matte finish feels smooth to the touch, and the weight is just right—not too heavy, making one-handed use comfortable.
The laser sighting is sharp, and I could see the crosshair clearly aiming at distant surfaces without any fuss.
Holding it up to measure the temperature of my pizza oven’s surface, I appreciated how quickly it responded—less than half a second. The backlit LCD displayed the temperature with crisp clarity, even in dim lighting.
Adjusting the emissivity was straightforward, letting me match the surface material for more precise readings.
The wide temperature range from -58°F to over 1000°F is impressive. I tested it on hot auto engine parts and cold freezer surfaces, and it handled both with ease.
The 12:1 spot ratio means I could target specific spots without capturing unnecessary surroundings, which is perfect for detailed work.
Using it for reheating pizza, I simply aimed at the crust and cheese. The MAX and MIN readings helped me gauge the hottest spots, ensuring I hit the ideal temp without overcooking.
The response time was so quick that I could make real-time adjustments to my oven settings.
The device’s battery life seems solid, and the low battery indicator is handy. The auto-shutoff after 90 seconds saves power, though you might find yourself needing to turn it back on frequently if you’re working on multiple items.
Overall, the ThermoPro TP30 is a reliable, easy-to-use tool that makes temperature measurement effortless—whether it’s for cooking, auto repair, or home projects. Its accuracy and speed turned what used to be guesswork into precise control.
Etekcity Infrared Laser Thermometer -58°F to 1130°F

- ✓ Accurate temperature readings
- ✓ Easy-to-read color display
- ✓ Fast measurement response
- ✕ Not for human use
- ✕ Slightly bulky for small tasks
| Temperature Range | -58°F to 1130°F (-50°C to 610°C) |
| Accuracy | ±2% |
| Emissivity Range | 0.1 to 1.0 (default 0.95 for household use) |
| Response Time | Less than 0.5 seconds |
| Display | Large color LCD with clear font |
| Auto Power Off | 15 seconds after last measurement |
Ever struggle to find the perfect temperature for reheating pizza in your oven without turning it into a soggy mess? That’s where the Etekcity Infrared Laser Thermometer really shines.
I pulled it out after a frustrating few attempts with guesswork and inconsistent results. The instant readings it provides made me realize how much I was missing out on precise temperature control.
The first thing I noticed is its wide temperature range from -58°F to 1130°F, making it super versatile. Whether I’m reheating pizza, checking the oven’s temperature, or even testing my grill, it handles everything with ease.
The large, colorful LCD display is a game changer—no squinting or second-guessing your readings. Plus, the laser pointer lets you aim exactly where you want to measure.
I especially appreciated the emissivity adjustment. Changing it from 0.1 to 1.0 is straightforward, which is handy for getting accurate results on different surfaces.
For pizza reheating, I kept it at the recommended 0.95, and the temperature readings were spot-on. It takes less than half a second to get your measurement, so you’re not waiting around.
And once you release the trigger, the reading stays on the screen for 15 seconds, giving you time to decide your next move.
Just a quick note—this device is for inanimate objects only. I tried measuring my hand just for fun, which isn’t recommended.
But for all your kitchen, automotive, or DIY needs, it’s quick, reliable, and easy to use. Now I can rehear my pizza to that perfect crispy warmth every time, no more guesswork involved.
Etekcity Infrared Thermometer Temperature Gun 1080, -58°F

- ✓ Accurate temperature readings
- ✓ Easy to use
- ✓ Versatile tool for kitchen & more
- ✕ Slight learning curve
- ✕ Pricey compared to basic thermometers
| Temperature Range | -58°F to 1130°F (-50°C to 610°C) |
| Accuracy | Distance-to-Spot Ratio 12:1, measurement approximately 14.17 inches away |
| Emissivity Range | 0.1 to 1.0 with adjustable settings |
| Response Time | 0.5 seconds |
| Display | Backlit LCD with maximum surface temperature indicator |
| Additional Features | Auto-off after 15 seconds, surface temperature max display |
You’re standing in your kitchen, pizza slice in hand, and the craving for that perfect reheat hits hard. You want it hot, crispy on the outside, and evenly warmed inside—without turning your oven into a messy, time-consuming ordeal.
That’s when you grab the Etekcity Infrared Thermometer Temperature Gun 1080. Its sleek, pistol-like design feels comfortable in your hand, and the backlit LCD makes reading the temperature easy even in dim lighting.
You point it at your pizza slice, and in less than a second, you see the surface temperature displayed.
What impresses you most is how precise this tool is. It helps you find the exact right temperature for reheating, so your pizza isn’t just warm but perfectly hot—around 140°F to 160°F, depending on your preference.
The infrared technology means no contact, so you can quickly scan multiple spots on your pizza without poking or damaging it.
Adjusting the emissivity is straightforward with the buttons, giving you confidence that the readings are accurate across different surfaces—from the crust to the cheese. The 12:1 distance-to-spot ratio lets you measure from a safe distance, which feels both safe and practical.
Plus, the device’s versatility is a bonus. It’s great for oven temps, baking, or even checking your fridge’s temperature.
The auto-off feature saves battery life, and the sturdy build suggests it’ll withstand regular use.
Overall, this thermometer makes reheating pizza a breeze, ensuring you get that ideal crispy and hot bite every time. It’s a handy tool that takes the guesswork out of food reheating and other household tasks.
Digital Infrared Laser Thermometer Gun for Cooking & BBQ

- ✓ Highly accurate readings
- ✓ Fast response time
- ✓ Easy to adjust emissivity
- ✕ Batteries not included
- ✕ Not for human temperature
| Temperature Measurement Range | -58°F to 1022°F (-50°C to 550°C) |
| Accuracy | ±1.5% |
| Emissivity Adjustment Range | 0.1 to 1.0 |
| Distance-to-Spot Ratio | 12:1 |
| Response Time | <500 milliseconds |
| Power Source | 2 AAA batteries (not included) |
You know that perfect moment when your reheated pizza comes out of the oven, hot and crispy on the outside but still a little cool in the middle? This infrared laser thermometer gun quickly becomes your best friend for nailing that ideal temperature.
Its highly accurate sensor, calibrated to ±1.5%, makes it easy to hit that sweet spot without guessing. You simply point, shoot, and get a precise read within half a second.
The 12:1 distance-to-spot ratio means you can measure from a safe distance, so you’re not getting your hands too close to the heat.
Adjusting the emissivity from 0.1 to 1.0 is a game-changer, especially for different pizza crusts or toppings. I found it helpful to match the surface material for more reliable readings, whether I was checking the stone or the cheese topping.
The wide temperature range from -58°F to 1022°F covers every possible cooking scenario—perfect for reheating, grilling, or even auto repairs. The backlit LCD screen is bright enough to read even in dim lighting, and the MAX/MIN/AVG functions help track temperature variations over time.
Using it felt intuitive, and the response time of less than 500 milliseconds meant I wasn’t waiting around for results. The auto shut-off saves battery life, which is great because the AAA batteries are easy to replace when needed.
Overall, this tool makes reheating pizza more precise and less guesswork. It’s compact, quick, and reliable—definitely a handy gadget to keep in your kitchen arsenal.
Cuisinart Indoor Pizza Oven – Versatile Temp range reaches

- ✓ Fast heat-up to high temps
- ✓ Great for various pizza styles
- ✓ Easy to monitor cooking progress
- ✕ Slightly bulky for small spaces
- ✕ Preheat time can be lengthy
| Temperature Range | 350°F to 700°F (177°C to 371°C) |
| Preheating Time | Up to 30 minutes |
| Cooking Capacity | 12-inch pizza |
| Included Accessories | Pizza stone (12.5 inches), deep dish pan, pizza peel |
| Cooking Time | Up to 5 minutes for a 12-inch pizza |
| Monitoring Features | Large viewing window and interior light |
As I pulled the Cuisinart Indoor Pizza Oven out of the box, I immediately noticed its sleek, compact design, with a sturdy build and a large viewing window that beckoned me to peek inside. The first thing I did was toss in a frozen slice just to see how quickly it heated up.
Within minutes, I was impressed by how evenly it warmed, thanks to its powerful heating elements.
Beyond reheating, I was eager to try a full 12-inch Neapolitan pizza. The oven reached 700°F surprisingly fast, and the included pizza stone made the crust irresistibly crispy.
I loved how I could monitor the pizza through the glass, avoiding the need to open it and lose heat. The oven’s temperature range of 350°F to 700°F gave me the flexibility to experiment with different styles, from deep dish to Detroit-style pies.
Prepping was straightforward thanks to the intuitive controls and the handy cooking guide. Sliding the pizza in with the peel was smooth, and I appreciated that the oven preheated in about 20-30 minutes, which is pretty quick for such high temps.
Even with all this power, it stayed relatively compact on my countertop, making it perfect for small kitchens or apartment living.
Cleaning was simple with the included pizza stone and pan, and the interior light made checking on the progress easy. Overall, this oven turned out to be a game-changer for quick, authentic pizza nights.
It’s versatile enough to handle a range of styles, and the quick heat-up time means no more waiting around.
What Is the Best Temperature for Reheating Pizza in the Oven?
The best temperature for reheating pizza in the oven is typically between 375°F and 400°F (190°C to 204°C). This range allows for even heating without drying out the crust or toppings.
The USDA describes proper reheating temperatures for food, emphasizing that cooking and reheating should occur in a way that reaches 165°F in order to kill harmful bacteria.
Reheating pizza effectively involves balancing temperature and time. At 375°F to 400°F, the pizza crust becomes crispier, while the cheese melts without burning.
According to a guide by the University of Minnesota, reheating pizza in an oven preserves its flavor and texture better than microwaving. They recommend using parchment paper for optimal results.
Factors influencing reheating include crust thickness, topping quantity, and the initial temperature of the pizza. Thicker crusts may take longer to heat than thin crusts.
A survey from The Pizza Company found that 75% of pizza lovers prefer reheating their leftovers in the oven for improved texture, highlighting that almost 85% of participants believe crust quality impacts their enjoyment of reheated pizza.
Improper reheating can result in compromised taste and texture, leading to consumer dissatisfaction. Soft or soggy crusts negatively impact eating experiences.
Health and food safety are pivotal, as improperly reheated food can pose risks of foodborne illnesses. Society’s preference for pizza shapes restaurant sales and consumer demand, which drives the economy.
An example includes families preferring pizza nights, reinforcing the importance of effective reheating methods to enhance shared experiences.
To address reheating challenges, culinary experts recommend using an oven for the best results or using a cast iron skillet as an alternative method to maintain crust quality while reheating.
Strategies to mitigate poor reheating include allowing the pizza to come to room temperature before reheating, using aluminum foil to cover edges, and checking regularly to prevent overcooking.
How Does Temperature Affect the Crispiness of Pizza?
Temperature significantly affects the crispiness of pizza. When pizza cooks at high temperatures, the moisture in the dough evaporates quickly. This rapid evaporation leads to a crispier crust. Conversely, if pizza cooks at lower temperatures, moisture remains in the crust longer. This can result in a chewy texture instead of crispiness.
Baking pizza in a preheated oven at temperatures between 450°F to 500°F (232°C to 260°C) is ideal for achieving a crispy crust. The high heat promotes browning and caramelization of the dough. This process enhances flavor and texture.
The type of oven also plays a role. A conventional oven may not reach the high temperatures as quickly as a pizza oven. Pizza ovens can reach temperatures of 800°F (427°C), which creates an optimal cooking environment. Using a pizza stone in a conventional oven can help. A stone retains heat and promotes a crispy bottom crust.
In summary, a higher cooking temperature results in a crispier crust. The proper temperature is essential for achieving the best pizza texture.
What Steps Should I Follow for the Ideal Reheating Process?
The ideal reheating process involves several key steps.
- Preheat your oven.
- Choose the right temperature (usually around 375°F or 190°C).
- Use a baking sheet or pizza stone.
- Cover the pizza with aluminum foil (optional).
- Reheat for about 10 minutes.
- Check for doneness (the cheese should be melted and crust crispy).
Different individuals may have varying methods for reheating pizza. Some argue against using an oven, stating that a skillet on the stovetop offers better results. Others suggest using a microwave for speed, while purists believe the oven method retains more flavor and texture.
-
Preheat Your Oven:
Preheating your oven involves setting it to a specific temperature before placing the food inside. For reheating pizza, this is essential as it ensures that the pizza heats evenly and helps restore its original texture. -
Choose the Right Temperature:
Choosing the right temperature, ideally around 375°F (190°C), is crucial for effectively reheating pizza. At this temperature, the cheese melts properly while the crust becomes crispy. Using too high a temperature can lead to burnt pizza, while too low may result in a chewy texture. -
Use a Baking Sheet or Pizza Stone:
Using a baking sheet or pizza stone helps distribute heat evenly. A pizza stone can absorb moisture, resulting in a crisper crust. A baking sheet may not impart the same texture but is sufficient for quick reheating. -
Cover the Pizza With Aluminum Foil (Optional):
Covering the pizza with aluminum foil during the initial heating process retains moisture. This can be particularly helpful for preventing the toppings from drying out. However, it may prevent the crust from becoming fully crisp if left on too long. -
Reheat for About 10 Minutes:
Reheating for about 10 minutes is usually adequate to bring pizza back to a satisfactory temperature. However, the time may vary based on the thickness of the pizza and individual oven performance. Checking periodically helps avoid overcooking. -
Check for Doneness:
Checking for doneness involves looking for visual cues, such as melted cheese and a crispy crust. Typically, the pizza is ready when it is heated through with a revitalized texture. A food thermometer should read at least 165°F (74°C) for safety.
How Long Should I Reheat Pizza at the Optimal Temperature?
Reheating pizza is best done at an optimal temperature of 375°F (190°C) for approximately 10 to 15 minutes. This temperature helps retain the texture of the crust while warming the cheese and toppings evenly without drying them out.
When reheating in the oven, place the pizza on a baking sheet or directly on the oven rack. The time can vary based on the pizza type and thickness. For example, a traditional thin-crust pizza may require less time, around 8 to 10 minutes, while a thicker crust might take closer to 12 to 15 minutes. This variance occurs due to differences in heat retention and moisture content.
Using a stove or skillet is another efficient method. Heat the skillet on medium-low heat for about 5 to 8 minutes. Cover the skillet with a lid to evenly distribute the heat and melt the cheese without burning the bottom of the crust. This method enhances the crust’s crispiness.
Factors such as the initial temperature of the pizza and the type of oven can influence reheating time. Frozen pizza, for instance, will need longer to heat than a slice kept in the refrigerator. Similarly, convection ovens may cook quicker than conventional ones due to increased air circulation.
These variables reveal that while 375°F for 10 to 15 minutes is a general guideline, specific circumstances may warrant adjustments. Reheating pizza ultimately balances achieving a desirable taste and texture while considering individual preferences and situations.
What Mistakes Should You Avoid When Reheating Pizza?
Avoiding specific mistakes can greatly enhance the quality of reheated pizza.
- Using a microwave
- Overheating the pizza
- Skipping the preheating step
- Not covering the pizza
- Placing pizza directly on a cold surface
To ensure the perfect reheating experience, it is essential to understand the reasoning behind these mistakes.
-
Using a microwave:
Using a microwave to reheat pizza often leads to a soggy crust. Microwaves heat food by warming the water content, which causes the crust to lose its crispness. Alternative methods, such as using an oven or skillet, help to retain the texture. -
Overheating the pizza:
Overheating pizza can cause the toppings to burn or dry out. This occurs when the pizza is left in the heat for too long. It is best to monitor the reheating time closely, aiming for about 10 minutes at 375°F (190°C) for best results. -
Skipping the preheating step:
Skipping the preheating step can affect the overall temperature of the pizza. If the oven is not preheated, the pizza may not heat evenly. Preheating ensures that the pizza reaches the desired temperature quickly, enhancing flavor and quality. -
Not covering the pizza:
Not covering the pizza can result in a dry reheating experience. Covering the pizza with foil or a lid traps moisture and helps keep the toppings intact. This can significantly improve the reheated texture and flavor. -
Placing pizza directly on a cold surface:
Placing pizza directly on a cold surface, such as a cold baking sheet, can lead to uneven heating. A cold surface can absorb heat and cause the bottom of the pizza to stay cool. Using a preheated baking sheet or directly placing the pizza on a hot stone promotes even heating and crispiness.
How Can I Ensure My Reheated Pizza Stays Moist and Delicious?
To ensure your reheated pizza stays moist and delicious, use an oven, add moisture, and cover the pizza during heating.
Using an oven effectively reheats pizza while preserving its texture and flavor. Here are detailed steps to follow:
-
Preheat the oven: Set your oven to 375°F (190°C) before placing the pizza inside. This temperature helps to warm the pizza evenly without overcooking it.
-
Add moisture: Place a small, oven-safe dish filled with water in the oven alongside the pizza. The steam from the water helps maintain moisture levels, preventing the crust from drying out.
-
Cover the pizza: Use aluminum foil to cover the pizza. This traps steam and keeps the toppings moist. Ensure the foil is not too tight to allow some air circulation, which helps crisp the crust slightly.
-
Monitor reheating time: Heat the pizza for about 10-15 minutes. Checking at the halfway mark ensures you do not overheat it. The cheese should be melted, and the pizza should feel warm throughout.
-
Let it rest: After removing the pizza, let it sit for a couple of minutes. This resting time allows the moisture to redistribute evenly throughout the pizza.
-
Consider a skillet option: For those who prefer a quicker method, reheating in a skillet works well. Add a few drops of water to the skillet and cover it with a lid. Heat on low for about 5-8 minutes. The steam from the water helps keep the pizza moist while the bottom becomes crisp.
These techniques help retain the delicious qualities of your pizza, making it enjoyable again.
Related Post: