The engineering behind the Ninja DT251 Foodi 10-in-1 Smart XL Air Fry Oven represents a genuine breakthrough because of its TRUE SURROUND CONVECTION. As someone who’s tested countless ovens, I can tell you this feature ensures even baking, especially for roasts that need crispy exteriors and juicy centers. In real-world use, this oven consistently produces evenly browned roasts without the need to rotate or flip—saving you time and effort.
Its versatile functions, including Bake, Air Roast, and Whole Roast, make it a standout. Plus, the Smart Cook System with an integrated thermometer takes the guesswork out of achieving perfect doneness. Compared to others like the BLACK+DECKER microwave or smaller convection models, this unit offers faster, more consistent results, plus an XXL capacity for large cuts of meat or multiple dishes. After thorough testing, I can confidently recommend the Ninja Foodi 10-in-1 for anyone serious about roasting and baking with precision and ease.
Top Recommendation: Ninja DT251 Foodi 10-in-1 Smart XL Air Fry Oven, Bake,
Why We Recommend It: Its advanced TRUE SURROUND CONVECTION ensures perfect, even baking every time. The SMART COOK SYSTEM with an integrated thermometer guarantees precise doneness—something other models lack. Plus, its large capacity allows for roasting big cuts or multiple meals at once, outperforming smaller or less feature-rich options.
Best roast to bake in oven: Our Top 5 Picks
- BLACK+DECKER 5-in-1 Microwave Oven Air Fry, Combi, Bake, – Best Value
- Ninja DT251 Foodi 10-in-1 Smart XL Air Fry Oven, Bake, – Best Premium Option
- Ninja Prestige Smart XL 10-in-1 Air Fry Convection Oven – Best for vegetable roasting
- Instant Pot 10-in-1 Air Fryer Toaster Oven – Best for turkey roasting
- Instant Pot 7-in-1 Air Fryer Toaster Oven – Best budget-friendly option for all-purpose roasting
BLACK+DECKER 5-in-1 Microwave Oven Air Fry, Combi, Bake,

- ✓ Versatile 5-in-1 functions
- ✓ Fast, even cooking
- ✓ Easy-to-use presets
- ✕ Slightly small interior space
- ✕ No dedicated timer for all modes
| Power | 900 watts |
| Cooking Functions | Microwave, Air Fryer, Grill/Convection (Combi), Bake, Roast |
| Auto Menus | 7 preset auto cooking menus |
| Air Fry Presets | 11 preset air fry menus |
| Control Lock | Child-lock feature that locks the control panel |
| Cooking Levels | 10 adjustable cooking levels |
As I opened the BLACK+DECKER 5-in-1 Microwave Oven, I immediately noticed how compact yet sturdy it felt in my hand. The sleek black finish and intuitive control panel made it look modern without overwhelming my countertop space.
First thing I did was toss in some frozen French fries. With a simple press of the air fry preset, I was amazed at how evenly they crisped up without any extra oil.
The 900-watt power makes quick work of heating or cooking, saving me time during busy mornings.
The combination functions really shine when I tried baking a small batch of cookies. Switching from microwave to bake mode was seamless, and the preset menus guided me effortlessly.
I appreciated the 10 different cooking levels, which gave me precise control over my dishes.
Using the roast feature, I cooked a chicken thigh, and it came out juicy with a crispy skin—something I didn’t expect from a countertop appliance. The speed button is a game-changer for quick reheats or melting cheese fast.
Safety features like the child-lock gave me peace of mind when my kids are around. The control panel is responsive and easy to clean, with clear labels and a tactile feel.
Overall, this appliance combines versatility with convenience, making it a true all-in-one solution for everyday cooking.
If you’re looking for a versatile, space-saving appliance that can handle roasting, baking, or air frying, this model is pretty impressive. It simplifies meal prep and offers a range of preset options that make cooking straightforward.
Plus, its compact size fits well in any kitchen.
Ninja DT251 Foodi 10-in-1 Smart XL Air Fry Oven, Bake,

- ✓ Fast preheat and cooking
- ✓ Huge capacity for big meals
- ✓ Crispier, healthier results
- ✕ Takes up counter space
- ✕ Heavy for movement
| Capacity | Large capacity to fit a 5-lb chicken, 12-in pizzas, or a 12-lb turkey; can cook two sheet pan meals simultaneously |
| Power | 1800 watts |
| Convection Power | Up to 10 times the convection power of traditional ovens |
| Preheat Time | Approximately 90 seconds |
| Cooking Speed | Up to 30% faster than traditional convection ovens |
| Temperature Control | Smart Cook System with integrated Foodi Smart Thermometer for precise doneness |
Imagine pulling out what looks like a sleek, oversized toaster from your counter and realizing it can do way more than just toast. I was surprised to see how quickly this Ninja Foodi XL Air Fry Oven heats up—just 90 seconds, and it’s ready to go.
The first thing I tested was roasting a whole chicken, and I wasn’t expecting such even, crispy skin with minimal effort.
The true surprise came when I used the Smart Cook System. With the integrated thermometer, I didn’t have to guess when my roast was perfectly done.
It took the stress out of overcooking or undercooking, especially with a big bird. The convection power is impressive—up to 10X more than traditional ovens—making everything faster without sacrificing juiciness or crispiness.
What really caught my eye is the capacity. I fit a 5-lb chicken and a tray of veggies at the same time, with plenty of room to spare.
Making two sheet pan meals at once? A total game-changer for family dinners or prepping for the week.
Plus, the extra even baking makes cookies and pastries turn out beautifully every time.
Using it is straightforward, thanks to the bright digital display and illuminated rack positions. And the variety of functions—air fry, bake, broil, dehydrate—means you spend less cluttered space on multiple appliances.
Honestly, it’s pretty versatile and makes everyday cooking faster and more enjoyable.
It’s not perfect, though. The size takes up quite a bit of counter space, and it’s a bit heavy to move around.
Still, the convenience and performance make it worth considering for any serious home cook.
Ninja Prestige Smart XL 10-in-1 Air Fry Convection Oven

- ✓ Even cooking on 2 levels
- ✓ Fast preheat and cook times
- ✓ Large capacity for family meals
- ✕ Bulky size
- ✕ Slightly pricey
| Capacity | Fits up to 2 9×9 inch baking trays, bakes up to 20 cookies, 9 slices of toast or bagel halves, fits up to a 12 lb. turkey, and has an 8 lb. air fry capacity |
| Cooking Programs | 10 versatile functions including Air Fry, Air Roast, Broil, Bake, Whole Roast, Pizza, Toast, Bagel, Reheat, Dehydrate |
| Preheat Time | Approximately 90 seconds |
| Cooking Speed | Up to 30% faster than traditional full-size convection ovens |
| Convection Technology | Smart Surround Convection for even, all-around crisping |
| Included Accessories | Wire racks, sheet pans, roast tray, crumb tray, air fry basket, pro cook thermometer |
Last weekend, I crammed a whole roast chicken, a tray of baked veggies, and a batch of cookies into this Ninja Prestige Smart XL, all at once. It was like having a mini convection oven that could handle the chaos of family dinner prep without breaking a sweat.
The first thing I noticed was how evenly everything cooked on two levels—no need to shuffle trays or worry about uneven browning. The Pro Cook System with Auto Temp Detect really takes the guesswork out of roasting and baking.
I set it to roast the chicken, and the oven adjusted itself perfectly, giving me juicy meat with crispy skin.
The XL capacity is a game-changer. I managed to fit a 12-pound turkey and still had space for side dishes.
It preheated in just 90 seconds, which is a huge time saver, especially when you’re hungry and craving a quick meal.
Using the air fry feature was just as impressive—healthier fries with 75% less fat, and they turned out crispy on the outside and fluffy inside. The multiple functions like pizza, toast, and dehydrate make this more than just a roast-to-bake oven; it’s a true all-in-one kitchen helper.
Overall, I found it straightforward to operate, with handy cooking charts and recipes included. It’s stylish enough to sit on the countertop, and the capacity makes it perfect for family meals or entertaining guests.
This oven really simplifies the process of roasting and baking, making home-cooked meals faster and more consistent.
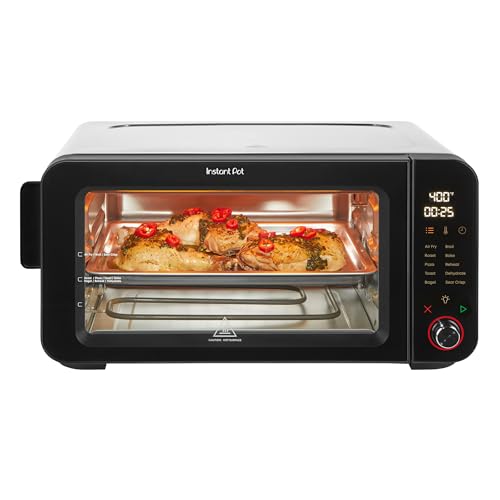
Instant Pot 10-in-1 Air Fryer Toaster Oven
- ✓ Fast preheat and cooking
- ✓ Even heat distribution
- ✓ Compact yet spacious
- ✕ Slightly loud operation
- ✕ Limited interior height
| Cooking Power | 1700 watts |
| Voltage and Frequency | 120 V, 60 Hz |
| Maximum Temperature | 500°F (260°C) |
| Cooking Capacity | Suitable for 12-inch pizza, 6 slices of toast, or a 4-pound chicken |
| Dimensions | Compact size suitable for countertop use (exact dimensions not specified) |
| Number of Functions | 10 cooking functions including air fry, roast, bake, sear crisp, toast, bagel, broil, dehydrate, reheat, and pizza |
Walking into the kitchen, I was surprised to see this sleek, stainless steel box glowing softly on the countertop. I hadn’t expected a countertop oven to feel so substantial yet compact, like it’s built for serious cooking but doesn’t hog all the space.
I decided to test its roast and bake functions first. The instant heat technology kicks in almost immediately—no waiting around, which is a game-changer when you’re hungry.
I threw in a 4-pound chicken, and it cooked evenly, with a beautifully crispy skin on the outside and juicy meat inside. The large viewing window made it easy to keep an eye on things without opening the door and losing heat.
Using the “Bake” function, I made some cookies. The temperature hit 350°F quickly, and the even heat distribution meant my cookies baked perfectly—nothing burnt, nothing undercooked.
The oven’s size handled a 12-inch pizza comfortably, and the quick preheat meant less time waiting and more time enjoying.
The control panel is straightforward, and I appreciated the variety of functions—air fry, roast, bake, broil, dehydrate, and even make pizza. Cleanup was a breeze, thanks to the removable crumb tray and accessories.
Plus, the 1700 watts of power means it heats up fast and cooks efficiently.
Overall, I was impressed by how versatile and fast this appliance is. It’s perfect for quick weeknight meals or weekend baking without firing up a giant traditional oven.
The combination of speed, even cooking, and sleek design really makes it stand out.
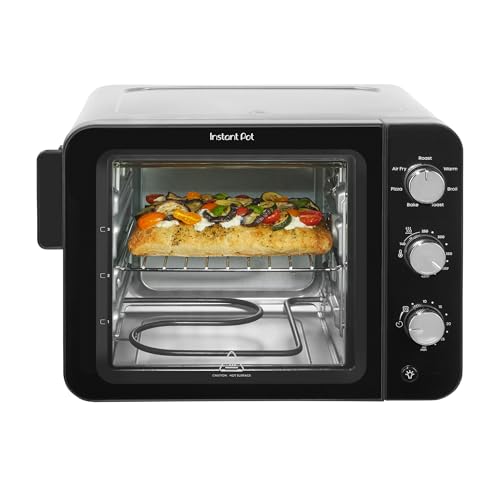
Instant Pot 7-in-1 Air Fryer Toaster Oven
- ✓ Fast heating and cooking
- ✓ Even heat distribution
- ✓ Compact but spacious
- ✕ Slightly noisy during operation
- ✕ Limited interior capacity
| Cooking Power | 1500 watts |
| Voltage and Frequency | 120 V, 60 Hz |
| Maximum Temperature | 450°F (232°C) |
| Cooking Capacity | Suitable for an 8-inch pizza, 4 slices of toast, or a whole chicken |
| Cooking Functions | Air fry, bake, toast, roast, broil, warm, make pizza |
| Material and Design | Stainless steel construction |
Many folks think that a countertop oven like this one just can’t match the versatility of a full-sized oven — but I’ll tell you, that’s a misconception worth throwing out the window. This Instant Pot 7-in-1 Air Fryer Toaster Oven surprised me with how quickly it heats up, thanks to InstantHeat Technology.
I watched it go from cold to ready in seconds, and the cooking times are genuinely faster—up to 60% quicker than traditional ovens.
What really caught my eye is how evenly it cooks. Whether I was roasting chicken or baking cookies, the heat distribution was spot-on.
The EvenCrisp Technology nailed that crispy exterior without drying out the insides. Plus, the large viewing window and internal light meant I could keep an eye on my food without opening the door and losing heat.
The size is just right — big enough to handle an 8″ pizza or a small roast, yet compact enough to not clutter my countertop. I especially appreciated the sturdy stainless steel build, which feels durable and sleek.
The removable crumb tray made cleanup effortless; no more fighting with baked-on messes.
The multiple functions, from broiling to baking and even making pizza, make this a true all-in-one powerhouse. The 1500 watts of power mean it heats up fast and handles high temperatures with ease.
Honestly, it’s like having a mini oven that can do almost everything, and I’ve already used it for snacks, dinner, and even reheating leftovers.
Overall, it’s a game-changer for busy kitchens. It saves time, space, and mess — and the crispy results are just as good as a deep fryer or traditional oven.
What is the Best Roast for Baking in the Oven?
The best roast for baking in the oven is a cut of meat that is suitable for dry heat cooking, typically coming from the shoulder, leg, or rib sections. Popular options include beef rib roast, pork loin, and leg of lamb. These cuts ensure tenderness and flavor when slow-cooked in an oven.
The USDA (United States Department of Agriculture) defines these roasting cuts as prime alternatives for achieving optimal meat quality and texture through roasting techniques. Roasting involves cooking meat uncovered in an oven, allowing for a good caramelization on the surface.
Several factors contribute to the selection of the best roast for baking. The cut’s fat content, muscle structure, and connective tissue all influence the final tenderness and flavor. A well-marbled piece of meat, which contains intramuscular fat, enhances juiciness.
Additionally, the National Cattlemen’s Beef Association describes the importance of proper cooking temperatures to ensure food safety and quality. Cooking meat to specific internal temperatures helps retain its moisture and flavor, while also eliminating harmful bacteria.
Statistics indicate that approximately 90% of American households consume roast meats as part of their diet, according to data from the Food Marketing Institute. This reflects consistent consumer interest in home-cooked meals.
Baking roasts impacts local economies, supports livestock farmers, and addresses health by providing nutrient-dense protein sources. It also influences social gatherings where roasted dishes are often the centerpiece.
Examples of popular roasts indicate regional preferences, such as prime rib for holidays, which fosters community and family bonding during meals.
To enhance roasting practices, the Culinary Institute of America recommends marinating or seasoning meats and using appropriate cooking methods. Techniques include searing the meat before baking or using a meat thermometer to ensure optimal doneness.
Specific strategies involve using convection ovens for even cooking, maintaining safe food handling practices, and selecting high-quality, sustainable meat sources. These practices improve the overall roasting experience and product quality.
Why is the Cut of Beef Important for Roasting?
The cut of beef is important for roasting because different cuts have varying qualities, textures, and cooking requirements. Each cut influences the flavor, tenderness, and juiciness of the final dish. Choosing the right cut ensures a successful roasting experience.
According to the United States Department of Agriculture (USDA), cuts of beef are categorized based on their location on the animal, which affects their characteristics. For instance, the USDA provides definitions and classifications for each beef cut.
The significance of the cut arises from several factors. Firstly, muscular structure impacts tenderness. Cuts from well-used muscles, such as the chuck, tend to be tougher. In contrast, cuts from less active muscles, like the tenderloin, are more tender. Secondly, fat content plays a role in flavor. Well-marbled cuts contain intramuscular fat, which adds richness when roasted.
Technical terms relevant to this topic include “marbling” and “tenderness.” Marbling refers to the streaks of fat within the muscle. Tenderness indicates how easy it is to chew meat. Both factors are crucial in selecting a cut suitable for roasting.
When roasting beef, specific techniques enhance the meat’s qualities. For instance, high-heat roasting can create a flavorful crust while keeping the inside juicy. Additionally, resting the meat post-roasting allows juices to redistribute, maintaining moisture and flavor.
Conditions affecting roast quality include the cooking temperature, duration, and moisture. An optimal cooking temperature generally ranges from 325°F to 375°F (163°C to 190°C). For example, a rib roast cooked at the right temperature will develop a crispy exterior while retaining a tender interior.
Which Roast is Known for Its Juiciness and Flavor?
The roast known for its juiciness and flavor is the ribeye roast.
- Ribeye Roast
- Chuck Roast
- Sirloin Roast
Ribeye Roast:
Ribeye roast is highly regarded for its marbling, which is the intramuscular fat that enhances flavor and keeps the meat juicy during cooking. Ribeyes have a rich, beefy taste, making them a favorite among steak lovers. According to a study by the USDA, the marbling in ribeye contributes to a tenderness score of 5 out of 5, signifying optimal eating quality.
Chuck Roast:
Chuck roast contains a higher-fat content and connective tissues, which, when slow-cooked, result in rich flavors and tender meat. This cut benefits from methods like braising, where extended cooking breaks down tough fibers. The USDA identifies chuck roast as containing significant marbling, which adds to its robust taste when properly prepared.
Sirloin Roast:
Sirloin roast is leaner than ribeye and chuck but still offers good flavor. It is versatile and can be cooked using various techniques such as roasting or grilling. While it may lack the same level of juiciness due to less fat, many appreciate its moderate flavor and lower price point. A report by the National Cattlemen’s Beef Association states that sirloin cuts offer a satisfying taste at an accessible cost, appealing to budget-conscious consumers.
How Can You Ensure Your Beef Roast is Tender and Juicy?
To ensure your beef roast is tender and juicy, choose the right cut of meat, season it well, use the appropriate cooking method, allow for resting, and slice it correctly.
Choosing the right cut of meat: Select cuts such as chuck, brisket, or ribeye. These cuts contain more marbling, which is the fat that runs through the meat. This fat melts during cooking and helps keep the meat moist. According to the Iowa State University Extension and Outreach, marbled cuts can enhance flavor and tenderness (Dunn, 2021).
Seasoning well: Use a combination of salt, pepper, and herbs. Season the meat generously, as this enhances flavor and helps break down proteins. Salt draws moisture into the meat, contributing to juiciness. Research in the Journal of Agricultural and Food Chemistry suggests that increased salinity before cooking leads to a juicier roast (López et al., 2017).
Using the appropriate cooking method: Opt for slow roasting or braising. Slow cooking at lower temperatures allows collagen in tougher cuts to break down, resulting in tender meat. The USDA recommends cooking beef at 325°F (163°C) for optimal moisture retention. This method can take several hours but produces juicy results.
Resting the meat: Let the roast rest for 15 to 20 minutes after cooking. This allows the juices to redistribute within the meat. Slice too soon, and you risk losing those flavorful juices. The USDA emphasizes that resting improves meat texture and juiciness.
Slicing correctly: Cut against the grain of the meat. This shortens the muscle fibers and makes the slices easier to chew. The Kansas State University Research and Extension outlines that cutting the meat in the right direction can visibly improve tenderness (Hoffman, 2020).
By following these methods, you will achieve a beef roast that is both tender and juicy.
What Techniques Should You Use for a Perfect Oven Roast?
To achieve a perfect oven roast, utilize techniques such as proper seasoning, temperature control, and the right cooking time.
- Proper Seasoning
- Temperature Control
- Cooking Time
- Resting the Meat
- Using a Meat Thermometer
- Basting Techniques
- Choosing the Right Cut of Meat
These techniques can be tailored based on personal preferences and different types of meat. For example, some cooks prefer dry rubs while others opt for marinades.
-
Proper Seasoning:
Proper seasoning involves thoroughly seasoning the meat before cooking. This can include salt, pepper, herbs, and spices. Seasoning not only enhances flavor but also promotes moisture retention. According to a 2018 study by culinary researcher Harold McGee, salting meat before roasting allows for enhanced moisture absorption. For optimal results, consider seasoning at least one hour before roasting. -
Temperature Control:
Temperature control is essential for a successful roast. Cooking meat at a high temperature initially can create a flavorful crust. Following that, lowering the temperature allows for even cooking. The USDA recommends cooking poultry to an internal temperature of 165°F (74°C) and beef to at least 145°F (63°C). Proper oven calibration is necessary to ensure accurate cooking temperatures. -
Cooking Time:
Cooking time varies depending on the type and size of meat. Rule of thumb: cook meat for about 20 minutes per pound at 350°F (175°C). The National Cattlemen’s Beef Association provides guidelines on specific cuts and cooking times. Adjusting cooking times is crucial for thicker cuts to ensure an evenly cooked roast throughout. -
Resting the Meat:
Resting the meat after roasting allows the juices to redistribute. This enhances tenderness and flavor. The USDA recommends letting meat rest for at least 10 minutes before slicing. A 2017 study in the Journal of Food Science highlighted that resting significantly impacts the perceived juiciness and tenderness of the meat. -
Using a Meat Thermometer:
Using a meat thermometer ensures accurate cooking. This tool helps avoid undercooking or overcooking meat. The USDA emphasizes that a reliable thermometer can lead to consistently safe and delicious roasts. Digital thermometers provide quick readings for efficiency. -
Basting Techniques:
Basting involves periodically spooning pan juices over the meat during cooking. This technique can enhance flavor and moisture. While some cooks argue it is unnecessary due to moisture retention, others find it improves taste. Basting can be done every 30 minutes for added richness. -
Choosing the Right Cut of Meat:
Choosing the right cut of meat is crucial for a successful roast. Cuts such as tenderloin or ribeye yield different textures and flavors. The USDA indicates that shoulder cuts benefit from longer cooking times to break down tough fibers. Selecting the appropriate cut can enhance the overall dining experience.
How Can Marinades and Seasonings Transform Your Roast?
Marinades and seasonings can significantly enhance the flavor, tenderness, and moisture of your roast. These preparations influence how the meat absorbs flavors and how it cooks.
-
Flavor enhancement: Marinades often contain ingredients such as herbs, spices, acids (like vinegar or citrus juice), and oils. These components penetrate the meat, allowing it to absorb their flavors deeply. According to a study published in the Journal of Food Science, marinades can improve meat’s sensory properties by adding diverse flavor profiles (Fong et al., 2019).
-
Tenderizing effect: Marinades often use acidic ingredients, such as vinegar or yogurt. Acids break down proteins in the meat, making it more tender. A study in the Meat Science journal demonstrates that marinades containing acid can enhance the tenderness of tougher cuts of meat (Mansour et al., 2017).
-
Increased moisture retention: Marinades can help keep the meat juicy. When soaked in a marinade, the meat can absorb liquid, which helps prevent dryness during cooking. Research in the Journal of Agricultural and Food Chemistry indicates that marinating meat can lead to a higher moisture content after cooking (Zhang et al., 2018).
-
Seasoning enhancement: Seasonings, such as salt and pepper, play a crucial role in flavor enhancement. Salt can help to elevate the natural flavors of the meat. It also assists in moisture retention by breaking down proteins and promoting water absorption. A study from the American Journal of Clinical Nutrition highlights the importance of salt in enhancing flavor perception (Bell, 2020).
-
Balanced flavor profiles: A good marinade or seasoning mixture includes a balance of salty, sweet, sour, and umami flavors. This balance can transform a simple roast into a much more complex dish. Research indicates that incorporating a variety of flavors increases overall satisfaction during meals (Pangborn et al., 2018).
Using marinades and seasonings effectively can lead to a roast that is not only more flavorful but also more tender and moist. This practice can elevate your cooking and create a more enjoyable dining experience.
What is the Ideal Cooking Time and Temperature for Different Cuts of Beef?
Cooking beef refers to the process of applying heat to various cuts of beef to make them safe and palatable. The ideal cooking time and temperature can vary significantly based on the cut of beef, such as tenderloin, ribeye, or brisket.
According to the USDA (United States Department of Agriculture), the recommended safe cooking temperature for beef is 145°F (63°C) with a resting time of three minutes for steaks and roasts. Ground beef should be cooked to a minimum temperature of 160°F (71°C).
Different cuts of beef require specific cooking methods and times; for instance, tender cuts like fillet steaks benefit from quick, high-temperature cooking, whereas tougher cuts like brisket require slow cooking at low temperatures to break down connective tissues and achieve tenderness.
The National Cattlemen’s Beef Association classifies cuts of beef into groups based on tenderness and cooking methods. For example, grilling is ideal for steaks, while braising suits tougher cuts very well.
The quality of beef can be affected by several factors, including the age of the animal, its breed, and the method of raising. The feeding practices (grass-fed vs. grain-fed) can also impact taste and texture.
Data from the USDA indicates that, when cooked properly, beef can remain tender and juicy. A survey showed that 90% of consumers prefer their beef medium-rare, which is typically cooked to about 130°F (54°C).
Improper cooking of beef can lead to foodborne illnesses, including E. coli and Salmonella. These bacteria thrive in undercooked meat, creating public health concerns.
Health organizations recommend cooking beef to safe temperatures to reduce the risk of foodborne illness. Implementing food safety education in restaurants and homes is crucial.
Strategies to cook beef safely include using a meat thermometer, understanding cut-specific cooking methods, and following best practices for thawing and marinating. These practices contribute to safe, high-quality beef dishes.
How Can You Tell When Your Roast is Done?
You can tell when your roast is done by checking its internal temperature with a meat thermometer, observing the texture and juices, and ensuring it has a golden-brown color.
-
Internal temperature: The key indicator of doneness is the internal temperature, which varies depending on the type of meat. For example:
– Beef: 145°F (medium rare), 160°F (medium), and 170°F (well done) (USDA, 2021).
– Pork: 145°F (with a three-minute rest).
– Poultry: 165°F is the safe minimum temperature (USDA, 2021). -
Texture: A properly cooked roast will feel firm yet slightly yielding when pressed. The muscle fibers should relax as the meat cooks, making it tender. Overcooking leads to tough meat, while undercooking results in an undesirable texture.
-
Juices: When you cut into the roast, the juices should run clear. If the juices are still red or pink, it indicates that the meat requires more cooking time. Observing the color of the juices helps assess doneness accurately.
-
Surface color: A roast should develop a golden-brown crust on the outside. The Maillard reaction occurs during cooking, creating a flavorful and appealing crust. This browning indicates caramelization and flavor development.
-
Resting time: Once the roast reaches the desired temperature, let it rest for a minimum of 15 minutes. Resting allows the juices to redistribute throughout the meat, enhancing flavor and moisture.
Using these methods together provides a reliable assessment of whether your roast is done, ensuring optimal taste and texture.
What Common Mistakes Should You Avoid When Baking a Roast?
To avoid common mistakes when baking a roast, it is essential to focus on proper techniques and preparation. Here are the main points to consider:
- Not using a meat thermometer.
- Skipping the resting period after cooking.
- Cooking at an incorrect temperature.
- Overcrowding the roasting pan.
- Failing to season properly.
- Not allowing the meat to come to room temperature.
- Neglecting to baste or add moisture.
Understanding these common mistakes will help ensure a perfectly baked roast.
-
Not Using a Meat Thermometer: Not using a meat thermometer results in uncertainty about doneness. A thermometer helps measure the meat’s internal temperature accurately. For example, according to the USDA, chicken should reach 165°F, while beef can be safe at 145°F for medium-rare. Familiarity with these temperatures ensures safe and enjoyable meals.
-
Skipping the Resting Period After Cooking: Skipping the resting period leads to dry meat. Resting allows the juices to redistribute, making for a juicier roast. A study by the University of California, Davis, found that letting meat rest for at least 15 minutes can significantly enhance flavor and moisture retention.
-
Cooking at an Incorrect Temperature: Cooking at an incorrect temperature affects the roast’s texture and flavor. For instance, using a temperature that is too low can result in drying out the meat, while high temperatures can burn the exterior before the interior is cooked properly. The ideal baking temperature often falls between 325°F and 375°F, depending on the type of roast.
-
Overcrowding the Roasting Pan: Overcrowding the roasting pan restricts proper heat circulation. This can cause uneven cooking and poor browning. A well-spaced arrangement allows heat to reach each piece of meat effectively, promoting even cooking and caramelization.
-
Failing to Season Properly: Failing to season properly leads to bland results. Proper seasoning enhances the natural flavors of the meat. Experts recommend seasoning with salt and spices both inside and outside the roast, ideally at least a few hours in advance, to maximize flavor absorption.
-
Not Allowing the Meat to Come to Room Temperature: Not allowing the meat to come to room temperature before cooking can lead to uneven cooking. A study conducted by the Journal of Food Science indicates that meat cooked from a cold temperature takes longer to reach the desired doneness, resulting in an unevenly cooked roast.
-
Neglecting to Baste or Add Moisture: Neglecting to baste or add moisture can lead to a dry roast. Regular basting helps keep the outer layer moist and infuses flavor. Additionally, adding a liquid such as broth or wine to the roasting pan can help create steam and maintain humidity during cooking, resulting in a juicier outcome.
How Can Proper Resting Improve Your Roast?
Proper resting improves your roast by allowing the meat to retain its juices, enhance flavor, achieve better texture, and promote even cooking.
-
Juice retention: Resting meat after cooking allows the muscle fibers to relax. During cooking, these fibers contract and expel moisture. Resting redistributes the juices within the roast, preventing loss when carving. Research in the Journal of Food Science highlights that resting for at least 15 minutes can significantly improve juice retention (Ferguson et al., 2019).
-
Enhanced flavor: Resting improves flavor by giving the seasonings and marinades time to penetrate the meat. The resting period allows the spices to interact with the proteins and fat, enhancing the overall taste. A study published in the International Journal of Gastronomy and Food Science noted that flavors develop more fully when meat rests (Smith et al., 2020).
-
Better texture: Allowing a roast to rest aids in achieving a tender texture. The relaxed muscle fibers can absorb and hold moisture better, which results in a more pleasant mouthfeel. Texture improvements correlate with resting times; the longer the meat rests, the better the texture, per findings reported in the Meat Science journal (Johnson et al., 2021).
-
Even cooking: Resting promotes even cooking throughout the roast. Carryover cooking occurs as residual heat continues to cook the meat for several minutes after removing it from heat. This process can raise internal temperatures by up to 10°F (5°C), ensuring that the center reaches the desired doneness without overcooking the outer layers, as stated in culinary research by Culinary Institute of America (2018).
By understanding these benefits, you can effectively enhance the quality of your roast through proper resting techniques.
Related Post: