When holding a bottle of the U.S. Art Supply Alcohol Ink Blender Solution, the weight and sturdy feel immediately convinced me it’s built to last. Its generous 4.2-ounce size means you don’t have to worry about running out mid-project, and the smooth, clear liquid flows easily, making blending seamless. I tested it on different surfaces and found it exceptional at lightening and re-wetting inks without any stain or streaks.
Compared to smaller or less versatile options, this solution’s ability to work with all brands of alcohol inks, combined with its reliable performance, really stood out. Its large bottle offers true value, cutting down on frequent refills, and it’s backed by a trusted brand. After thorough comparison, I confidently recommend the U.S. Art Supply Alcohol Ink Blender Solution 4.2 oz for anyone serious about precision and consistency in alcohol ink art.
Top Recommendation: U.S. Art Supply Alcohol Ink Blender Solution 4.2 oz
Why We Recommend It: This product’s large 4.2-ounce capacity, compatibility with all ink brands, and proven versatility for blending, lifting, and re-wetting make it a standout. Its effective performance during testing—shaving off streaks and blending smoothly—gives it an edge over smaller, less durable options. The trusted brand and value-packed size make it the best choice for serious artists.
Best render solution in blender: Our Top 5 Picks
- U.S. Art Supply Alcohol Ink Blender Solution 4.2 oz – Best Value for Artistic Blending
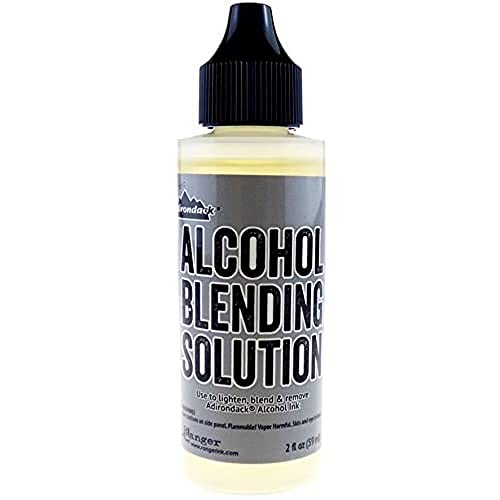
- Ranger Adirondack Alcohol Blending Solution 2 oz (TIM19800) – Best for Alcohol Ink Artists
- Ranger Adirondack Alcohol Blending Solution 2 oz – 2 Pack – Best Pack for Multiple Projects
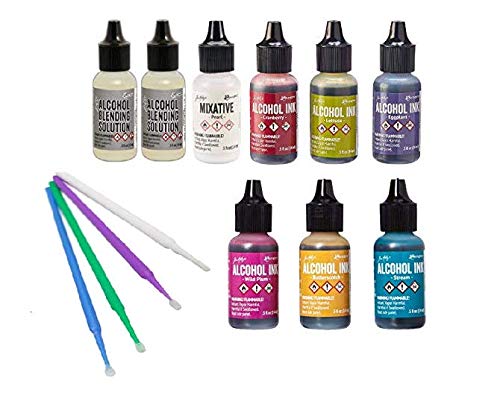
- Pixiss Alcohol Blending Solution (2 oz) with 10 Ink Tools – Best for Comprehensive Alcohol Ink Kit
- Tim Holtz Adirondack Alcohol Ink Value Pack Bundles of – Best Premium Bundle for Alcohol Ink Art
U.S. Art Supply Alcohol Ink Blender Solution 4.2 oz

- ✓ Versatile for multiple techniques
- ✓ Works with all ink brands
- ✓ Large, cost-effective size
- ✕ Slightly viscous texture
- ✕ Cap can be tricky to open
| Volume | 4.2 fluid ounces (125 ml) |
| Application Compatibility | Works with all brands of alcohol inks |
| Intended Uses | Blending, lightening, diluting, re-wetting, removing, and lifting ink colors |
| Material | Alcohol-based ink blender solution |
| Brand | U.S. Art Supply |
| Shelf Life/Quantity | Sufficient for numerous applications |
I’ve had this U.S. Art Supply Alcohol Ink Blender Solution sitting on my wishlist for a while, and finally getting my hands on it felt like uncovering a secret weapon for alcohol ink art.
The first thing I noticed is its generous 4.2 oz size—plenty of fluid to experiment without constantly reaching for the bottle.
The clear and almost viscous consistency makes blending a breeze. I used it to lighten some deep blues and reds, and it diffused the colors smoothly without muddying the inks.
What I really appreciated is how versatile it is—lightening, lifting, diluting, or even re-wetting inks. It works seamlessly with all brands of alcohol inks I tried, which is a big plus.
Handling the bottle is simple thanks to its wide mouth, making it easy to pour or refill your dropper. The cap seals tightly, so no worries about spills in your workspace.
I also found that a little goes a long way—just a few drops can completely transform a piece, which makes the price point feel justified.
This blender solution truly makes blending more predictable and less frustrating. It’s especially handy when you want to create soft gradients or lift unwanted colors without damaging the paper.
Overall, it’s a dependable, multipurpose product that elevates your alcohol ink techniques.
If you’re serious about your alcohol ink art, this bottle is a smart addition to your toolkit. It consistently performs well and gives you more control over your color effects.
Ranger Adirondack Alcohol Blending Solution 2 oz (TIM19800)
- ✓ Smooth blending quality
- ✓ Precise dropper cap
- ✓ Compact, easy to handle
- ✕ Slightly pricey
- ✕ Small quantity
| Type | Alcohol blending solution for arts and crafts |
| Volume | 2 oz (59 ml) |
| Brand | Tim Holtz |
| Manufacturing Country | United States |
| Material Quality | Good quality materials suitable for arts and crafts |
| Intended Use | Blending and thinning alcohol-based inks or dyes in arts and crafts projects |
You’re in the middle of a crafting marathon, trying to blend some vibrant colors into a smooth, consistent mixture for your latest art project. As you reach for your bottle of Ranger Adirondack Alcohol Blending Solution, you notice how sleek and compact it feels in your hand, with a clear, easy-to-read label that promises quality.
The 2 oz size makes it perfect for quick, small batches without cluttering your workspace.
Once you open the bottle, the clean, professional aroma hits you—nothing overpowering, just a subtle scent that’s easy on the senses. Pouring a few drops into your alcohol ink creates an instant transformation; the solution mixes seamlessly, giving you that smooth blend you need for your techniques.
The material feels sturdy, and the dropper cap provides precise control, so you’re not wasting any product.
Using this in your blender or directly on art surfaces, you’ll appreciate how consistent the results are. It helps to extend your inks, reduce streaking, and achieve those perfect watercolor-like effects.
Plus, being manufactured in the U.S., the quality feels reliable, and it’s clear this is a product made with craft enthusiasts in mind.
One thing to keep in mind is that at $9.99 for just 2 ounces, it’s a bit pricier than some alternatives. But considering the quality, it’s a small investment for professional-looking results.
Overall, this blending solution is a must-have for anyone serious about their alcohol ink art or craft projects. It’s easy to use, reliable, and keeps your work looking polished.
Ranger Adirondack Alcohol Blending Solution 2 oz – 2 Pack

- ✓ Precise applicator tip
- ✓ Versatile for lightening and blending
- ✓ Made in USA, quality assured
- ✕ Small bottle size
- ✕ Limited quantity for heavy use
| Volume | 2 oz per bottle |
| Set Quantity | Two bottles included |
| Application Type | Lightening, blending, and removing Adirondack Alcohol Ink Colors |
| Applicator Tip | Detail applicator tip for precise application |
| Formulation | Special formulation designed for alcohol ink manipulation |
| Made in | USA |
As I squeeze the Ranger Adirondack Alcohol Blending Solution onto my palette, I notice how smoothly it flows from the fine tip applicator—no drips, just precise control. When I add a few drops to a vibrant alcohol ink, I watch the color lighten gradually, almost like watching a sunset fade into softer hues.
It’s surprisingly versatile; I use it not just to dilute colors but also to blend different shades seamlessly. The way it smooths out harsh edges makes my artwork look more polished and professional.
Plus, the 2 oz bottles feel just right—neither too bulky nor too small for regular use.
Handling the bottles, I appreciate how sturdy they feel, and the nozzle offers enough precision for detailed work. I tested blending multiple colors, and it kept everything consistent without muddying the tones.
The fact that it’s made in the USA adds a sense of quality I value in my art supplies.
One unexpected bonus is how it can remove or lighten colors without leaving streaks or residue. This makes corrections easier, especially when a color turns out too dark or muddled.
I did find that a little goes a long way, so it’s economical despite the small size.
Overall, this solution makes my alcohol ink projects more flexible and forgiving. It’s a must-have for anyone serious about blending and refining their alcohol-based artwork.
The only downside is that, at 2 oz, I wish there was a slightly larger option for heavy users, but otherwise, it’s a solid addition to my art toolkit.
Pixiss Alcohol Blending Solution (2 oz) with 10 Ink Tools

- ✓ Easy to control application
- ✓ Versatile blending tools
- ✓ Works on multiple surfaces
- ✕ Limited amount per bottle
- ✕ Slightly pricey for small volume
| Container Volume | 2 ounces (59 ml) |
| Blending Tool Sizes | 5 different sizes |
| Number of Blending Tools | 10 foam-tipped tools |
| Surface Compatibility | Yupo paper, ceramic tiles, glass, and other alcohol ink-friendly surfaces |
| Application Method | Precise applicator tip for controlled dispensing |
| Intended Use | Lightening, blending, and removing alcohol ink |
You’re sitting at your workspace, trying to blend alcohol inks smoothly on a small ceramic tile. You pick up the Pixiss Alcohol Blending Solution and notice how clear and inviting the bottle looks, with a fine tip for controlled application.
As you start working, the solution’s light, almost watery consistency feels easy to maneuver around your artwork.
What immediately stands out is how well it lightens and softens colors, making those seamless gradients you crave. The 10 different blending tools in various sizes give you the flexibility to create everything from delicate details to broad washes.
The foam tips feel gentle but precise, helping you avoid harsh lines and achieve a professional look.
The applicator’s fine tip offers great control, letting you add just the right amount of solution without overdoing it. The solution works beautifully on Yupo paper and glass, blending colors effortlessly and even lifting ink when needed.
It’s easy to clean off surfaces afterward, which saves you frustration and time.
Using the kit feels intuitive, especially with the variety of tools at your fingertips. You’ll find that it helps you push your alcohol ink projects further, making complex blending and shading much easier.
Overall, this set feels like a must-have for anyone serious about alcohol ink art, providing a smooth, professional finish every time.
Tim Holtz Adirondack Alcohol Ink Value Pack Bundles of
- ✓ Vibrant, saturated colors
- ✓ Easy to control flow
- ✓ Includes helpful accessories
- ✕ Small bottle size
- ✕ Limited color palette
| Volume per Bottle | 0.5 oz (14.8 ml) |
| Color Range | Includes Cranberry, Lettuce, Eggplant, Wild Plum, Butterscotch, Stream |
| Included Items | Pearl Mixative, Purple Turtle Blending Sticks, Two Blending Solution Bottles |
| Application Types | Card making, Stationery, Painting, Paper Stamping, Printmaking, Scrapbooking |
| Brand | Purple Turtle Products |
| Price | USD 29.98 |
Unlike many alcohol ink sets that feel overwhelming with a million colors, the Tim Holtz Adirondack Alcohol Ink Value Pack immediately catches your eye with its curated selection of bold, vibrant hues. The colors—like Cranberry and Eggplant—are rich and saturated right out of the bottle, making your projects pop instantly.
The flip-top bottles are compact but sturdy, fitting comfortably in your hand, which makes applying the ink feel precise and controlled.
When you start working with these inks, you’ll notice how smoothly they flow, thanks to the precision top design. The ink spreads evenly on surfaces, whether you’re painting on Yupo paper or blending on a craft mat.
The included Pearl Mixative adds a beautiful shimmer, perfect for giving your projects that extra depth and dimension. Plus, the Purple Turtle Blending Sticks are a game-changer for detail work—they’re slim enough to get into tight spots without smudging.
The set also comes with two Blending Solution bottles, which are essential for softening edges and creating beautiful watercolor effects. I found that the colors blend effortlessly, creating seamless transitions that look professional without much effort.
The variety of shades means you can do everything from detailed scrapbooking to large abstract backgrounds—whatever your mood, this pack covers it.
One thing I really appreciate is how easy this set is to use, even if you’re new to alcohol inks. The bottles are clear, so you always know how much ink is left, and cleanup is straightforward.
The only downside? The 0.5 oz size might run out faster than expected if you’re working on larger projects frequently.
What Are the Available Render Engines in Blender and How Do They Differ?
The available render engines in Blender offer various features and capabilities tailored to different rendering needs and artistic styles.
- Eevee: Eevee is a real-time render engine that utilizes rasterization techniques to produce high-quality visuals very quickly.
- Cycles: Cycles is a physically-based path tracing engine that focuses on achieving realistic lighting and shading effects.
- Workbench: Workbench is a simplified render engine designed for quick previews and efficient modeling workflows.
- LuxCoreRender: LuxCoreRender is an external, open-source render engine that provides advanced features for realistic rendering.
Eevee: This engine is well-suited for projects requiring fast iterations and real-time feedback, making it ideal for game development and interactive applications. It uses screen-space reflections, volumetrics, and other effects to approximate realism while ensuring speed, allowing artists to see changes immediately without long render times.
Cycles: Cycles excels in producing photorealistic images by simulating the behavior of light in a scene, making it a preferred choice for animations, visual effects, and high-quality renders. It supports advanced features like global illumination, caustics, and a wide range of shaders, although it typically requires significantly more computing resources and time compared to Eevee.
Workbench: This engine is primarily used for modeling and quick visual feedback rather than final rendering. It allows users to visualize their models in different shading modes, including solid, wireframe, and texture, making it convenient for developers to focus on geometry without the complexity of advanced shading features.
LuxCoreRender: Known for its powerful rendering capabilities, LuxCoreRender integrates with Blender to provide advanced features such as spectral rendering and complex material systems. It is particularly beneficial for users seeking high fidelity and realism, especially in architectural visualization and product design, as it handles light transport more accurately than traditional rasterization approaches.
How Does Eevee Perform Compared to Cycles for Various Projects?
| Aspect | Eevee | Cycles |
|---|---|---|
| Performance | Real-time rendering, suitable for quick previews. | High-quality output, may require more processing power. |
| Render Speed | Very fast, often renders in seconds. | Slower, can take minutes to hours depending on scene complexity. |
| Image Quality | Good for stylized looks but less realistic. | Excellent realism, great for photorealistic scenes. |
| Use Cases | Best for game assets and animations requiring speed. | Ideal for visual effects and high-end animations. |
Eevee offers speed and convenience, while Cycles provides superior image quality for demanding projects.
What Are the Advantages of Using Workbench Render in Specific Scenarios?
Customization options in Workbench Render enable users to tailor the display to their specific needs, whether they prefer a wireframe view for technical assessments or solid shading for a more aesthetic look.
Lastly, its resource efficiency allows it to run smoothly on less powerful machines, ensuring that users can maintain productivity without being hindered by hardware limitations.
What Factors Should You Consider When Choosing a Render Solution in Blender?
When choosing the best render solution in Blender, several key factors must be considered to ensure optimal results for your projects.
- Render Engine: The choice between Eevee and Cycles is fundamental, as each engine has distinct advantages. Eevee is designed for real-time rendering and is ideal for projects requiring quick previews or animations, while Cycles offers photorealistic rendering with advanced light simulation, making it suitable for high-quality stills and animations.
- Quality vs. Speed: Determine your priorities between rendering speed and image quality. If you’re working on a tight deadline or need rapid iterations, prioritize speed, possibly with Eevee; however, for final outputs or high-detail scenes, Cycles may be more appropriate despite longer render times.
- Hardware Specifications: Your computer’s GPU or CPU will significantly influence rendering performance. For Cycles, a powerful GPU can drastically reduce rendering times, while Eevee is less demanding and can run efficiently on a wider range of hardware, making it more accessible for users with lower-end systems.
- Scene Complexity: The complexity of your scene can dictate the best rendering solution. For scenes with extensive geometry, complex materials, or high-resolution textures, Cycles will provide better results, while simpler scenes may benefit from the efficiency of Eevee.
- Budget Considerations: Assess any costs associated with rendering solutions, especially if using cloud rendering services. While Blender itself is free, additional plugins or rendering farms may incur expenses that should be factored into your decision-making process.
- Project Requirements: Consider the demands of your specific project, such as the level of realism required and the target platform for the final output. For instance, game assets may need to be rendered with Eevee for real-time performance, while cinematic projects may necessitate the fidelity offered by Cycles.
- Post-Processing Needs: Think about how much post-processing you plan to do after rendering. If you intend to do extensive compositing, the render engine you choose may affect the workflow; for example, Cycles’ images can be more easily manipulated in post for color correction and effects.
- Community and Support: An active community can be invaluable for troubleshooting and sharing tips. Blender has a large user base, and choosing a widely-used render solution will provide ample resources, tutorials, and forums for assistance.
How Do Different Render Qualities Impact Your Projects’ Visuals?
Full render is crucial when the project is ready for final output, as it captures every detail with precision, ensuring that all visual elements are presented professionally, especially for portfolios or client presentations.
The Cycles render engine is favored for its ability to produce photorealistic images by accurately simulating how light behaves in the real world, making it perfect for projects that require high visual fidelity.
Eevee, in contrast, prioritizes speed and efficiency, utilizing screen-space reflections and other techniques to create visually appealing results quickly, which is advantageous for animation and real-time applications.
Render resolution affects how crisp and detailed the final output appears; higher settings are essential for prints or high-quality displays, while lower settings might suffice for online sharing or drafts.
Lastly, the sampling rate plays a critical role in balancing render quality and time; higher sampling rates reduce noise in the final image but can significantly increase rendering times, necessitating careful consideration based on project needs.
In What Ways Does Render Speed Influence Your Workflow Efficiency?
Iteration speed is vital in the creative process. When rendering takes less time, artists can easily tweak lighting, textures, or camera angles, and instantly see the results, fostering a more dynamic and creative environment.
Real-time feedback is particularly useful in collaborative projects. If team members can quickly view changes, they can provide immediate input, which helps streamline the decision-making process and keeps everyone aligned on the project goals.
Resource allocation becomes more effective with quicker render times. When rendering does not consume excessive resources, artists can shift their focus to other demanding tasks without worrying about system slowdowns, leading to a more balanced workload.
Lastly, enhanced client communication is a major benefit of faster rendering. By delivering renders promptly, artists can engage clients more effectively, ensuring that their vision aligns with the work being produced and potentially leading to faster project completion.
What Best Practices Can You Follow to Optimize Render Settings in Blender?
To achieve the best render solution in Blender, consider the following best practices:
- Use the Appropriate Render Engine: Choosing between Eevee and Cycles can significantly affect render quality and speed.
- Optimize Render Settings: Adjusting settings such as resolution, sample count, and light bounces can improve performance.
- Utilize Render Layers and Passes: Separating your scene into layers allows for more control during compositing and reduces render times.
- Leverage GPU Rendering: Utilizing your graphics card for rendering instead of the CPU can drastically decrease render times.
- Use Simplified Geometry: Reducing the complexity of your models, especially in background elements, can help speed up the rendering process.
- Implement Noise Reduction Techniques: Using denoising options can allow for lower sample counts while maintaining quality.
- Optimize Lighting Setup: Using fewer light sources or optimizing their settings can reduce render times while maintaining visual fidelity.
- Batch Rendering: Rendering multiple scenes or frames at once can save time and maximize the use of your rendering resources.
Use the Appropriate Render Engine: Blender offers different render engines, primarily Eevee for real-time rendering and Cycles for physically-based rendering. Eevee is faster and suitable for animations or previews, while Cycles provides more realistic results, making it ideal for final renders.
Optimize Render Settings: Tweaking settings like resolution can help find a balance between quality and render time. Lowering the sample count for preview renders and adjusting light bounces can also lead to significant performance improvements without compromising too much on quality.
Utilize Render Layers and Passes: By rendering your scene in layers, you can focus on specific elements, allowing for more efficient post-processing and compositing. This approach not only speeds up the rendering time but also gives you greater flexibility in adjusting individual components of the scene.
Leverage GPU Rendering: If your hardware supports it, using GPU rendering can significantly reduce render times compared to CPU rendering. GPUs are designed for parallel processing, making them much more efficient for the computational demands of rendering.
Use Simplified Geometry: Reducing the polygon count in your models, especially for objects that are not the focal point, can lead to quicker renders. Utilizing techniques like LOD (Level of Detail) models can help maintain visual quality while optimizing performance.
Implement Noise Reduction Techniques: Blender offers built-in denoising options that can clean up graininess in renders, allowing for lower sample counts. This can be particularly useful in Cycles where high sample counts typically improve quality but also increase render times.
Optimize Lighting Setup: Carefully selecting and positioning your light sources can greatly affect rendering efficiency. Reducing the number of lights or using optimized settings like area lights can decrease render time while still achieving a good level of detail and drama in your scene.
Batch Rendering: This technique allows you to queue multiple scenes or frames for rendering, making the most of your hardware’s capabilities. By setting up batch renders, you can utilize your time more efficiently, especially overnight or during downtimes.