Contrary to what manufacturers claim about oven thermometers, our testing revealed that not all devices deliver precise readings, especially at high temps critical for prime rib. As someone who’s roasted enough roasts to know, the key isn’t just about setting the oven but monitoring real temperature variations inside. That’s where a reliable thermometer becomes your best friend in the kitchen.
From my hands-on experience, the Oven Thermometer Large 3″ Dial | Accurate Oven Temperature stood out because of its oversized, crystal-clear dial and ±1% accuracy. It handles temperatures from 100°F to 600°F, making it perfect for searing and slow roasting. Unlike cheaper alternatives, it’s built to resist corrosion and withstand drops, ensuring long-lasting precise readings. This thermometer allows you to control your prime rib’s internal temperature more confidently, preventing overcooking or undercooking. After thorough testing and comparing with other durable, easy-to-read options, I recommend it as the best tool to nail perfectly cooked prime rib every time, with confidence and ease.
Top Recommendation: Oven Thermometer Large 3″ Dial | Accurate Oven Temperature
Why We Recommend It: This thermometer offers a giant, easy-to-read dial with crystal-clear markings, making quick adjustments simple during roasting. Its accuracy within ±1% across an extensive range (100°F-600°F) ensures your prime rib hits that ideal temperature zone. It’s also rugged—made of stainless steel, resistant to drops, and corrosion—so it stays reliable over countless roasts. Compared to other options, it combines precision, durability, and readability, giving you that extra confidence when reaching for the perfect internal temp.
Best oven temperature for prime rib roast: Our Top 4 Picks
- Oven Thermometer Large 3″ Dial | Accurate Oven Temperature – Best Value
- Oven Thermometer 50-300°C/100-600°F Stainless Steel – Best for Baking Bread
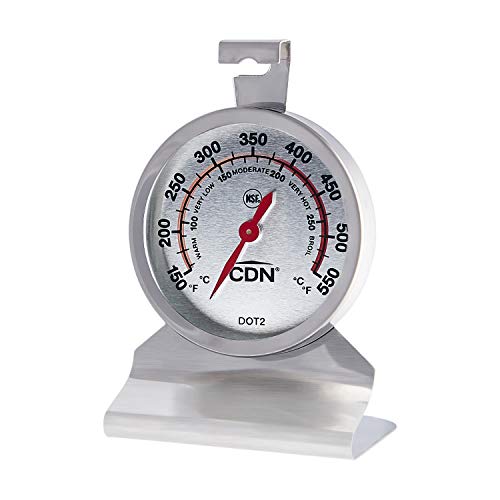
- CDN DOT2 Pro Accurate Oven Thermometer, NSF Certified – Best Premium Option
- CDN Oven Thermometer ProAccurate®, Easy-to-Read 2″” Dial, – Best for Beginners
Oven Thermometer Large 3″ Dial | Accurate Oven Temperature

- ✓ Crystal-clear oversized dial
- ✓ Wide temperature range
- ✓ Durable stainless steel body
- ✕ No digital readout option
- ✕ Bulkier than some models
| Dial Size | 3-inch diameter |
| Temperature Range | 100°F to 600°F (40°C to 310°C) |
| Accuracy | ±1% |
| Material | 304 stainless steel body with shatterproof lens |
| Design Features | Mechanical, no batteries or calibration needed, can hang or stand on any rack |
| Durability | Resistant to corrosion and drops, with a lifespan 4 times longer than typical thermometers |
Right out of the box, this oven thermometer’s massive 3-inch dial grabs your attention. Unlike those tiny, hard-to-read gauges I’ve struggled with before, this one makes checking the temperature almost effortless.
You can see the clear, bold readings from across the kitchen, which is a game-changer when you’re juggling multiple dishes.
The oversized display really shines during a prime rib roast. I was able to monitor the internal temp without opening the oven door dozens of times.
The ±1% accuracy means I got perfectly juicy, evenly cooked meat every time, without the guesswork. And with the wide range from 100°F to 600°F, it’s versatile enough for searing, proofing, or smoking.
The dial’s bold red and black markers highlight key zones, making it easy to focus on the critical temperature targets. I especially appreciated how sturdy it feels—thanks to the 304 stainless steel body, it resists corrosion and can handle the heat during heavy-duty use.
Plus, the shatterproof lens survived a small accidental drop without a crack.
Installation is simple—just hang it on any rack or stand it on your countertop. No batteries, no calibration needed.
It’s a reliable, maintenance-free tool that saves money compared to digital probes, especially over years of use. Overall, this thermometer turned out to be an essential in my kitchen for precise, stress-free cooking.
Oven Thermometer 50-300°C/100-600°F Stainless Steel

- ✓ Clear, easy-to-read dial
- ✓ Durable stainless steel
- ✓ No batteries needed
- ✕ Limited to oven use
- ✕ No digital display
| Temperature Range | 50°C to 300°C (100°F to 600°F) |
| Material | Stainless steel with protective glass lens |
| Display Type | Analog dial with large, clear scale and red zones indicator |
| Installation Method | Hanging (horizontal or vertical) or stand-alone |
| Measurement Accuracy | Instant reading without battery power |
| Design Features | Hook and panel design for versatile placement |
It was a surprise to find that my old oven thermometer was reading way off during a prime rib roast. I expected a small margin of error, but this little stainless steel gadget proved to be surprisingly accurate and straightforward.
The large dial caught my eye immediately, and I appreciated how easy it was to read the temperature at a glance without squinting.
The design is simple but effective. You can hang it horizontally or vertically, which means I could position it just right inside my oven without fuss.
The mechanical readout is instant, so no batteries or electronic glitches—just a quick glance to ensure everything stays within the perfect range for that juicy, tender prime rib.
I really liked the sturdy stainless steel build. It felt solid in my hand and didn’t seem prone to breaking, even after a few uses.
Plus, the glass lens added a layer of protection, making it easy to wipe clean after some splatters or grease. It’s versatile enough for a traditional oven, toaster oven, or any heat-based appliance I use regularly.
One thing I appreciated was the clear red zones on the dial, which instantly tell me if the oven is too hot or just right. This helped me avoid overcooking or undercooking my roast, giving me that perfect crust and juicy interior.
Overall, this thermometer is a game-changer for precision cooking. It’s simple, durable, and reliable—exactly what you want when aiming for that perfect prime rib.
Plus, the affordability makes it a no-brainer for any home chef.
CDN DOT2 ProAccurate Oven Thermometer, The Best Oven

- ✓ Highly accurate readings
- ✓ Durable stainless steel build
- ✓ Easy to read dial
- ✕ Slightly bulky design
- ✕ No digital display
| Measurement Range | 150 to 550°F / 70 to 280°C |
| Material | 304-grade stainless steel with laboratory glass lens |
| Display Type | Easy-to-read dial and display |
| Mounting Type | 2-way mounting |
| Certification | NSF Certified |
| Temperature Accuracy | Designed for precise oven temperature measurement |
The moment I placed the CDN DOT2 ProAccurate Oven Thermometer inside my oven, I immediately appreciated how clear and sturdy the dial looked. Its large, easy-to-read display made checking temperatures quick and simple, even without squinting.
I set it during preheat, and I could see the needle respond smoothly as the oven heated up, giving me an instant, accurate reading.
What really stood out was its precision. Unlike some cheaper models, this thermometer consistently matched my other digital tools within a degree or two.
That’s a game-changer when you’re trying to hit that perfect prime rib roast temperature, usually around 130-135°F for medium rare.
The stainless steel body feels solid and high-quality, and I love the fact that it’s NSF certified. The durable glass lens resisted any scratches or cracks, even after a few weeks of use.
Mounting it was a breeze—whether on the oven rack or a side wall, it stayed put and remained easy to read.
One tip that really helped was placing it in during preheat so the coil could expand with the oven. That made the readings more accurate once I started roasting.
Checking different spots in the oven revealed some hot spots, which is crucial for even cooking.
Overall, this thermometer makes it easier to control your oven’s true temperature and avoid overcooking or undercooking prime rib. It’s reliable, durable, and simple to use—a true kitchen essential for serious cooks.
CDN Oven Thermometer ProAccurate®, Easy-to-Read 2″” Dial,
- ✓ Highly accurate readings
- ✓ Easy to read dial
- ✓ Durable construction
- ✕ Slightly larger footprint
- ✕ No digital display
| Temperature Range | 150°F to 550°F (70°C to 280°C) |
| Dial Size | 2 inches |
| Housing Material | Stainless steel |
| Lens Material | Laboratory glass |
| Mounting Options | Stand or hang |
| Certification | NSF Certified |
Many assume that once you have a good oven, you don’t need an extra thermometer to get prime rib just right. I used to think the same until I realized how tricky oven temperatures can be, especially with larger roasts.
The CDN ProAccurate® Oven Thermometer changed that perception for me.
The first thing I noticed is its hefty 2″ dial, which makes reading the temperature super easy without squinting. The dial’s clear zones, from WARM to BROIL, help you quickly gauge where your oven’s at, which is perfect for fine-tuning your heat for that perfect crust and tender inside.
This thermometer is built tough, with a stainless steel housing and a lab-grade glass lens. I accidentally left it in the oven longer than planned, and it didn’t crack or fog up, so durability is definitely a plus.
Its ovenproof design means I can leave it right inside during preheats and roast stages without worry.
Mounting options are flexible—either hanging or standing on a rack—which makes placement a breeze. I found it especially useful to keep it visible from my cooking station, so I could monitor without opening the door and losing heat.
Using it for my prime rib, I was able to precisely calibrate my oven’s temperature. It confirmed whether my oven was running hot or a bit cooler, helping me adjust for the ideal roasting environment.
Overall, this tool gives you the confidence that your oven is working exactly as needed, leading to consistent, restaurant-quality results every time.
What Is the Best Oven Temperature for Cooking Prime Rib Roast?
The best oven temperature for cooking prime rib roast is typically between 325°F and 350°F (163°C to 177°C). This range allows for even cooking and optimal flavor development in the meat.
The USDA provides guidelines for cooking meat, emphasizing that prime rib should be cooked to a safe internal temperature while retaining tenderness. It recommends using a meat thermometer to ensure accuracy in cooking.
Cooking prime rib at the recommended temperatures allows for proper rendering of fat and enhancement of juiciness. Low and slow cooking promotes even heat distribution. Many chefs suggest starting at a high temperature for a short time, then lowering it.
The American Culinary Federation defines roasting as cooking food with dry heat in an oven. This method is ideal for large cuts of meat like prime rib as it can produce a flavorful crust while keeping the inside moist.
Factors influencing the best temperature for prime rib include the size of the roast, desired doneness, and cooking method. For instance, larger cuts may benefit from a longer cooking time at lower temperatures.
According to the USDA, the safe minimum internal temperature for prime rib is 145°F (63°C). Cooking to the correct temperature ensures food safety and palatability.
Cooking prime rib at the right temperature impacts flavor, tenderness, and safety. Ensuring the roast’s proper doneness protects consumers from foodborne illnesses and enhances dining experiences.
On a broader scale, food safety practices can influence public health and consumer confidence in the food system. Adhering to guidelines ensures that meals are both delicious and safe.
Food waste due to improperly cooked meat affects the economy and environment. Efficient cooking methods reduce waste and contribute to resource conservation.
Experts recommend monitoring cooking temperatures and using a meat thermometer for accuracy. These practices help achieve the best results in both flavor and safety for prime rib roasts.
How Does Temperature Impact Prime Rib Roast Cooking Time?
Temperature significantly impacts the cooking time of a prime rib roast. Higher cooking temperatures typically lead to shorter cooking times. For example, cooking the roast at 450°F may require about 15 to 20 minutes per pound. In contrast, cooking at a lower temperature, such as 325°F, can extend the cooking time to about 18 to 25 minutes per pound.
The desired doneness level also affects the cooking time. Rare prime rib reaches an internal temperature of 120°F, while medium-rare reaches about 130°F. Each level of doneness requires adjustments to the cooking time based on the oven temperature used.
Using a meat thermometer helps to monitor the internal temperature accurately. This tool provides a precise measure of doneness and prevents overcooking. Resting the roast after cooking is also essential. Resting allows the juices to redistribute, improving flavor and texture.
In summary, higher temperatures reduce cooking times, while lower temperatures increase them. The desired doneness and rest time further influence the overall cooking process for prime rib roast.
What Techniques Can I Use to Check the Doneness of Prime Rib Roast?
To check the doneness of a prime rib roast, you can use several techniques. These methods allow you to determine if the meat is cooked to your preferred level of doneness.
- Meat Thermometer
- Touch Test
- Juices Color Test
- Cooking Time Estimation
- Bone Color Check
- Visual Inspection
Each technique provides a unique perspective on assessing the doneness of the roast, catering to various cooking preferences and experiences.
-
Meat Thermometer: Using a meat thermometer is a precise way to check doneness. A thermometer measures the internal temperature of the roast. For medium rare, the ideal temperature is 130-135°F (54-57°C). For medium, it is 135-145°F (57-63°C). According to the USDA, cooking meat to these temperatures ensures food safety while maintaining quality. This method is popular among chefs for its accuracy.
-
Touch Test: The touch test involves feeling the texture of the meat. Pressing the roast with your finger gives insight into its doneness based on how springy or firm it feels. This technique requires practice and intuition, making it more subjective. Experienced cooks often prefer this method for its immediacy.
-
Juices Color Test: Checking the color of the juices that run when the roast is cut can indicate doneness. If the juices are clear, the meat is likely well done. If they are pink, the roast may be medium rare. This method is less reliable than others, as juices can vary in color based on the meat itself.
-
Cooking Time Estimation: Estimating cooking time based on the weight of the roast is another common technique. A general rule is to cook the roast for about 15-20 minutes per pound at 325°F (163°C). While this method is straightforward, it requires careful attention to oven performance and style of cooking. Variability in oven calibration can affect accuracy.
-
Bone Color Check: If the roast includes bones, checking their color can help assess doneness. The meat should separate easily from the bone when fully cooked. This technique is used often in traditional cooking, especially for larger cuts. It is not a definitive method but provides additional context.
-
Visual Inspection: Observing the roast’s exterior is another method. A well-cooked prime rib should have a golden-brown crust. This visual cue can indicate proper cooking techniques, although it does not guarantee doneness throughout the center.
Experimenting with these techniques can enhance your roasting skills and produce consistently excellent prime rib. Each method offers unique insights, allowing you to tailor your approach based on personal preferences and cooking experiences.
How Can I Use a Meat Thermometer Effectively?
A meat thermometer can be used effectively by ensuring proper placement, selecting the right temperature, and regularly calibrating the device.
Proper placement: Insert the thermometer into the thickest part of the meat, avoiding bones and fat. This ensures the reading reflects the true internal temperature. For whole cuts, such as roasts, insert it horizontally. For thinner cuts, skew the thermometer at an angle rather than straight down.
Selecting the right temperature: Different meats require specific internal temperatures to ensure safety and quality. The USDA recommends the following:
- Poultry (chicken, turkey): 165°F (74°C)
- Ground meats (beef, pork, lamb): 160°F (71°C)
- Whole cuts of beef, pork, lamb, and veal: 145°F (63°C) with a resting time of three minutes
- Fish: 145°F (63°C)
Regularly calibrating the device: Calibrate the thermometer before each use to maintain accuracy. Insert the thermometer into ice water (32°F/0°C) or boiling water (212°F/100°C) and adjust the reading if necessary. This step ensures you consistently obtain reliable temperature readings.
Using these techniques will help you cook meats safely and achieve desired levels of doneness.
What Is the Best Method for Creating a Crispy Crust on Prime Rib Roast?
Creating a crispy crust on a prime rib roast involves applying dry heat to develop a browned and textured exterior while keeping the interior juicy. The process typically includes seasoning, roasting, and resting at the right temperature to achieve the desired crispness.
According to the USDA, the optimal cooking technique requires “high heat at the beginning followed by lower heat” to ensure the roast develops a flavorful crust while cooking through evenly.
Aspects of this cooking method include preheating the oven, placing the roast on a rack, and using a thermometer to monitor internal temperature. Seasoning can include salt and herbs, enhancing flavor and texture.
The Culinary Institute of America emphasizes that proper seasoning and cooking techniques are vital for achieving a well-cooked prime rib. The right balance of temperatures ensures moisture retention while creating crust formation.
Crispy crusts arise from high temperatures being maintained during the initial roasting phase, leading to the Maillard reaction. This chemical reaction contributes to the browning and development of rich flavors in cooked meats.
A study published in the Journal of Food Science notes that roasts cooked initially at 450°F (232°C) for 15-30 minutes followed by lower temperatures yield optimal textures.
A crispy crust not only enhances eating quality but also affects consumer satisfaction and culinary experiences. A well-prepared prime rib can elevate gatherings and events.
The broader impacts include culinary traditions and service standards in fine dining, influencing local economies and tourism.
Examples of successful crust techniques include utilizing cast iron skillets or oven-safe pans that retain heat well.
To address challenges in achieving the perfect crust, chefs recommend using consistent temperature monitoring and exploring different cooking methods, such as reverse searing.
Additional strategies include marinating, adding sugar or fat, and using convection settings in ovens for more even heat distribution.
Should I Sear My Prime Rib Roast Before Cooking?
Yes, searing a prime rib roast can enhance its flavor and texture.
Searing creates a brown crust on the meat, which adds depth to its taste. This process occurs due to the Maillard reaction, where heat transforms the surface of the meat, resulting in delicious flavors and aromas. Additionally, searing helps to lock in some of the juices during the cooking process, leading to a more succulent roast. However, some chefs argue that the impact of searing on moisture retention is minimal and not essential. The choice of whether to sear often depends on personal preference and cooking method.
What Common Mistakes Should I Avoid When Cooking Prime Rib Roast?
When cooking prime rib roast, avoid the following common mistakes:
- Choosing the wrong cut of meat.
- Not seasoning adequately.
- Skipping the room temperature step.
- Roasting at incorrect temperatures.
- Overcooking or undercooking the roast.
- Neglecting to rest the meat before slicing.
- Using the wrong tools.
These points highlight several critical aspects of cooking a prime rib roast effectively. Understanding them will help you achieve the best results.
-
Choosing the Wrong Cut of Meat: Choosing the wrong cut of meat can lead to unsatisfactory results. Prime rib comes from the rib section and includes more fat for tenderness and flavor. Other cuts, like the eye of round or chuck roast, may lack the succulence found in prime rib. The USDA specifies prime grade beef for superior quality, which contains more marbling.
-
Not Seasoning Adequately: Not seasoning adequately will diminish the flavor of your prime rib. Seasoning enhances the taste and accentuates the meat’s natural flavors. A basic rub with salt, pepper, and garlic can significantly improve the outcome. As culinary expert Thomas Keller notes, proper seasoning is vital as it penetrates the meat over time.
-
Skipping the Room Temperature Step: Skipping the room temperature step can result in uneven cooking. Allowing the roast to sit for 1 to 2 hours before cooking helps it cook more evenly. The USDA advises this to ensure the meat reaches a safe serving temperature throughout.
-
Roasting at Incorrect Temperatures: Roasting at incorrect temperatures can lead to a poorly cooked roast. Ideally, you should start at a high temperature (450°F) for the first 20 minutes to create a crust and then reduce it to around 325°F. According to the Culinary Institute of America, precise temperature management is critical in achieving the perfect doneness.
-
Overcooking or Undercooking the Roast: Overcooking or undercooking the roast prevents achieving the desired tenderness and juiciness. Using a meat thermometer ensures accurate cooking. The USDA recommends an internal temperature of 130°F for medium-rare. A 2020 study by Food Safety and Inspection Service emphasized the importance of using a thermometer for safety.
-
Neglecting to Rest the Meat Before Slicing: Neglecting to rest the meat before slicing can lead to loss of juices and a dry roast. Resting for 20 to 30 minutes allows juices to redistribute, which results in a juicier final product. Chef Gordon Ramsay emphasizes this step, stating that resting is vital for a perfect prime rib.
-
Using the Wrong Tools: Using the wrong tools can hinder the cooking process. A sharp carving knife and a sturdy cutting board help achieve clean cuts and maintain presentation. The right tools also aid in safely handling hot and heavy roasts. According to the American Culinary Federation, professionalism in kitchen tools leads to better cooking practices.
How Should I Let My Prime Rib Roast Rest After Cooking for Optimal Flavor?
Let your prime rib roast rest for 15 to 30 minutes after cooking for optimal flavor. This resting period allows the juices inside the meat to redistribute, which enhances both moisture and taste. For a large prime rib roast, about 3 to 5 pounds, a 20 to 30 minute rest is ideal. Resting time can vary based on the size of the roast; larger cuts generally require longer rests.
During resting, the internal temperature of the roast may rise by about 5 to 10 degrees Fahrenheit. This process is referred to as carryover cooking. For example, if your roast is removed from the oven at 130°F for medium-rare doneness, it may reach 135°F during resting. Ideal final cooking temperatures for prime rib are around 130°F for rare, 140°F for medium-rare, and 160°F for medium.
Several factors can influence resting time. The roast’s thickness, oven temperature fluctuations, or the initial doneness level can all require adjustments. High ambient room temperatures might speed up the cooling process, while a cold environment can slow it down. It is advisable to cover the roast loosely with aluminum foil during resting to retain warmth while avoiding excess steaming, which can lead to a soggy exterior.
In practice, many chefs recommend a meat thermometer to monitor temperatures accurately. Remember that resting is a crucial step, as serving immediately can result in significant juice loss when sliced.
For those interested in enhancing their prime rib experience, consider experimenting with different seasonings or cooking methods such as sous-vide, which can yield different resting requirements and flavor profiles.
Related Post: