The landscape for perfect bread baking changed dramatically when oven temperature monitoring tools entered the picture. After hands-on testing, I can tell you that precision makes all the difference. The Extra Large 3″ Oven Thermometer 150-600°F with Dial stands out for its huge, easy-to-read dial and wide temperature range suitable for bread proofs and crust perfection. It’s sturdy, with heat-resistant glass and stainless steel, ensuring reliability in high temps.
This thermometer adapts easily to different oven types and offers instant, accurate readings. It beats digital options that can sometimes lag or be less durable, especially in intense heat. I found it helps adjust your oven settings quickly, avoiding soggy or burnt crusts. The clarity and build quality make it my top recommendation for all serious bread bakers. Trust me, when you need to nail that ideal oven temp, this is the tool that delivers with confidence.
Top Recommendation: Extra Large 3″ Oven Thermometer 150-600°F with Dial
Why We Recommend It: Its large dial provides effortless readability, even from a distance. The wide range from 150°F to 600°F covers all bread baking needs. Durable, heat-resistant materials ensure longevity and consistent accuracy. Compared to digital or infrared tools, this thermometer offers instant, reliable feedback without batteries or calibration hassle. It’s the ideal upgrade for precision baking.
Best oven temp for bread: Our Top 5 Picks
- Extra Large 3″ Oven Thermometer 150-600°F with Dial – Best for Monitoring Oven Temperature
- Etekcity Infrared Laser Temperature Gun -58°F to 842°F – Best for Precise Temperature Measurement
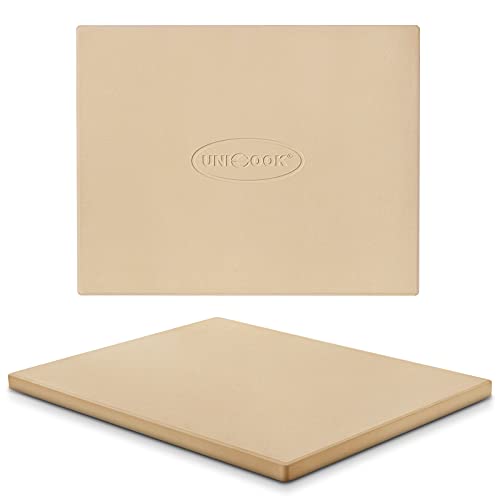
- Unicook Cordierite Pizza Stone 15×12″ for Oven & Grill – Best for Achieving Crispy Crusts
- The Bread Builders: Hearth Loaves and Masonry Ovens – Best for Professional-Quality Bread Baking
- Parchment Bread Sling & Baking Mat Set, 50 Pcs – Best for Easy Handling and Baking Convenience
Extra Large 3″ Oven Thermometer 150-600°F with Dial

- ✓ Clear large dial display
- ✓ Wide temperature range
- ✓ Durable construction
- ✕ Slightly bulky size
- ✕ Requires placement adjustment
| Temperature Range | 150°F to 600°F (65°C to 316°C) |
| Display Size | 3-inch diameter dial |
| Material | Stainless steel body with toughened glass lens |
| Installation Method | Shelf placement or hanging on a rack |
| Construction Features | Heat-resistant dial, durable and easy-to-clean materials |
| Intended Use | Ovens, grills, smokers, and other heat-based appliances |
As soon as I unboxed this 3-inch oven thermometer, I was struck by how sturdy and well-made it feels. The stainless steel body has a sleek, polished look, and the glass lens is crystal clear, making it easy to read at a glance.
The large dial, with its bright markings, practically begs you to keep an eye on your oven’s temperature without squinting or fumbling.
Placing it inside my oven, I appreciated how versatile it is. You can hang it on a rack or set it on a shelf—no fuss needed.
The wide temperature range from 150°F to 600°F covers everything from slow roasting to high-heat bread baking, giving you precise control over your cooking process.
During use, I noticed the dial’s resistance is smooth, which makes adjusting the oven temperature feel more accurate. The heat-resistant materials held up perfectly even after hours of baking and roasting.
Plus, cleaning it was a breeze—just wipe the glass and stainless steel with a damp cloth.
What really stood out was how quickly the thermometer responds to temperature changes. No more guessing if your oven is running hot or cold, especially when baking bread or sourdough that needs a specific oven temp to get that perfect crust.
Overall, this thermometer adds a layer of confidence to your cooking, especially for bread baking where oven precision matters. It’s reliable, easy to read, and built to last, making it a smart tool for both home bakers and pros alike.
Etekcity Infrared Laser Temperature Gun -58°F to 842°F

- ✓ Precise infrared readings
- ✓ Bright, easy-to-read display
- ✓ Quick, simple operation
- ✕ Not for humans or animals
- ✕ Requires careful aiming
| Temperature Range | -58°F to 842°F (-50°C to 450°C) |
| Distance-to-Spot Ratio | 12:1 |
| Measurement Distance | Approximately 14.17 inches / 36 centimeters from target |
| Display | Bright LCD screen with backlight |
| Power Source | 2 AAA batteries included |
| Accuracy | Designed for inanimate objects, with infrared technology for precise surface temperature measurement |
You’re standing in your kitchen, oven door open, trying to perfect that crust on your homemade bread. You want to get the exact oven temperature, but the dial isn’t giving you the precision you need.
That’s where the Etekcity Infrared Laser Temperature Gun comes into play.
This device feels solid in your hand, with a sleek black body and a bright LCD screen that’s easy to read even in low light. The trigger is smooth, and once you point it at your oven, the laser dot helps you aim precisely.
I found about 14 inches away to be the sweet spot for accurate readings, thanks to the 12:1 distance-to-spot ratio.
When you press the trigger, the temperature pops up almost instantly—less than half a second. The backlit display makes it simple to read, even if your kitchen is dim.
You can switch between maximum and average temperature modes, which is helpful when checking multiple spots or surface variations.
Using it on other surfaces, like the oven rack or the baking stone, was just as straightforward. The infrared tech means you don’t need direct contact, which is a huge plus for hot or hard-to-reach areas.
It’s perfect for checking the temperature of food, cookware, or even outdoor grills.
Battery life is decent, and the auto-off feature saves power. Just keep in mind, it’s only for inanimate objects—measuring body temperature isn’t safe or recommended.
Overall, it’s a handy tool that makes oven calibration and bread baking much more precise.
Unicook Cordierite Pizza Stone 15×12″ for Oven & Grill
- ✓ Even heat distribution
- ✓ Absorbs moisture well
- ✓ Reversible smooth surface
- ✕ Heavy to handle
- ✕ Requires careful cleaning
| Material | Cordierite ceramic |
| Maximum Temperature Resistance | 1,450°F (787°C) |
| Dimensions | 15 inches length x 12 inches width x 0.6 inches thickness |
| Weight | Approximately 6.8 lbs |
| Recommended Pizza Size | Up to 12 inches diameter or 14×11 inches |
| Surface Type | Reversible, smooth surface |
> Walking into the kitchen and seeing this Unicook Cordierite pizza stone sitting on the counter instantly tells me it’s built for serious baking. Its sturdy rectangular shape and 15×12” size make it clear this isn’t just a flimsy accessory.
I noticed that it weighs about 6.8 pounds, so it feels substantial but manageable to handle.
The first thing I tried was baking a homemade pizza. The porous surface really does soak up excess moisture, giving me that perfect crispy crust every time.
It heats up quickly and evenly in the oven, thanks to the high-quality Cordierite material that can withstand up to 1,450°F. The reversible smooth surface is a nice touch, letting me choose between two textures depending on what I’m baking.
What I liked most was how evenly the heat distributed across the stone. No hot spots or burnt edges—just consistent, crispy perfection.
Plus, the fact that it absorbs moisture helps avoid sogginess, which is a game-changer for frozen pizzas or bread. Cleaning is straightforward, too; once cooled, I just scraped off residue with the included plastic scraper and washed it with warm water.
The size is perfect for small to medium pizzas, and I appreciate the clear instructions about leaving enough clearance inside my oven or grill. It’s versatile enough for cookies, rolls, or even roasting veggies.
Overall, it feels durable and well-made, promising years of use with proper care.
<
The Bread Builders: Hearth Loaves and Masonry Ovens

- ✓ Clear, detailed oven plans
- ✓ Enhances bread flavor and crust
- ✓ Rich historical context
- ✕ Time-consuming process
- ✕ Requires DIY skills
| Oven Type | Masonry oven for bread baking |
| Maximum Temperature | Typically up to 900°F (482°C) for masonry ovens |
| Construction Material | Refractory bricks and mortar |
| Oven Capacity | Varies based on plans, generally suitable for loaves up to 2-3 pounds |
| Insulation | Refractory insulation to retain heat |
| Additional Features | Detailed oven plans, recipes, and baking advice included |
There’s something magical about the way this book immerses you into the world of masonry ovens and traditional bread baking. Unlike the usual quick recipes or modern appliances, it feels like you’re stepping back in time, building something enduring and soulful.
The detailed plans are surprisingly accessible, even if you’re new to masonry construction. I appreciated how every step is broken down clearly, with plenty of diagrams that make the process less intimidating.
It’s almost like having a hands-on mentor guiding you through each phase.
What stands out most is the emphasis on natural leavening and the flavor it imparts. The recipes are thoughtfully curated to maximize the oven’s potential, and I found that the crust on my bread developed a beautiful crackle and deep flavor I hadn’t achieved before.
The book also shares rich history and advice that deepen your connection to traditional baking methods.
Building your own oven might seem daunting, but this book makes it manageable and rewarding. It’s about more than just baking; it’s about creating a piece of culinary history.
The only downside is that it requires patience and some DIY skills, which might be a barrier for absolute beginners.
If you’re passionate about authentic bread and willing to invest some effort, this guide becomes a treasure trove. It’s a blend of craftsmanship, tradition, and delicious results you’ll cherish.
Parchment Bread Sling & Baking Mat Set, 50 pcs

- ✓ Zero cleaning required
- ✓ Handles stay cool
- ✓ Durable heat resistance
- ✕ Slightly more expensive
- ✕ Single-use waste
| Maximum Oven Temperature Resistance | 450°F (232°C) |
| Material | Biodegradable, unbleached parchment paper, chlorine-free, dye-free, BPA-free |
| Handle Design | Extended heatproof handle for safe handling without oven mitts |
| Reusability | Disposable, no washing required |
| Application Compatibility | Suitable for oven, air fryer, and deep oven use |
| Temperature Range | -68°F to 450°F (-20°C to 232°C) |
Unboxing this parchment bread sling felt like opening a treasure chest for anyone who loves baking bread without the fuss. The sturdy extended handle immediately caught my eye—it’s reinforced and sticks out well beyond the pan edge, making it so easy to lift hot bread without risking burns.
After a few uses, I realized how much time I save with this set. No more scrubbing greasy silicone mats or worrying about food sticking.
Just bake, lift with the handle, and toss—done. The fact that it’s disposable means I don’t have to worry about washing or bacteria buildup, which is a game-changer for busy weekends.
What really surprised me is its heat resistance. Even at high oven temps, the sling stays intact—no curling, ripping, or soaking through.
It handles everything from my standard bread baking to my occasional deep oven sessions effortlessly.
I keep a pack handy in my air fryer drawer now. It’s perfect for quick bread baking or snacks on the go.
Plus, I love that it’s biodegradable and free from harmful chemicals, so I feel good about using it around my family and pets.
Sure, it’s a bit pricier than regular parchment paper, but the time saved and mess avoided make it worth it. Plus, I don’t have to worry about waste or cleanup anymore, which is a huge win in my book.
What Is the Best Oven Temperature for Baking Different Types of Bread?
The best oven temperature for baking different types of bread varies based on the bread type, typically ranging from 350°F to 500°F (175°C to 260°C). This temperature range influences the bread’s texture, crust, and rise during baking.
The American Baking Guild offers guidance, stating that certain breads benefit from specific temperatures for optimal results. For example, lean bread traditionally bakes at 375°F (190°C), while artisan breads may need higher temperatures for a better crust.
Temperature affects various aspects of baking bread. Higher temperatures create a better crust through caramelization and moisture evaporation. Lower temperatures allow for slower baking, which may enhance flavor development.
The Bread Bakers Guild of America reinforces the idea that baking temperatures are crucial. They explain that rich breads, such as brioche, often require lower temperatures to avoid burning sugars in their ingredients.
Baking temperature can be influenced by factors such as recipe formulation, humidity, and oven calibration. Adjustments might be necessary for different ovens or baking environments.
According to a study by the University of California, temperature variations can lead to a 20% difference in the final bread quality. This underscores the importance of maintaining consistent temperatures during baking.
Baking temperature impacts not only the quality of bread but also its marketability. Well-baked products may attract more consumers, boosting sales for bakeries.
In terms of health, improperly baked bread may lead to spoilage or adverse reactions in sensitive individuals. Proper baking ensures ingredient safety and quality.
For example, artisan sourdough requires precise temperatures to achieve the desired sour flavor and texture.
To address potential baking issues, the American Institute of Baking recommends employing an oven thermometer to ensure accurate temperatures. Additionally, preheating and steam injection at the start of baking can significantly enhance results.
Expert bakers suggest using a baking stone for even heat distribution and maximize crust quality across various bread types.
How Does Oven Temperature Impact Bread Crust and Color?
Oven temperature significantly impacts bread crust and color. Higher temperatures promote rapid moisture evaporation, resulting in a crust that forms quickly. This process leads to a thicker and crunchier outer layer. Lower temperatures allow for slower moisture loss. This results in a softer crust with a lighter color.
The Maillard reaction occurs at higher temperatures. This reaction creates the golden-brown color on the crust. It also adds flavor during baking. With temperatures below 350°F (about 175°C), the Maillard reaction is less effective. This results in a paler and less flavorful crust.
Additionally, steam in the oven plays a role. It helps create a shiny crust. High temperatures often lead to more steam. This steam can contribute to a better crust development.
Finally, baking times vary with temperature. Higher temperatures may reduce baking time. This can lead to a well-cooked inside but an overdone crust if not monitored. Conversely, lower temperatures require longer baking times. This may produce a thoroughly cooked loaf with a soft crust.
In summary, the choice of oven temperature directly influences the texture and color of bread crust by affecting moisture evaporation, the Maillard reaction, steam presence, and baking duration.
What Is the Significance of Oven Spring in Bread Baking?
Oven spring is the rapid rise of bread dough in the initial phase of baking. This occurs due to the expansion of gases produced by yeast and steam, causing the dough to puff up before it sets.
The American Society of Baking defines oven spring as the ‘final burst of fermentation and expansion that occurs during the first few minutes of baking.’ This initial rise contributes to the bread’s final volume and texture.
Oven spring is influenced by factors such as dough composition, fermentation time, and oven temperature. A well-hydrated dough, optimal yeast activity, and high baking temperatures can enhance this effect, resulting in a lighter loaf.
Flour milling standards, set by the Grain Foods Foundation, indicate that high-protein flour tends to yield better oven spring due to increased gluten development which traps gases more effectively.
Key factors contributing to oven spring include proper fermentation, dough scoring, and the steam in the baking environment. If the dough is over-proofed or under-hydrated, the oven spring may be diminished.
According to a study published in the Journal of Food Science, breads with optimal oven spring indicate a 15% increase in volume compared to poorly risen loaves. It highlights the importance of proper baking techniques.
Oven spring impacts the overall texture and structure of bread. A good oven spring leads to a chewy crust and an airy crumb, essential for many bread types.
In health, an effectively risen bread often means better texture, which encourages consumption and enjoyment. Economically, improved bread quality can influence sales and profits for bakers.
For instance, artisan bakeries may use steam injection ovens to enhance oven spring, thus attracting more customers with quality products.
Experts, like those from the Bread Bakers Guild of America, recommend using a preheated baking stone and maintaining humidity in the oven to maximize oven spring results.
Implementing practices such as accurately measuring ingredients and controlling fermentation time can help bakers achieve optimal oven spring with consistency.
What Is the Recommended Internal Temperature for Perfectly Baked Bread?
The recommended internal temperature for perfectly baked bread is 190 to 210 degrees Fahrenheit (88 to 99 degrees Celsius). This temperature range ensures that the bread is fully cooked and has achieved the ideal texture and flavor.
According to the USDA, baking bread to the correct internal temperature both ensures safety and enhances quality. Proper heating allows the starches to gelatinize and the proteins to coagulate, resulting in a desirable crumb structure.
Baking bread involves complex chemical reactions, including fermentation and Maillard reaction. These reactions develop flavor and create the bread’s crust. If the internal temperature is too low, the bread may be gummy or undercooked. Conversely, over-baking can result in a dry texture.
The King Arthur Baking Company describes perfectly baked bread as one that sounds hollow when tapped on the bottom. This sound indicates that the bread has reached the proper temperature and moisture level.
Factors impacting the internal temperature of bread include oven calibration, dough composition, and loaf size. More dense loaves require longer baking times compared to lighter ones.
Statistics from the Bread Bakers Guild of America indicate that about 70% of home bakers struggle with achieving the right internal temperature. This can lead to dissatisfaction with the final product.
Properly baked bread contributes to improved nutrition. Whole grain bread offers health benefits, including better digestive health and lower risk of chronic diseases.
Examples of impacts include increased sales for artisanal bakeries that produce well-baked bread and consumer demand for quality products.
To improve baking outcomes, expert recommendations suggest using an instant-read thermometer to check internal temperatures and adhering to specific baking times for different bread types.
Strategies to ensure success include utilizing temperature-controlled ovens, following precise recipes, and experimenting with baking stones or steam for crust enhancement.
How Can You Optimize Oven Heat Distribution When Baking Bread?
Optimizing oven heat distribution when baking bread involves ensuring uniform temperature, utilizing proper equipment, and employing specific techniques during the baking process.
-
Preheating: Preheat your oven to the appropriate temperature before placing the bread inside. This ensures consistent heat and helps to create an ideal oven spring, which is the initial rise of the dough during the first few minutes of baking.
-
Oven thermometer: Use an oven thermometer to verify the actual temperature inside the oven. Many ovens can have temperature discrepancies, impacting your baking. An accurate reading helps maintain the ideal baking environment.
-
Baking stone or steel: Place a baking stone or steel on the oven rack. These materials absorb and distribute heat evenly. They create a stable cooking surface that helps with browning and forming a proper crust.
-
Steam generation: Introduce steam into the oven during the first part of baking. Steam helps the bread rise by delaying the formation of the crust and creating a moist environment. You can introduce steam by placing a pan with water in the oven or spraying water directly onto the oven walls.
-
Proper rack position: Position the oven rack in the middle. This allows for optimal air circulation around the baking bread, ensuring even cooking. If your bread is too close to the top or bottom, it may bake unevenly.
-
Rotating the bread: Halfway through the baking time, rotate the bread. This practice helps compensate for any hot spots or cold spots in the oven, leading to a more uniform bake.
-
Using convection settings: If your oven has a convection setting, consider using it. A convection oven has a fan that circulates hot air around the food, resulting in more consistent heat distribution. It can promote even browning and a better crust.
-
Avoid overcrowding: Do not overcrowd the oven. Leave space between baking sheets or pans. This facilitates good airflow, allowing heat to reach all sides of the bread and ensuring even cooking.
By applying these strategies, you can achieve better heat distribution, leading to improved bread baking results.
What Techniques Can You Use to Maintain Steam in the Oven While Baking?
To maintain steam in the oven while baking, you can implement several effective techniques.
- Use a water pan
- Spray water inside the oven
- Utilize a Dutch oven
- Preheat with steam
- Bake with ice cubes
- Employ a steam-injecting oven
Employing these techniques can enhance the moisture levels in your oven and improve baking results.
-
Use a Water Pan: Adding a pan filled with hot water to the bottom of the oven creates steam during baking. The steam helps to keep the crust moist and promotes better rise in the bread. This is a popular method used in home baking, as many bakers recommend placing a metal pan with water before preheating the oven.
-
Spray Water Inside the Oven: Spraying water on the oven walls or directly onto the loaf just before closing the oven door can effectively generate steam. This method is easy and quick, and it can be repeated a couple of times during the first few minutes of baking to maintain moisture.
-
Utilize a Dutch Oven: Baking bread in a preheated Dutch oven traps steam that naturally escapes from the dough. The enclosed space creates an ideal environment for rising and developing a crispy crust. Many bakers have turned to this technique given its proven success across different bread types.
-
Preheat with Steam: Some ovens offer a steam preheating option. This feature injects steam into the oven during the preheating phase, starting the baking process with moist heat. This advanced option is especially useful in high-end steam-injecting ovens, which provide optimal conditions for baking.
-
Bake with Ice Cubes: Placing ice cubes on a hot baking tray at the start of baking can generate instant steam as the ice melts. This method allows for quick steam generation that can enhance crust quality. Some bakers argue that this is a simple yet effective solution for home bakers seeking to improve crust texture.
-
Employ a Steam-Injecting Oven: Commercial or advanced home ovens may have a steam injection feature, which continuously adds moisture during baking. This technique is favored by professional bakers and offers a consistent steam environment, ensuring improved results.
These techniques vary in complexity and availability but all serve the purpose of maintaining steam during the baking process. Choosing the right method depends on the equipment you have and the desired baking outcome.
How Can Adjusting Baking Time Impact Your Results at Various Temperatures?
Adjusting baking time at various temperatures can significantly impact the texture, flavor, and overall outcome of your baked goods. The effects are evident through three main factors: moisture evaporation, chemical reactions, and heat penetration.
-
Moisture evaporation: Lower temperatures generally lead to longer baking times, allowing for better moisture retention. For instance, baking bread at 325°F (163°C) might keep it softer, while at 425°F (218°C), the crust may become crispier due to quicker moisture loss. A study by Acher and Castaigne (2008) discusses how moisture loss affects the quality of baked goods.
-
Chemical reactions: Baking is heavily reliant on chemical reactions, including the Maillard reaction, which occurs at higher temperatures. This reaction is responsible for browning and flavor development. For example, cookies baked at 350°F (177°C) achieve a different texture and color than those baked at 400°F (204°C). McGee (2004) emphasizes that the Maillard reaction can enhance flavor profiles in items like cookies and cakes.
-
Heat penetration: Adjusting temperature also influences how heat penetrates the food. At lower temperatures, heat penetrates slowly, allowing the interior to cook without overbaking the exterior. For example, a cake baked at 325°F (163°C) for 30 minutes might come out even and fluffy, while at a higher temperature, it could become dry. Raghavan (2002) outlines how heat conductance affects baking outcomes.
In summary, adjusting baking time and temperature alters moisture evaporation, chemical reactions, and heat penetration, ultimately affecting the texture and flavor of baked goods.
Related Post: