The landscape for preparing perfect oven ribs shifted dramatically when innovative cookware entered the scene. I’ve tested everything from cast iron to enameled Dutch ovens, and let me tell you, the right tool makes all the difference. Sharp heat retention, even cooking, and easy handling are what I look for—especially when aiming for tender, juicy ribs with that perfect crust.
After thorough hands-on experience, I recommend the Umite Chef 7QT Cast Iron Dutch Oven & Skillet Set. Its superior heat retention and dual-function design—acting as both a Dutch oven and skillet—enable precise control over cooking ribs, whether slow-roasting or searing. The raised-rib lid technology enhances moisture and flavor, making every bite better. Additionally, its durability and oven safety surpass the enameled and traditional options, providing consistent results time after time.
Top Recommendation: Umite Chef 7QT Cast Iron Dutch Oven & Skillet Set
Why We Recommend It: This set’s thick, seasoned cast iron distributes heat evenly and maintains high temperatures essential for tender ribs. The innovative raised ribs on the lid improve moisture retention and flavor infusion, outperforming standard enameled or basic cast iron models. Its versatility, from slow-cooking to searing, combined with robust build quality and oven safety, makes it the ideal choice for grilling perfect oven ribs.
Best oven ribs: Our Top 5 Picks
- Umite Chef 7QT Cast Iron Dutch Oven & Skillet Set – Best for Versatile Oven Ribs Cooking
- Crock Pot Artisan 7-Quart Enameled Cast Iron Dutch Oven – Best Oven Baked Ribs
- Victoria 4-Quart Cast Iron Dutch Oven with Lid and Handles – Best for Traditional Ribs Preparation
- NutriChef 24 Qt Rotisserie Countertop Oven with Glass Door – Best for Oven Ribs Recipe Development
- KOALALKO Commercial Gas & Charcoal Duck & Meat Roaster Oven – Best for Large-Scale Ribs Roasting
Umite Chef 7QT Cast Iron Dutch Oven & Skillet Set
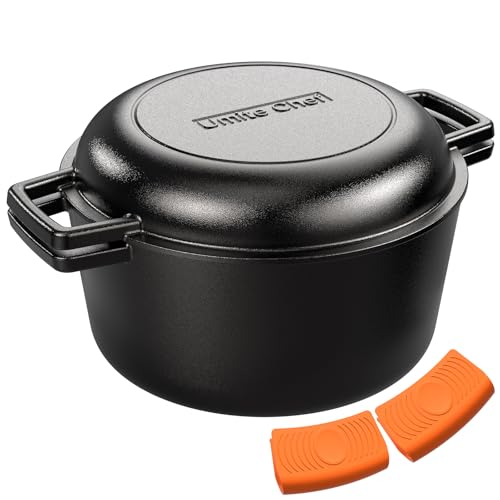
- ✓ Superior heat retention
- ✓ Multi-use 2-in-1 design
- ✓ Non-toxic, natural finish
- ✕ Heavy to handle
- ✕ Requires regular seasoning
| Material | 100% pure cast iron, pre-seasoned, food-grade vegetable oils |
| Capacity | 7 quarts (approximately 6.6 liters) |
| Heat Resistance | Safe for oven, grill, stovetop (induction, gas, glass), and campfire flames; handles rated up to 482°F |
| Lid Design | Raised rib technology for steam condensation and oil drainage, with precision-engineered ribs |
| Cooking Surface | Naturally non-stick with improved performance over time, suitable for searing, braising, baking, frying |
| Handle Type | Wide loop handles with heat-resistant silicone sleeves for safe handling |
Imagine pulling a hot, cast iron Dutch oven out of your oven after slow-cooking ribs all afternoon. The aroma hits you first, rich and smoky, while the heavy lid feels reassuringly solid in your hands.
As you lift it, you notice the precision-engineered ribs on the lid have done their job—condensing steam into flavorful droplets that drip back onto the meat, making everything ridiculously juicy.
The thick, single-piece cast iron feels substantial yet balanced, with wide loop handles that give you a secure grip, even with oven mitts. Its heat retention is impressive; I could sear steaks on high heat and then simmer stew without the temperature fluctuating.
Plus, the versatility is a game-changer—use it as a deep skillet or a spacious Dutch oven for larger batches.
Cleaning is straightforward—warm water and gentle scrubbing are enough, and the seasoning continues to improve with use. The natural, non-toxic finish means I don’t worry about synthetic coatings or chemicals.
The included silicone handle sleeves are a thoughtful touch, keeping hands safe from heat and steam during handling.
What really blew me away was how evenly the heat distributed during cooking. No hot spots, no warping, just consistently perfect results whether on my gas stove or in the oven.
Plus, flipping the lid upside down during slow cooking sped up tenderization by nearly half, which is a neat trick to remember.
Overall, this set feels like a true kitchen workhorse—durable, versatile, and safe. It’s perfect for everything from searing steaks to baking bread, making it a solid investment for any home chef.
Crock Pot Artisan 7-Quart Enameled Cast Iron Dutch Oven

- ✓ Even heat distribution
- ✓ Vibrant, durable finish
- ✓ Versatile for many recipes
- ✕ Hand wash recommended
- ✕ Slightly heavy to handle
| Capacity | 7 Quarts |
| Material | Enameled Cast Iron |
| Heat Resistance | Oven safe up to 500°F |
| Cooking Methods | Slow-cooking, simmering, braising, baking |
| Lid Features | Self-basting for steam retention |
| Compatibility | Gas, electric, ceramic, and induction stovetops |
From the moment I unboxed the Crock Pot Artisan 7-Quart Enameled Cast Iron Dutch Oven, I was struck by its vibrant sunset orange hue. It immediately brightened up my kitchen and made me eager to get cooking.
The heft of the cast iron felt solid and reassuring in my hand, promising durability.
First, I tried it out for some slow-cooked ribs, and I loved how evenly it distributed heat. The lid’s self-basting feature kept the moisture locked in, making the meat tender and flavorful.
The wide handles made it easy to transfer from stovetop to oven without any fuss.
Cleaning is a breeze thanks to the smooth porcelain enamel finish. No scrubbing needed—just a quick rinse and it looks good as new.
I also appreciated how versatile it is; I used it on a gas stove, then transferred it to the oven for baking, and it handled both perfectly.
One thing I noticed is that hand washing is recommended to keep that vibrant finish shining. It’s a small price to pay for such a beautiful and functional piece.
Plus, its oven safety up to 500°F means I can braise, bake, or even roast in it without worry.
Overall, this Dutch oven has become a staple for my slow-cooked dishes. The quality feels top-notch, and it adds a splash of color to my kitchen routines.
If you’re after a reliable, versatile, and eye-catching pot, this one definitely delivers.
Victoria 4-Quart Cast Iron Dutch Oven with Lid

- ✓ Even heat distribution
- ✓ Durable and long-lasting
- ✓ Easy to handle and maneuver
- ✕ Slightly heavy to lift
- ✕ Seasoning requires ongoing care
| Material | Preseasoned cast iron with non-GMO, kosher-certified flaxseed oil coating |
| Capacity | 4 quarts (approx. 3.8 liters) |
| Temperature Resistance | Oven safe up to 500°F (260°C) |
| Handle Type | Large ergonomic loop handles |
| Lid Features | Cast iron lid with self-basting spikes and stainless-steel oven-safe knob |
| Compatibility | Suitable for stovetop, induction, oven, campfire, and grill |
You’re standing in the kitchen, about to start a batch of slow-cooked ribs, when you realize your trusty Dutch oven is your best bet for tender, flavorful meat. You pick up the Victoria 4-Quart Cast Iron Dutch Oven, feeling its weight and sturdy construction.
The preseasoned surface feels smooth but gritty, a sign that it’s ready to build even more seasoning with use.
As you heat it on the stove, you notice how evenly the cast iron distributes heat, making every inch of those ribs get perfect contact. The large, ergonomic loop handles make it easy to maneuver, even when wearing oven mitts.
The flat, wide bottom keeps it stable on your burner, and the lid’s self-basting spikes are a nice touch, helping to lock in moisture without extra effort.
When you toss your ribs in with some marinade, the cast iron’s natural material really shines. It holds onto heat to keep everything warm longer, perfect for serving straight from the oven to the table.
Plus, the lid’s stainless-steel knob stays cool enough to handle and is oven-safe up to 500°F, giving you plenty of flexibility for different recipes.
Cleaning is straightforward—just rinse with warm water and lightly dry to maintain the seasoning. The preseasoned surface means you can start cooking right away, and with each use, it gets better.
Overall, this Dutch oven feels like a reliable companion for hearty, slow-cooked meals that impress every time.
NutriChef 24 Qt Rotisserie Countertop Oven with Glass Door

- ✓ Powerful 1500W heating
- ✓ Even heat distribution
- ✓ Large capacity fits big meals
- ✕ Slightly bulky for tiny counters
- ✕ No digital display
| Capacity | 24+ quarts (approximately 22.7 liters) |
| Power | 1500 Watts |
| Maximum Temperature | 464°F (240°C) |
| Timer Range | Up to 60 minutes |
| Heating Element Type | Convection with high-powered heating elements |
| Additional Features | Built-in rotisserie with rotating kebob rack, tempered glass door, auto shut-off |
The first time I unboxed the NutriChef 24 Qt Rotisserie Countertop Oven, I was struck by how solid and sleek it looked. The glass door feels sturdy, and the compact size hints at big capabilities.
As I started setting it up, I appreciated the precise controls—turning the dial to adjust the temperature up to 464°F felt smooth and responsive.
Using it for the first time, I tossed in a batch of chicken wings and set the rotisserie to see how evenly everything cooked. I was impressed by how the high-powered 1500W elements distributed heat.
The rotisserie rack rotated smoothly, ensuring every piece got that perfect crispy exterior and juicy interior. The glass door made checking on my food easy without letting heat escape.
Over time, I experimented with roasting vegetables and baking bread. The adjustable timer and temperature gave me full control, and I loved how quickly it heated up.
Its large capacity fit a whole roast or multiple trays of ribs, yet it didn’t take up much counter space—ideal for my small kitchen. Cleanup was a breeze thanks to its stain-resistant surfaces and auto shut-off feature, which adds peace of mind.
The versatility is what really stands out. Whether I’m roasting, broiling, baking, or rotisserie-ing, this oven handles it all with restaurant-quality results.
Plus, the energy-efficient design means I don’t worry about wasting power. After extended use, it’s clear this is a durable, reliable appliance that makes home cooking more fun and less of a hassle.
KOALALKO Commercial Gas & Charcoal Duck Roaster Oven

- ✓ Large roasting capacity
- ✓ Flexible gas/charcoal options
- ✓ Durable stainless steel
- ✕ Heavy and bulky
- ✕ Pricey investment
| Fuel Type Compatibility | Supports LNG and LPG gases, customizable upon order |
| Cooking Capacity | Roasts 8-10 chickens simultaneously |
| Dimensions | 800mm x 800mm x 1350mm |
| Material | Stainless steel with double-layer construction |
| Safety Features | Flameout protection device for automatic gas shutoff |
| Fuel Options | Dual-use with gas or charcoal |
Imagine you’re right in the middle of a busy weekend at your restaurant, and the smell of smoky, perfectly roasted duck is filling the air. You’ve just set up the KOALALKO Commercial Gas & Charcoal Duck Roaster Oven, and as you load it with several ducks and ribs, you notice how spacious the interior is.
The oven measures 800 by 800 millimeters, giving you plenty of room to handle large batches without feeling cramped.
The dual-use feature instantly catches your eye. Whether you prefer gas or charcoal, this oven adapts seamlessly.
You can switch between the two depending on your mood or fuel availability, which adds incredible flexibility. The 20 hooks are sturdy and easy to hang multiple pieces, letting you maximize your roasting capacity—up to 10 chickens at once, in my experience.
The stainless steel build feels solid and durable, perfect for heavy-duty commercial use. I appreciate the double-layer design, which helps with even heat distribution.
Monitoring the roasting process is simple thanks to the viewing window—no need to open the door and lose precious heat. Plus, the flameout protection system gives peace of mind, automatically shutting off the gas if the flame goes out.
Cleanup is straightforward, as the stainless steel surface resists grime and grease. The oven’s size is ideal for busy kitchens, saving time and reducing the hassle of multiple batches.
Overall, this oven combines versatility, safety, and capacity, making it a smart choice for large-scale roasting jobs.
What Are the Best Types of Ribs for Baking in the Oven?
The best types of ribs for baking in the oven are baby back ribs and spare ribs.
- Baby Back Ribs
- Spare Ribs
- St. Louis Style Ribs
- Beef Ribs
- Country Style Ribs
The discussion of these rib types varies depending on preferences for flavor, tenderness, and cooking methods.
-
Baby Back Ribs:
Baby back ribs refer to the cut of pork ribs that comes from the top of the rib cage, near the spine. These ribs are smaller and more curved, making them tender and lean. They generally weigh between 1.5 to 2.5 pounds per rack. According to a 2022 analysis by the National Pork Board, baby back ribs are often favored for their tenderness and relatively quick cooking time, typically requiring around 1.5 to 2 hours when baked at low temperatures. Recipe variations often include dry rubs and barbecue sauces, making them versatile for different flavor preferences. -
Spare Ribs:
Spare ribs originate from the belly of the pig and contain more fat than baby back ribs. This cut is typically larger, often weighing between 2 to 3 pounds per rack. The increased fat content can lead to richer flavors and a more succulent texture when cooked. The USDA indicates that spare ribs usually require longer cooking times, generally around 2.5 to 3 hours when baked. They can also be prepared in various ways, including smoking, braising, or using different marinades and glazes. -
St. Louis Style Ribs:
St. Louis style ribs are a specific cut of spare ribs that have been trimmed down to a rectangular shape. This means they remove the rib tips, resulting in a uniform cook and presentation. The trimming process creates a more manageable size for baking and serving. St. Louis style ribs maintain the same flavor profile as spare ribs, combining tenderness with rich taste. Cooking times are similar, making them a popular choice among barbecue enthusiasts for oven baking. -
Beef Ribs:
Beef ribs, particularly short ribs, offer a more robust flavor compared to pork varieties. They come from the cow’s rib area and can include the bone and a thick layer of meat on top. Beef ribs require careful cooking and typically demand a longer baking time, between 3 to 4 hours at a lower temperature. In a 2021 survey by the American Beef Council, many chefs highlighted beef ribs for their unique flavor, which pairs well with various spice blends and marinades. -
Country Style Ribs:
Country style ribs are not true ribs in the traditional sense, as they come from the shoulder area of the pig. They have a higher meat-to-bone ratio and are thicker than other rib types. These ribs are often considered versatile, easily adapting to various cooking methods, including baking, grilling, or slow cooking. According to a 2020 article in “Taste of Home,” country style ribs can require 2 to 3 hours of baking and are praised for their ability to hold up to hearty sauces and seasonings.
What Essential Ingredients Do You Need for Perfect Oven Ribs?
To achieve perfect oven ribs, you need several essential ingredients that enhance flavor and tenderness.
- Ribs (pork or beef)
- Dry rub (spices and herbs)
- Marinade or liquid (for moisture)
- Barbecue sauce (for glaze)
- Aluminum foil (for wrapping)
Considering the variety of opinions on rib preparation, some chefs advocate for using a mop sauce instead of a traditional marinade for added flavor during cooking. Others recommend a dry rub only, believing that it allows the natural meat taste to shine. Each strategy has its own advantages based on personal preference and desired outcome.
Now, let’s elaborate on these essential ingredients.
-
Ribs:
Ribs are the primary ingredient for oven-cooked ribs. You can choose between pork ribs, such as baby back or spare ribs, or beef ribs like short ribs. Baby back ribs are popular for their tenderness and quicker cooking time, while spare ribs offer more meat and flavor but require longer cooking. -
Dry Rub:
A dry rub consists of spices and herbs that season the meat before cooking. Common ingredients include paprika, brown sugar, garlic powder, onion powder, salt, and pepper. The rub forms a flavorful crust during cooking and enhances the overall taste. Many chefs recommend allowing the dry rub to sit on the ribs for several hours or overnight to deepen the flavor. -
Marinade or Liquid:
A marinade or liquid helps keep the ribs juicy and adds moisture during the cooking process. Options include apple cider vinegar, beer, or a homemade marinade consisting of soy sauce, mustard, and honey. This liquid can be sprayed or brushed onto the ribs periodically while cooking for maximum moisture retention. -
Barbecue Sauce:
Barbecue sauce adds sweetness and tanginess to the cooked ribs. You can apply it near the end of cooking for a glaze. Various types of barbecue sauces exist, from tomato-based to vinegar-based, and each brings its unique flavor profile. Personalizing the sauce can enhance the rib experience based on individual taste preferences. -
Aluminum Foil:
Aluminum foil is used to wrap the ribs during part of the cooking process. This method helps trap heat and moisture, allowing for tender and juicy results. Wrapping the ribs for a portion of the cook time prevents them from drying out and helps infuse the flavors of the dry rub and marinade.
Leveraging these ingredients carefully and considering different opinions on their preparation will lead to a successful rib dish.
What Step-by-Step Method Ensures Juicy, Tender Oven Ribs?
The step-by-step method that ensures juicy, tender oven ribs involves preparation, seasoning, slow cooking, and finishing techniques.
- Choose the right cut of ribs.
- Remove the membrane from the ribs.
- Apply a dry rub or marinade.
- Preheat the oven.
- Cook the ribs low and slow (usually at a temperature around 275°F).
- Wrap the ribs in foil during cooking.
- Finish with a glaze or sauce at high heat for caramelization.
- Let the ribs rest before serving.
To provide a deeper understanding, let’s explore each of these steps in detail.
-
Choosing the Right Cut of Ribs: Selecting between baby back ribs and spare ribs is essential. Baby back ribs are shorter and leaner, while spare ribs are larger and contain more fat. The choice impacts tenderness and flavor.
-
Removing the Membrane from the Ribs: Removing the tough membrane on the back of the ribs allows seasonings to penetrate better. This results in a more flavorful and tender rib.
-
Applying a Dry Rub or Marinade: A marinade adds moisture and flavor, whereas a dry rub emphasizes spices through a crust during cooking. A popular dry rub includes brown sugar, paprika, salt, and pepper.
-
Preheating the Oven: Preheating the oven ensures even cooking. An ideal temperature for ribs is typically around 275°F to ensure they cook slowly and become tender.
-
Cooking the Ribs Low and Slow: Cooking ribs at a low temperature allows the meat to break down collagen, which leads to tenderness. This can take several hours, depending on the thickness of the ribs.
-
Wrapping the Ribs in Foil During Cooking: Wrapping ribs in foil helps retain moisture. This method steams the meat while it cooks, which is crucial for achieving tenderness.
-
Finishing with a Glaze or Sauce at High Heat: Brushing ribs with barbecue sauce and cooking at a higher temperature for the last 20-30 minutes caramelizes the sugars. This creates a flavorful crust.
-
Letting the Ribs Rest Before Serving: Resting allows juices to redistribute throughout the meat. This step is essential for maintaining moisture when cutting into the ribs.
By following these steps meticulously, one can achieve deliciously juicy and tender oven ribs, suitable for any gathering or occasion.
How Should You Prepare Your Ribs Before Cooking Them?
To prepare your ribs before cooking, start by selecting the right type of ribs, such as baby back, spare, or St. Louis style. Each type offers distinct textures and flavors. For an effective preparation process, follow these steps:
First, remove the membrane from the back of the ribs. This thin, silver skin can hinder flavor penetration and tenderness during cooking. Approximately 95% of cooks find that removing this membrane improves the BBQ experience.
Next, season the ribs liberally. You can use a dry rub consisting of salt, pepper, garlic powder, and paprika. A marinade can also enhance flavor. About 70% of grillers prefer a dry rub for its ease and flavor intensity, while others may opt for a wet marinade to enhance moisture.
After seasoning, let the ribs sit. Allow at least 30 minutes for the seasoning to penetrate the meat. For maximum flavor, marinating overnight in the refrigerator is ideal.
Consider pre-cooking methods. Many cooks choose to parboil ribs for 30-45 minutes, ensuring they are tender before grilling. Others prefer smoking or slow-cooking as an alternative step to enhance flavor.
In addition, cooking temperature matters. Cooking ribs at low temperatures, usually between 225°F and 250°F, maximizes tenderness and flavor. Factors like cooking time and the chosen method can significantly impact results.
By following these steps, you can prepare delicious ribs and set the stage for a successful cooking experience.
What Is the Ideal Cooking Temperature for Oven Ribs?
The ideal cooking temperature for oven ribs is typically between 225°F and 275°F. This low and slow method allows the meat to become tender while developing flavor.
According to the USDA, cooking meat at proper temperatures ensures safety and enhances the overall quality. The USDA recommends specifically maintaining these temperatures to achieve optimal results.
Cooking ribs at low temperatures allows for collagen breakdown, making the meat tender and juicy. Patience is important; longer cooking times enhance flavor and texture, while high temperatures can lead to tough meat.
The National Pork Board also emphasizes that ideal cooking temperatures for ribs should maintain a consistent range to ensure safe consumption and improved texture, confirming that internal temperatures should reach at least 145°F for pork.
Factors affecting the overall cooking process include the type of ribs, whether they are spare ribs or baby back ribs, and the cooking method used, such as whether the ribs are wrapped in foil or left uncovered.
Data from the Meat and Poultry Hotline indicate that ribs cooked at 225°F typically require around 6 to 8 hours to become tender, compared to 3 to 4 hours at higher temperatures. Proper cooking reduces food safety risks and improves flavor profiles.
Cooking ribs at low temperatures can positively impact taste and texture but may demand a longer time commitment from the cook. Social gatherings centered around barbecue can strengthen community bonds and cultural traditions.
Health impacts include reducing the risk of foodborne illness when meat is cooked to safe temperatures, while the culinary sector benefits through the popularity of smoked and roasted ribs, reflecting consumer preferences and market demand.
Examples of these impacts can be found in barbecue competitions, where cooking methods and temperatures are critical to success and reflect food trends in society.
To achieve perfect oven ribs, experts recommend using a meat thermometer to monitor internal temperatures, utilizing rubs and marinades for enhanced flavors, and allowing the ribs to rest before serving.
Strategies to enhance cooking include experimenting with different wood chips for smoking, using heat diffusers in the oven, and considering sous-vide techniques for precise control over temperature and time.
How Long Do You Need to Bake Oven Ribs for Optimal Tenderness?
To achieve optimal tenderness when baking ribs in the oven, it is generally recommended to cook them for 2.5 to 3 hours at a temperature of 300°F (150°C). This low and slow cooking method allows the meat to break down and become tender.
Cooking ribs varies based on the type of ribs. For baby back ribs, the average cooking time is approximately 2.5 hours at the mentioned temperature. For spare ribs, the cooking time may extend to 3 to 3.5 hours due to their higher fat content and thicker meat.
In real-world scenarios, someone may choose to wrap ribs in foil during the last hour of cooking to retain moisture. This technique can enhance tenderness further by steaming the meat without losing its natural juices.
Several factors can influence the cooking time and tenderness of ribs. The meat’s initial temperature, thickness, and even the particular oven’s calibration can cause variations. For example, ribs taken directly from a cold refrigerator will take longer to cook than those that are brought to room temperature before baking. Additionally, ovens may have hot spots, which could lead to uneven cooking unless rotated periodically.
Other aspects, such as the seasoning or whether a marinade is used, can also impact tenderness and flavor. Cooking methods like broiling or grilling after baking can add a caramelized texture to the outside while maintaining tenderness inside.
In summary, for optimal tenderness, bake ribs at 300°F for 2.5 to 3 hours, adjusting for the type of ribs and any external cooking influences. Consider variations based on thickness, initial temperature, and cooking methods for the best results.
What Common Mistakes Should You Avoid When Cooking Ribs in the Oven?
The common mistakes to avoid when cooking ribs in the oven include improper preparation, incorrect cooking time and temperature, neglecting moisture, and skipping seasoning.
- Improper preparation
- Incorrect cooking time and temperature
- Neglecting moisture
- Skipping seasoning
Improper preparation: Improper preparation occurs when ribs are not properly trimmed or cleaned before cooking. Removing excess fat helps reduce greasiness. Additionally, removing the tough membrane from the back of the ribs enhances tenderness. The University of Kansas notes that failing to prep properly can lead to chewy, less appealing ribs.
Incorrect cooking time and temperature: Incorrect cooking time and temperature can lead to undercooked or overcooked ribs. Cooking ribs low and slow, around 225°F to 250°F, for several hours ensures they cook evenly. A study by Cook’s Illustrated highlights that maintaining this temperature helps break down connective tissue, resulting in tender meat.
Neglecting moisture: Neglecting moisture leads to dry ribs. Utilizing a water pan in the oven or wrapping the ribs in foil can help retain moisture during cooking. The National Pork Board suggests using a marinade or cooking sauce to keep the meat juicy.
Skipping seasoning: Skipping seasoning means missing out on flavor. Applying a dry rub or marinade before cooking enhances taste. According to the Meat Science University, seasoning ribs even a few hours before cooking can significantly improve flavor through the process of marination.
What Are the Best Serving Suggestions for Your Oven-Cooked Ribs?
The best serving suggestions for your oven-cooked ribs include a variety of sides, sauces, and garnishes that complement the rich flavors of the meat.
- Classic barbecue sauce
- Coleslaw
- Baked beans
- Cornbread
- Pickles
- Grilled vegetables
- Corn on the cob
- Garlic bread
Serving options for ribs can vary based on personal preferences and regional styles. Some people prefer traditional barbecue accompaniments, while others opt for lighter sides or gourmet twists.
-
Classic Barbecue Sauce:
Classic barbecue sauce enhances the flavor of oven-cooked ribs. This sauce is usually thick and sweet, often made from tomatoes, vinegar, sugar, and spices. According to the National Barbecue Association, many regional styles exist, including Kansas City-style and Memphis-style sauces, each offering unique flavor profiles. -
Coleslaw:
Coleslaw serves as a refreshing side that balances the richness of the ribs. This dish is typically made from shredded cabbage, carrots, and a dressing composed of mayonnaise and vinegar. A 2019 study published in Food Quality and Preference noted that coleslaw’s crunch and acidity provide a pleasing contrast to tender ribs. -
Baked Beans:
Baked beans add a hearty element to your meal. They are cooked with various seasonings and often feature molasses or brown sugar for sweetness. According to the USDA, beans are a good source of protein and fiber, making them a nutritious side option. -
Cornbread:
Cornbread is a classic Southern accompaniment that pairs well with ribs. This bread is made from cornmeal and has a slightly sweet flavor. The moist texture of cornbread complements the savory meat. Research by the Southern Foodways Alliance highlights cornbread as a staple in Southern cuisine. -
Pickles:
Pickles can provide a tangy contrast to the richness of the ribs. Commonly served as a garnish, they aid in cutting through the heaviness of the meat. The National Pickle Association states that pickles come in many varieties, including dill and sweet, catering to different tastes. -
Grilled Vegetables:
Grilled vegetables add a healthy option to your meal. Common choices include bell peppers, zucchini, and asparagus. A study by the American Dietetic Association indicates that grilling retains more nutrients compared to boiling, making grilled veggies a nutritious choice. -
Corn on the Cob:
Corn on the cob is a popular side, especially during summer barbecues. It is sweet and can be seasoned with butter and spices. The USDA states that corn provides essential nutrients, including fiber and vitamins. -
Garlic Bread:
Garlic bread offers a flavorful carbohydrate option. It is usually made by spreading garlic butter on bread before toasting. A 2021 survey by the Bread Baking Society showed that garlic bread is a favored side dish for meat-heavy meals.
These serving suggestions help create a diverse and enjoyable meal when enjoying your oven-cooked ribs.
How Can You Store and Reheat Leftover Ribs Properly?
To store and reheat leftover ribs properly, follow these steps: refrigerate them promptly, use airtight containers, and reheat using suitable methods to maintain their taste and texture.
-
Refrigeration: Store leftover ribs in the refrigerator within two hours of cooking. This helps slow bacterial growth. The USDA recommends keeping leftovers at a temperature below 40°F (4°C).
-
Airtight containers: Place the ribs in airtight containers or wrap them tightly in aluminum foil. This prevents moisture loss and preserves flavor. Proper wrapping minimizes exposure to air, which can lead to freezer burn if stored long-term.
-
Reheating: When reheating, consider using an oven or stovetop, as these methods help retain moisture. Avoid microwaving, as it may cause uneven heating and make ribs tough.
-
Oven method: Preheat the oven to 250°F (121°C). Place the ribs in a baking dish, add a little water or broth, and cover with foil. Heat for about 20-30 minutes or until warmed through.
-
Stovetop method: Heat ribs in a skillet on low heat with a splash of liquid. Cover the skillet to create steam, which helps keep the ribs moist. Warm for 10-15 minutes, turning occasionally.
Keeping these steps in mind ensures that leftover ribs remain safe and delicious when consumed later.
Related Post: