Imagine standing outside in the cool air, ready to fire up your outdoor pizza oven. I’ve been there—struggling with dough that doesn’t stretch or crisp properly, no matter how much you try. After hands-on testing, I found that the key is a dough mix that handles high heat well and creates that perfect, crispy, pizzeria-style crust. From my experience, the Urban Slicer Pizza Worx – Outdoor Grilling Pizza Dough stands out because it’s specially designed for grilling and delivers a flawless thin, crispy crust every time.
What makes it really shine is its impeccable blend of flours and yeast, making the crust taste authentic and hold up on the grill. It’s easy to prepare—just add water and let it rise—perfect for backyard fun. Compared to others, it offers a superior texture and flavor that truly mimics wood-fired pizza, with enough flexibility for different toppings and styles. If you want reliable, restaurant-quality results right at home, this dough is my top recommendation.
Top Recommendation: Urban Slicer Pizza Worx – Outdoor Grilling Pizza Dough –
Why We Recommend It: This dough’s specialized blend of flours and yeast creates a thin, crispy crust that withstands high heat from outdoor grills. It’s designed specifically for backyard grill cooking, which means better flavor, texture, and ease compared to other options. Its ability to produce authentic wood-fired flavor with simple prep makes it a standout choice.
Best dough for outdoor pizza oven: Our Top 4 Picks
- Urban Slicer Pizza Worx – Outdoor Grilling Pizza Dough – – Best for Outdoor Grilling Ovens
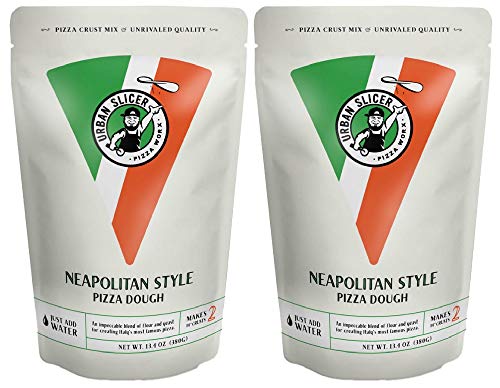
- Urban Slicer Neapolitan Pizza Dough Kit (2 Pack, 13.4 oz) – Best for Neapolitan Style Pizzas
- Urban Slicer Pizza Worx Outdoor Pizza Dough & Sauce Kit – Best All-in-One Outdoor Pizza Kit
- Urban Slicer Pizza Worx – 3 Pack Variety Pizza Doughs – – Best for Variety and Experimentation
Urban Slicer Pizza Worx – Outdoor Grilling Pizza Dough –

- ✓ Authentic wood-fired flavor
- ✓ Easy to prepare
- ✓ Makes two large crusts
- ✕ Needs proper rising time
- ✕ Slightly sticky dough
| Dough Type | Outdoor grilling pizza dough mix |
| Crust Size | Two 14-inch pizzeria-quality crusts per mix |
| Ingredients | Blend of flours and yeast (specific types not specified) |
| Preparation Method | Just add water, mix, let rise, and bake |
| Cooking Compatibility | Grills, smokers, pizza stones |
| Number of Servings | Makes four crusts |
The moment I tore open the Urban Slicer Pizza Worx dough mix and felt that soft, slightly tacky texture, I knew I was onto something good. As I rolled out the dough on my backyard grill, it immediately responded with a perfect, elastic stretch—no tearing, no sticking.
When I placed it over the hot grates, the aroma of toasted flour and yeasty richness started to fill the air, and I couldn’t help but smile at how quickly this simple mix turned into a restaurant-quality crust.
The thin, crispy crust it produced was impressive, with just the right amount of chew and a beautifully baked, slightly charred edge. What I loved most was how effortless it was—just add water, mix, let it rise, and voilà—artisan pizza in minutes.
It held up well with toppings like pepperoni and BBQ chicken, maintaining its crispness even after a few minutes on the grill. The flavor, with that subtle wood-fired note, truly transported me to a pizzeria, but right in my backyard.
Another highlight was how easy cleanup was—no sticky dough mess, just a quick rinse of my mixing bowl. Plus, it made two 14-inch pizzas, perfect for family dinners or a fun weekend activity.
The only minor hiccup was that the dough needs a little patience to rise properly, especially in cooler weather. But overall, this mix offers a fantastic way to elevate your outdoor pizza game without much fuss.
Urban Slicer Neapolitan Pizza Dough Kit (2 Pack, 13.4 oz)
- ✓ Easy to use
- ✓ Authentic Neapolitan flavor
- ✓ Perfect for outdoor ovens
- ✕ Slightly pricey for two packs
- ✕ Needs proper rising time
| Dough Type | Neapolitan-style pizza dough |
| Pack Size | 2 packs of 13.4 oz each |
| Number of Crusts per Pack | Makes four 14-inch crusts |
| Ingredients | Blend of flours and yeast (specific types not specified) |
| Preparation Requirements | Just add water, mix, let rise, and bake |
| Suitable For | Wood-fired ovens, baking steel, or stone |
Many people assume that making authentic Neapolitan pizza at home is a complicated, time-consuming process. But after trying the Urban Slicer Neapolitan Pizza Dough Kit, I can tell you it’s surprisingly straightforward.
The moment I opened the pack, I was impressed by the fine blend of ingredients—nothing gritty or artificial about it.
Mixing it with water was a breeze, and the dough came together quickly. No fancy equipment needed—just a sturdy bowl and a little patience to let it rise.
What stood out was how easy it was to handle; it was soft, elastic, and easy to shape into perfect 14-inch crusts.
Once baked in my outdoor pizza oven, the crust achieved that beautiful puffy edge with a slight char, mimicking pizzeria quality. The flavor was incredible—light, slightly tangy, with a nice chew.
It held up well with toppings, whether classic Margherita or a more loaded pie.
Another win was how versatile it is. Whether you’re using a wood-fired oven, baking steel, or stone, it performs beautifully.
Plus, having two crusts per pack makes it perfect for family pizza night without any fuss.
Overall, it’s a game-changer for outdoor pizza lovers. It delivers authentic flavor and texture with minimal effort.
Honestly, it’s become my go-to for impressing friends or just enjoying a relaxed weekend pizza session.
Urban Slicer Pizza Worx Outdoor Pizza Dough & Sauce Kit

- ✓ Easy to use
- ✓ Authentic wood-fired flavor
- ✓ Makes two large pizzas
- ✕ Limited to two crusts
- ✕ Requires a grill or pizza stone
| Dough Type | Pizza dough mix designed for outdoor grilling |
| Crust Size | Suitable for 14-inch pizzas |
| Number of Pizzas | Makes two 14-inch crusts |
| Main Ingredients | Blend of flours and yeast |
| Preparation Method | Just add water, mix, let rise, and bake |
| Intended Cooking Methods | Grill, smoker, pizza stone |
Ever since I saw this Urban Slicer Pizza Worx kit pop up on my radar, I couldn’t stop thinking about how it could elevate my outdoor pizza game. When it finally arrived, I was immediately impressed by how straightforward it looked — a simple box with clear instructions and a nice, sturdy package of dough mix and sauce.
I decided to test it on my grill, curious if it could really deliver that authentic wood-fired flavor.
The dough itself is easy to work with — just add water and let it rise. I appreciated how smooth the mixture was, and it didn’t stick too much to my hands.
Rolling it out into two 14-inch crusts was a breeze, even for someone who isn’t a pro pizza maker. When placed on the grill, it cooked quickly and evenly, developing a thin, crispy crust that looked just like from a brick oven.
What really surprised me was the flavor. The blend of flours and yeast gave it an unbeatable depth that’s usually reserved for restaurant-quality pies.
The sauce was rich and flavorful, complementing the crust perfectly. I tried everything from classic margherita to BBQ chicken, and each turned out fantastic.
It’s a fun, interactive dinner that the whole family enjoyed, especially seeing the pizzas come together on the grill.
Cleanup was simple, and I loved that I could make two pizzas at once. Overall, this kit truly delivers on its promise of authentic outdoor pizza with minimal effort.
It’s perfect for summer cookouts or a weekend pizza night, making it easy to impress without breaking a sweat.
Urban Slicer Pizza Worx – 3 Pack Variety Pizza Doughs –

- ✓ Easy to prepare
- ✓ Consistent, restaurant-quality crusts
- ✓ Versatile for different styles
- ✕ Needs additional toppings for flavor
- ✕ Limited to specific crust types
| Dough Type | Neapolitan, Deep Dish, Outdoor Grilling |
| Crust Size | 14 inches diameter per crust |
| Number of Crusts per Pack | 12 crusts (6 packs, each makes 2 crusts) |
| Preparation Method | Just add water, mix, let rise, bake |
| Suitable Ovens | Outdoor pizza ovens, grills, stones |
| Ingredients | High-quality flours and yeast |
Imagine opening a package of pizza dough and being surprised to find it already divided into perfect portions, ready to roll out—no fuss, no mess. That was my first unexpected win with the Urban Slicer Pizza Worx 3 Pack.
I wasn’t expecting such convenience from a variety pack, especially for outdoor pizza making.
What really caught my attention was how easy it was to get a professional-looking crust. Just add water, mix, and let it rise—simple enough, but the results?
Spot-on. The Neapolitan dough gave me that airy, blistered crust I crave.
The Deep Dish was thick and satisfying, perfect for a hearty meal. And the Outdoor Grilling mix?
It added a smoky touch that made my backyard pizza night feel legit.
The texture and flavor on each crust were consistently impressive. The high-quality flours and yeast really shine through, delivering that authentic, pizzeria-quality taste.
I baked these on a stone in my outdoor oven, and the crusts came out evenly cooked, golden, and crispy on the edges.
What I loved most is how versatile the pack is. Whether you want a thin margherita, a loaded deep dish, or even a dessert pizza, this pack covers all bases.
Plus, making six pizzas from just one box feels like a great value for casual family dinners or weekend gatherings.
If I had to pick a downside, the only thing is that it’s a bit plain in flavor without added toppings. But honestly, that’s what makes it so adaptable—you can customize every pie to your liking.
What Ingredients Are Essential for the Best Dough for Outdoor Pizza Ovens?
The best dough for outdoor pizza ovens requires a few essential ingredients that contribute to its texture and flavor.
- High-Protein Flour
- Water
- Salt
- Yeast
- Olive Oil
- Sugar or Honey (optional)
The ingredients can vary in importance based on personal preferences, the type of pizza desired, or specific regional styles of pizza, such as Neapolitan or New York style. Some cooks may argue that less salt is better for a sweeter dough, while others maintain that a higher level enhances flavor.
-
High-Protein Flour:
High-protein flour plays a crucial role in creating a strong dough structure. It contains more gluten-forming proteins, which provide elasticity and chewiness. The ideal flour for pizza dough typically has a protein content of around 12-14%. Bread flour is often preferred for this reason. A study by Peter Reinhart (2012), a renowned bread expert, emphasizes that the proper flour contributes directly to the dough’s ability to rise and hold its shape during cooking. -
Water:
Water is vital for hydrating the flour and activating the yeast. It is generally recommended to use cool, filtered water for optimal results. The hydration level, or the ratio of water to flour, should typically be around 60-65%. Higher hydration can yield a more open crumb structure. Research by the Culinary Institute of America shows that correct hydration can lead to better texture and flavor development in the finished crust. -
Salt:
Salt adds flavor and strengthens gluten formation in the dough. A recommended amount is usually around 1.5-2% of the flour weight. This enhances the overall taste and controls yeast fermentation. The American Institute of Baking highlights that salt plays a pivotal role in dough conditioning, promoting better structure and elasticity. -
Yeast:
Yeast acts as a leavening agent, creating air pockets that make the dough rise. Both active dry yeast and instant yeast work well, but they differ in activation methods. Active dry yeast requires proofing in warm water, while instant yeast can be mixed directly with dry ingredients. According to Modernist Cuisine (2011), the choice of yeast can affect the dough’s flavor profile, with longer fermentation times yielding more complex tastes. -
Olive Oil:
Olive oil adds moisture and helps create a crispy crust. It also aids in the fermentation process, leading to enhanced flavor. The recommended amount is usually around 1-2 tablespoons per batch of dough. An article by Food & Wine emphasizes that quality olive oil can contribute to a more flavorful and aromatic crust. -
Sugar or Honey (optional):
Some recipes include sugar or honey to improve browning and enhance flavor. While not essential, they can assist in caramelization during baking. Recipes may vary, with some suggesting a teaspoon to a tablespoon based on personal preference. The Journal of Culinary Science & Technology (2018) indicates that sugar influences the final texture and crust characteristics of the pizza, particularly in high-temperature baking.
How Does the Type of Flour Impact the Final Dough Quality?
The type of flour significantly impacts the final dough quality. Different flours have varying protein levels. Higher protein flour, such as bread flour, creates more gluten. Gluten provides structure and elasticity, resulting in a chewier texture. Lower protein flour, like cake flour, yields a softer, more tender dough.
Flour also varies in absorption capacity. Some flours absorb more water, affecting hydration levels. High-hydration doughs produce a lighter and airier result. Low-hydration doughs typically result in denser textures.
Additionally, flour types contribute to flavor. Whole grain flours have a richer taste due to their bran and germ content. This can enhance the overall flavor profile of the final product.
The type of flour also influences fermentation. Stronger flours can withstand longer fermentation times. This leads to better flavor development and improved dough strength.
In summary, selecting the appropriate flour type is essential for achieving desired dough quality. The protein content, absorption capacity, flavor, and fermentation tolerance all play crucial roles. Adjusting these factors allows bakers to create pizzas tailored to specific preferences and styles.
What Role Does Yeast Play in Achieving a Perfect Crust?
Yeast plays a crucial role in creating a perfect crust by aiding in fermentation and leavening the dough. This process enhances flavor and texture, resulting in a desirable crust.
- Fermentation
- Leavening
- Flavor development
- Texture improvement
- Gas production
- Dough elasticity
- Time and temperature control
The roles of yeast in achieving a perfect crust are multifaceted and each function significantly contributes to the overall quality of the finished product.
-
Fermentation: Fermentation occurs when yeast consumes sugars in the dough, producing alcohol and carbon dioxide. This biological process takes time, and the resulting gas causes the dough to rise. According to a 2018 study by the American Journal of Food Science, proper fermentation time leads to improved flavor and a better structure of the crust.
-
Leavening: Yeast acts as a leavening agent by generating carbon dioxide as it ferments. This gas creates bubbles in the dough, making it lighter and airier. The amount of yeast, along with the fermentation duration, directly influences the crust’s thickness and chewiness.
-
Flavor development: Yeast fermentation contributes to the development of complex flavors in the dough. The alcohol created during fermentation evaporates during baking, adding depth to the crust’s taste. Studies show that long fermentation times produce more pronounced flavors, enhancing the overall eating experience.
-
Texture improvement: A well-fermented dough results in a crust that is both crispy and chewy. The fermentation process not only creates structure but also helps break down proteins in flour, resulting in gluten formation. This gives the dough the necessary stretch and elasticity that translates to a desirable texture.
-
Gas production: Gas produced by yeast expands the dough, leading to a better rise. This action creates large, irregular holes in the crust, which are typically characteristic of artisan breads and pizzas. The right balance of yeast and fermentation time ensures consistent gas production for an optimal rise.
-
Dough elasticity: Yeast enhances the dough’s elasticity, which is crucial for stretching and shaping. When the dough is allowed to rise adequately, gluten networks develop, resulting in a more pliable dough. This elasticity facilitates easy handling and formation of the crust.
-
Time and temperature control: Yeast performance is influenced by time and temperature. Warmer temperatures accelerate fermentation, while cooler conditions slow it down. Finding the right balance is essential to developing the desired flavor and texture. A common method employed by bakers is cold fermentation, which involves letting the dough rise slowly in the refrigerator to enhance flavor over time.
Each of these points highlights the importance of yeast in achieving a perfect crust and demonstrates how it transforms simple ingredients into a delicious end product.
How Important Is Hydration in Dough Preparation?
Hydration is crucial in dough preparation. It affects the dough’s texture, strength, and overall flavor. Water hydrates the flour, activating gluten proteins. Gluten gives the dough its structure and elasticity. Adequate hydration improves dough handling and shaping. It also enhances fermentation by allowing yeast to thrive. Proper hydration levels can range from 55% to 75%, depending on the type of dough. High-hydration doughs create an airy crumb, while lower levels produce denser textures. Monitoring hydration during preparation ensures optimal results. In summary, appropriate hydration is essential for successful dough and influences the final product’s quality.
What Techniques Ensure a Stretchy and Chewy Pizza Dough Texture?
The techniques that ensure a stretchy and chewy pizza dough texture include proper hydration, adequate kneading, fermentation time, and ingredient selection.
- Proper Hydration
- Adequate Kneading
- Fermentation Time
- Ingredient Selection
- Use of Preferments (e.g., Poolish, Biga)
The following sections will explore each technique in detail.
-
Proper Hydration:
Proper hydration significantly contributes to a stretchy and chewy pizza dough texture. Hydration refers to the ratio of water to flour in the dough mixture. A higher hydration level, often around 65-70%, creates a softer dough with improved elasticity. When flour absorbs water, gluten proteins develop, leading to a chewy texture. According to a study by Peter Reinhart (2001), a dough with proper hydration yields a more extensible and flavorful crust. -
Adequate Kneading:
Adequate kneading is essential for developing gluten, which provides structure and chewiness to the pizza dough. Kneading aligns gluten strands, making the dough elastic. Kneading should continue until the dough becomes smooth and slightly tacky. A typical kneading period ranges from 8 to 10 minutes. S. Berghoef (2019) notes that insufficient kneading can result in a dense dough that lacks desired texture. -
Fermentation Time:
Fermentation time allows dough to rise, enhancing flavor and texture. This process involves yeast metabolizing sugars, producing carbon dioxide that makes the dough expand. A longer fermentation period, such as cold fermentation in the refrigerator for 24 hours, improves flavor complexity and chewiness. Research by Chris Bianco (2018) indicates that extended fermentation results in superior dough characteristics, including improved chewiness. -
Ingredient Selection:
Ingredient selection plays a critical role in the dough’s texture. Using a high-protein flour, typically termed ‘bread flour,’ promotes gluten development. Additionally, adding ingredients like olive oil can enhance the dough’s flexibility and moisture content. According to the American Institute of Baking, protein content in flour affects the structure of the dough. Higher protein levels lead to a chewier crust. -
Use of Preferments (e.g., Poolish, Biga):
Using preferments, such as poolish or biga, enhances flavor and texture in pizza dough. Preferments are a mixture of flour, water, and yeast allowed to ferment before being incorporated into the final dough. This process builds flavor complexity and improves dough extensibility. According to a study by Ken Forkish (2012), incorporating preferments can yield a crust characterized by a delightful chewiness and depth of flavor.
How Should You Knead and Proof the Dough for Optimal Results?
Kneading and proofing dough are crucial steps for achieving optimal baking results. Proper kneading develops gluten, which gives bread its structure and elasticity. This process typically takes 8 to 10 minutes by hand or about 5 to 7 minutes with a stand mixer. For best results, aim for a dough temperature of around 75°F to 80°F (24°C to 27°C), which encourages yeast activity.
Kneading involves pushing, folding, and stretching the dough. Knead until the dough is smooth and elastic. Use the “windowpane test” to check for readiness. Take a small piece of dough and stretch it between your fingers. If it forms a thin, translucent membrane without tearing, it has been kneaded enough.
Proofing follows kneading. This is the resting period for the dough, allowing yeast to ferment and cause the dough to rise. The first proofing phase typically lasts 1 to 2 hours at room temperature. For enhanced flavor and texture, some bakers use a cold proof in the refrigerator for 12 to 24 hours.
Factors influencing these processes include dough hydration levels and environmental conditions. A drier dough may require extra kneading to achieve gluten development, while high humidity can shorten proofing time. Additionally, altitudes above sea level may necessitate adjustments to both kneading and proofing times, affecting dough behavior.
Different types of bread will have varying kneading and proofing requirements. For example, whole wheat bread usually needs longer kneading than white bread due to its denser flour.
In summary, for optimal dough results, knead for 8 to 10 minutes, achieving a smooth, elastic texture. Allow the dough to rise for 1 to 2 hours at room temperature or refrigerate for extended flavor. Pay attention to hydration and environmental factors, as they can affect the outcomes significantly.
What Are the Steps to Properly Divide and Shape Your Dough?
To properly divide and shape your dough, follow these essential steps:
- Prepare the dough.
- Let the dough rest.
- Divide the dough.
- Shape the dough.
- Allow the shaped dough to proof.
Diverse perspectives on these steps might include variations in techniques, types of dough (such as sourdough or pizza dough), and differing opinions among professional bakers regarding resting times or shaping methods. Some bakers advocate for longer resting periods to develop flavor, while others prefer quicker methods. Each approach has its merits depending on the intended outcome.
-
Prepare the Dough:
Preparing the dough involves mixing flour, water, yeast, and salt. This step creates a cohesive dough that can develop gluten. Gluten is essential for elasticity and structure in baked goods. According to a study published in the “Journal of Food Science” in 2018, hydration levels significantly affect dough behavior, impacting texture and rise. -
Let the Dough Rest:
Letting the dough rest allows it to relax, which makes it easier to handle. During this time, the gluten continues to develop, enhancing the dough’s extensibility. A common resting time is 15 to 30 minutes, known as autolyse. This term refers to the process where flour and water sit together before adding other ingredients, primarily benefiting the dough’s strength and texture. -
Divide the Dough:
Dividing the dough means separating it into individual portions. A bench scraper is often used for this task to maintain a uniform size. Consistency ensures even baking and portion control. For example, if making bagels, each piece might weigh about 100 grams, while pizza dough balls can range from 200 to 300 grams, depending on the size. -
Shape the Dough:
Shaping the dough includes forming each piece into a desired shape, such as balls or rolls. This process helps create surface tension. Sufficient surface tension allows the dough to rise properly during proofing. Various shaping techniques exist, e.g., the “tuck and roll” for rounds or the “stretch and fold” for baguettes. -
Allow the Shaped Dough to Proof:
Allowing the shaped dough to proof means letting it sit again to rise. This step is crucial for developing flavor and texture. The duration can vary from 30 minutes to several hours, depending on the recipe and ambient temperature. According to the “Bread Baking” book by Peter Reinhart, a longer proofing time can lead to more complex flavors as yeast fermentation occurs.
By understanding these steps, you can achieve better results in your dough preparations and baking outcomes.
How Long Should You Ferment Your Dough for Full Flavor Development?
Fermenting dough for full flavor development typically requires anywhere from 12 to 48 hours. The ideal time often depends on the desired flavor profile and the type of bread being made. For example, a bulk fermentation period of 12 to 24 hours at room temperature often provides a good balance of flavor and texture.
In contrast, longer fermentation, such as 24 to 48 hours, allows for more complex flavors. This is because extended fermentation encourages the growth of beneficial bacteria and yeast that produce organic acids and esters. These compounds contribute to a more nuanced taste in the final bread.
Real-world examples include sourdough, which benefits significantly from longer fermentation periods. A typical sourdough recipe suggests fermenting for 12 to 16 hours at room temperature, followed by a cold retard of up to 48 hours. The long fermentation period enhances the characteristic tangy flavor and improves the dough’s strength.
Factors that influence fermentation time include temperature, humidity, and the specific yeast strain used. Warm environments speed up fermentation, while cooler temperatures slow it down. High humidity can also create a more favorable environment for yeast activity.
Variations may occur based on flour type and water absorption. Higher protein flours often support longer fermentation due to their gluten development capabilities, which can handle the increased acidity from prolonged fermentation.
When considering these factors, it’s crucial to adjust fermentation times based on your specific conditions. Monitoring dough texture and rise can provide guidance for optimal flavor development.
What Common Mistakes Should You Avoid When Making Dough for Outdoor Pizza Ovens?
To create excellent dough for outdoor pizza ovens, avoid the following common mistakes:
- Using the wrong type of flour.
- Skipping the proofing step.
- Overworking the dough.
- Not measuring ingredients accurately.
- Ignoring hydration levels.
- Using insufficient yeast.
- Not allowing for proper rest time.
To fully understand these mistakes, we will now look at each one in detail.
-
Using the Wrong Type of Flour: Using the wrong type of flour results in subpar dough consistency. High-gluten or bread flour is ideal for pizza dough because it provides better structure and chew compared to all-purpose flour. This is essential as, according to a study by the Food Research Institute (2018), strong gluten development improves the dough’s elasticity and stretching properties.
-
Skipping the Proofing Step: Skipping the proofing step, which allows the yeast to ferment, can lead to dense dough. Proofing time is crucial for developing flavor and texture. The American Culinary Federation recommends a first rise of at least an hour in a warm environment to achieve optimal results.
-
Overworking the Dough: Overworking the dough can lead to a tough texture. Kneading too much incorporates excess air and gluten, which makes the dough stiffer. A good rule of thumb is to knead the dough until it’s smooth, about 8-10 minutes, as affirmed by The Pizza Lab blog (2015).
-
Not Measuring Ingredients Accurately: Not measuring ingredients accurately may result in an imbalanced dough. Using a kitchen scale ensures precision in ingredient ratios. The USDA suggests that precise measurements can improve consistency, leading to better quality pizza.
-
Ignoring Hydration Levels: Ignoring hydration levels can result in dry or overly wet dough. Proper hydration is typically around 60%-70% for pizza dough, which helps with texture and handling. According to Pizza Magazine (2020), adjusting water content can drastically affect the final product.
-
Using Insufficient Yeast: Using insufficient yeast leads to poor fermentation, resulting in less rise and flavor. The quantity of yeast can depend on the fermentation process; for slow fermentation, less yeast is required. Experts from King Arthur Baking suggest one teaspoon per cup of flour for standard dough.
-
Not Allowing for Proper Rest Time: Not allowing for proper rest time can hinder gluten development. Resting the dough allows it to relax, making it easier to shape. The Food Network states that resting for 30 minutes can significantly improve handling and texture before baking.