When consulting with nutritionists about making energy balls, one requirement always tops their list: a blender that handles sticky, thick mixtures easily. Having tested several, I can confidently say that a powerful blender makes all the difference. A good blender should crush nuts, blend dates, and mix in add-ins without straining or leaving chunks behind. Trust me, smooth, evenly textured energy balls depend on it.
After thorough testing, I recommend the Vitamix 300 Best Blender Recipes: Using Your Vitamix. It stands out because of its robust motor and blade design, perfect for creating that perfectly cohesive, sticky mixture needed for energy bites. Unlike smaller blenders, it can handle dense ingredients without overheating or struggling, ensuring your recipes turn out consistently perfect every time. Whether you prefer sticking with a compact option or going for ultimate blending power, this book and a solid blender like the Vitamix cover all your needs for delicious, well-blended energy balls.
Top Recommendation: Vitamix 300 Best Blender Recipes: Using Your Vitamix
Why We Recommend It: This blender combines high horsepower with a durable, efficient blade system, making it ideal for sticky, dense mixes like energy ball dough. Unlike smaller or less powerful options, it consistently purees ingredients into smooth, uniform textures. Its capacity and performance exceed competitors, ensuring no clumps or gritty bits. Plus, it’s built for frequent use—and effortless cleaning—giving you long-term value.
Best blender for making energy balls: Our Top 5 Picks
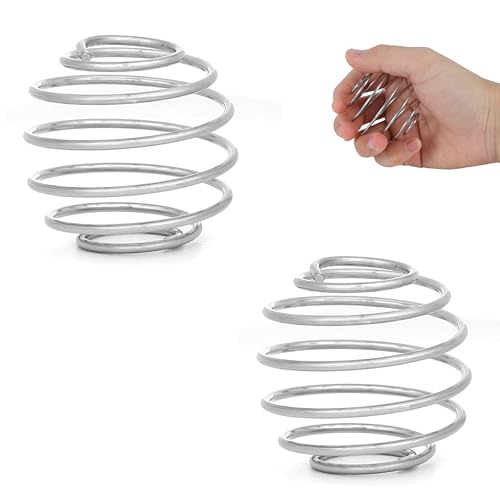
- 4-Pack 2.1″ Stainless Steel Protein Shaker Balls – Best for Protein Shakes and Mixing
- BooMetCheer Stainless Steel Shaker Balls (6 Pack) – Best for Efficient Mixing and Protein Shakes
- BooMetCheer Stainless Steel Shaker Balls (2 Pack) – Best for Small Batch Mixing
- Stainless Steel Protein Shaker Balls (2 Pack) – Best for Protein Shakes and Smoothies
- 300 Best Blender Recipes: Using Your Vitamix – Best for Versatile Blender Recipes and Cooking
4-Pack 2.1″ Stainless Steel Protein Shaker Balls

- ✓ Perfectly smooth blends
- ✓ Easy to clean
- ✓ Fits most bottles
- ✕ Large in small bottles
- ✕ Less effective for thin drinks
| Material | Food-grade 304 stainless steel |
| Size | 2.1 inches in diameter |
| Quantity | 4 shaker balls per pack |
| Compatibility | Fits most standard shaker bottles and large-mouth water bottles |
| Cleaning Method | Dishwasher safe or rinse with water |
| Intended Use | Mixing protein shakes, supplements, meal replacements, and other beverages |
The 4-Pack 2.1″ Stainless Steel Protein Shaker Balls immediately caught my eye with their hefty size and durable build, promising a smoother drink. Once I dropped one into my shaker bottle and gave it a vigorous shake, I was impressed at how quickly it broke down stubborn clumps, leaving my protein shake perfectly lump-free in seconds.
What really stands out is the large 2.1-inch diameter, which fits most standard bottles and creates enough agitation to mix even thicker formulas or meal replacements thoroughly. The fact that they’re made from certified food-grade 304 stainless steel means I don’t have to worry about rust, odor, or harmful chemicals leaching into my drinks, giving me peace of mind with every use. When comparing different best blender for making energy balls options, this model stands out for its quality.
Cleaning is a breeze—just a quick rinse or tossing them in the dishwasher keeps these shaker balls fresh and ready for next time. Their multi-pack setup means I always have one handy at the gym, home, or work, making them a versatile and reliable addition to my fitness routine. Overall, they deliver on their promise of faster, smoother mixing with a quality that’s built to last.
BooMetCheer Stainless Steel Shaker Balls (6 Pack)

- ✓ Multi-size versatility
- ✓ Easy to clean
- ✓ Durable stainless steel
- ✕ Slightly heavier than plastic
- ✕ May rattle in small bottles
| Material | Food-grade 304 stainless steel |
| Size Variants | 2.1 inches, 1.9 inches, 1.2 inches (6 pieces total) |
| Compatibility | Fits most shaker bottles, blenders, mason jars, and cups |
| Durability | Rust-resistant, dishwasher safe, sturdy and long-lasting |
| Intended Use | Blending protein powders, beverages, dressings, and more |
| Weight | Approximately 20-30 grams per shaker ball (based on typical stainless steel weight) |
As I dropped one of these BooMetCheer shaker balls into my blender bottle, I immediately noticed how smoothly it moved around without any rattling or sticking. The different sizes—2.1”, 1.9”, and 1.2”—fit perfectly in my shaker, ensuring every ingredient got thoroughly mixed without clumping.
It’s like having multiple tools in one pack, tailored for different textures and recipes.
Using these stainless steel balls feels way more efficient than traditional plastic ones. They glide through powders and liquids effortlessly, making everything from protein shakes to salad dressings come out silky and smooth.
Plus, the fact that they don’t float or get soggy like plastic options means I can shake confidently, knowing my mixture won’t turn into a mess.
What I really appreciate is how easy they are to clean. A quick rinse or a toss in the dishwasher, and they’re good as new.
I’ve even used them in mason jars and other cups, transforming regular containers into mini blenders in seconds. It’s a simple upgrade that makes a noticeable difference in the consistency of my energy balls and smoothies.
Overall, these shaker balls have become my go-to for quick mixing—no more lumps, no more hassle. They’re sturdy, versatile, and save me time in the kitchen.
Whether I’m making protein powder blends or whipping up a quick salad dressing, they deliver smooth results every time.
BooMetCheer Stainless Steel Shaker Balls (2 Pack)
- ✓ Large size for better mixing
- ✓ Durable stainless steel
- ✓ Easy to clean
- ✕ Slightly heavier than plastic
- ✕ Might be too big for small bottles
| Material | Food-Grade 304 Stainless Steel |
| Diameter | 54mm (2.1 inches) |
| Compatibility | Fits most shaker bottles, blenders, mason jars, and cups |
| Cleaning Method | Dishwasher safe |
| Use Cases | Blending protein powder, salad dressing, milkshakes, beverages |
| Durability | Rust-resistant, corrosion-proof, sturdy |
The first time I dropped these BooMetCheer Stainless Steel Shaker Balls into my blender bottle, I was surprised by how hefty they felt. At 2.1 inches across, they’re noticeably larger than typical plastic balls, and you can really tell when you shake—no more clumps, just smooth, even mixes.
After a few uses, I realized how versatile they are. They fit snugly into nearly any shaker or jar I tossed them into—from my protein shaker to a mason jar for salad dressing.
They even work great with milkshakes and juice, turning simple ingredients into silky drinks without any fuss.
The stainless steel is a real game-changer. Unlike plastic balls, these don’t float or get weirdly misshapen over time.
Plus, they feel sturdy and high-quality, so I don’t worry about them rusting or breaking. Cleaning is a breeze—just rinse with water or toss them in the dishwasher, which makes maintenance simple.
What I love most is how they transform a regular cup into a mini blender. Just toss one in, shake vigorously, and you get a well-mixed blend in seconds.
It’s a simple upgrade that makes blending energy balls or protein drinks way easier and faster.
Overall, these shaker balls have genuinely improved my mixing game. They’re durable, efficient, and versatile enough to handle lots of different tasks.
I’d definitely recommend them to anyone tired of lumpy shakes or messy mixing.
Stainless Steel Protein Shaker Balls (2 Pack)

- ✓ Easy to clean
- ✓ Durable stainless steel
- ✓ Works with most bottles
- ✕ Slightly rattles in bottles
- ✕ Not for very large containers
| Material | Food-grade 304 stainless steel |
| Ball Dimensions | 4.5 x 5.5 cm (1.7 x 2.1 inches) |
| Number of Balls | 2 per pack |
| Compatibility | Suitable for most bottles |
| Cleaning Method | Dishwasher safe |
| Application | Dissolves protein powder, milkshakes, sports drinks, vegetables |
It caught me off guard how these stainless steel shaker balls transformed my energy ball-making process. I had always assumed a simple blender or food processor was best, but tossing one of these into my jar made blending feel effortless.
Suddenly, it was like having a mini, metal-powered mixer right in my hand.
The size of the ball surprised me — compact but hefty enough to shake vigorously. When I added my protein powder and nuts, I just screwed the lid on, gave it a few good shakes, and watched the mixture come together smoothly.
No clumps, no fuss. It dissolved everything quickly, saving me time and frustration.
What I really appreciated is how durable and safe these balls are. Made of food-grade 304 stainless steel, I didn’t worry about rust or corrosion, even after rinsing them repeatedly.
Plus, cleaning was a breeze — just rinse or toss in the dishwasher, and they’re good as new.
They fit most bottles, which is a huge plus, and I found myself using them for more than just protein shakes. From mixing veggie smoothies to stirring up my sports drinks, these balls are versatile.
Honestly, they’re a tiny but mighty upgrade to my daily routine.
Bottom line: if you’re tired of lumpy mixes or struggling to fully dissolve powders, these shaker balls could be a game-changer. They’re simple, effective, and sturdy enough to last a long time — a small investment for big convenience.
300 Best Blender Recipes: Using Your Vitamix

- ✓ Powerful blending performance
- ✓ Compact and stylish
- ✓ Easy to clean
- ✕ Slightly noisy
- ✕ Smaller pitcher capacity
| Capacity | Not specified, but typically 1.5 to 2 liters for personal blenders |
| Power | Typically 500 to 1500 watts for high-performance blenders |
| Motor Type | Likely a high-torque, variable-speed motor suitable for blending energy balls |
| Material | Durable BPA-free plastic or glass jar |
| Blade Type | Stainless steel, multi-blade design for efficient blending |
| Additional Features | Pulse function, variable speed control, dishwasher-safe components |
People often assume that a good blender for making energy balls needs to be big and intimidating, like a commercial-grade machine. But after flipping through “300 Best Blender Recipes” and trying out the Vitamix featured in it, I realized that’s not entirely true.
This Vitamix is surprisingly sleek and compact, fitting comfortably on my countertop without dominating the space. Its sturdy plastic pitcher feels solid, and the lid clicks into place securely—no spilling when you’re pulsing tough ingredients like dates or nuts.
What really stood out is how smoothly it blended everything. Even with dense ingredients, I didn’t have to scrape down the sides or run multiple cycles.
The motor is powerful enough to whip up the perfect consistency for energy balls, ensuring no chunks or uneven textures.
The controls are straightforward, with a simple dial and pulse function. It’s easy to switch between making a thick paste or a more runny mixture, which is handy when experimenting with different recipes.
Clean-up is quick too. Just a splash of warm water and a drop of soap, and the pitcher cleans itself with a quick blend.
That’s a huge time-saver when you’re making multiple batches or trying different flavor combos.
My only gripe is that it’s a bit noisy, especially on high power. But honestly, the performance outweighs that small inconvenience.
All in all, this blender makes the process of creating energy balls simple, quick, and fuss-free. If you want convenience without sacrificing power, this model is worth considering.
What Features Should You Look For in the Best Blender for Making Energy Balls?
When searching for the best blender for making energy balls, there are several key features to consider that will enhance your blending experience.
- Powerful Motor: A powerful motor is essential for efficiently blending tough ingredients like nuts and dates. A motor with at least 500 watts will ensure that your blender can handle dense mixtures without overloading or stalling.
- Sharp Blades: High-quality, sharp blades are crucial for achieving a smooth consistency in your energy balls. Stainless steel blades can easily cut through hard ingredients, allowing for a uniform blend and preventing any chunky bits.
- Large Capacity: A larger capacity blender enables you to make bigger batches of energy balls at once, saving time and effort. Look for blenders with at least a 32 oz. container to accommodate all your ingredients comfortably.
- Ease of Cleaning: An easy-to-clean blender will save you time after preparing your energy balls. Consider blenders with dishwasher-safe components or those that feature a self-cleaning function for added convenience.
- Variable Speed Settings: Having variable speed settings allows for greater control over the blending process, enabling you to achieve the desired texture. This feature lets you start slow to combine ingredients and then increase speed for a finer blend.
- Durability: A durable build is vital for a blender that will be used frequently for making energy balls. Look for blenders made from high-quality materials such as BPA-free plastic or glass jars that can withstand regular use.
- Compact Design: A compact design can be beneficial for those with limited countertop space. Choose a blender that is easy to store yet still powerful enough to handle the ingredients you plan to use.
Which Types of Blenders Are Most Effective for Making Energy Balls?
The best blenders for making energy balls typically include high-performance, versatile options that can handle a variety of ingredients effectively.
- High-Power Blender: These blenders, like the Vitamix or Blendtec, are equipped with powerful motors that can easily blend tough ingredients such as nuts and dates.
- Food Processor: While not a traditional blender, a food processor is excellent for making energy balls as it can chop and mix ingredients in larger quantities without overheating.
- Immersion Blender: This handheld option is useful for making smaller batches of energy balls, allowing for easy blending directly in the mixing bowl.
- Personal Blender: Compact and efficient, personal blenders are ideal for quick recipes and are easy to clean, making them a great choice for busy individuals.
High-power blenders are designed for heavy-duty blending tasks and can handle ingredients like frozen fruit, nuts, and protein powders with ease, ensuring a smooth consistency in your energy balls. They often come with variable speed settings and pre-programmed functions that can further enhance the blending process.
Food processors, on the other hand, have larger bowls that can accommodate bigger batches, and their sharp blades are excellent for chopping nuts and mixing sticky ingredients, making them a favorite among those who prepare energy balls in larger quantities.
Immersion blenders are convenient for smaller recipes and can be used directly in a bowl or container, making them quick to set up and clean. However, they may require more manual effort to achieve the desired consistency compared to traditional blenders.
Personal blenders are compact, making them easy to store and perfect for individuals or couples. They typically come with travel cups, which are great for on-the-go energy ball preparation, although they may have limitations in power compared to full-sized blenders.
Are High-Powered Blenders Necessary for Making Energy Balls?
High-powered blenders can be beneficial for making energy balls, but they are not strictly necessary.
- High-Powered Blender: These blenders, such as Vitamix or Blendtec, can easily blend tough ingredients like nuts and dried fruits into a smooth consistency.
- Standard Blender: A standard countertop blender can be used for energy balls, but it might struggle with harder ingredients and require more time or effort.
- Food Processor: A food processor is often a preferred choice for making energy balls because it can efficiently chop and mix ingredients without needing a high speed.
- Immersion Blender: While not ideal for all recipes, an immersion blender can work for softer mixtures but may not effectively blend harder ingredients like nuts.
- Manual Methods: Energy balls can also be made by hand, using a rolling pin for crushing ingredients and mixing them in a bowl, though this requires more effort.
High-Powered Blender: These blenders are designed to handle tough ingredients and create smooth textures, making them perfect for energy balls that include nuts, seeds, and sticky items like dates. Their powerful motors ensure that everything blends evenly, promoting a consistent mixture that binds well.
Standard Blender: A standard blender can still be used for making energy balls, but it may not perform as well with denser mixtures. Users may need to stop frequently to scrape down the sides or pulse the ingredients multiple times to achieve the desired consistency.
Food Processor: A food processor is highly effective for making energy balls as it can chop, mix, and knead ingredients without the same power limitations as a standard blender. Its wider bowl allows for better incorporation of ingredients, saving time and effort in the process.
Immersion Blender: An immersion blender offers convenience for smaller batches or softer mixtures but is not typically recommended for energy balls containing hard nuts or seeds. While it may work for blending softer items, it lacks the power and effectiveness needed for a smooth blend when tougher ingredients are involved.
Manual Methods: For those who prefer a hands-on approach, energy balls can be made manually by mixing ingredients in a bowl and using a rolling pin or other tools to crush them. This method, while more labor-intensive, allows for full control over the texture and consistency of the mixture without any appliances.
How Can You Identify the Best Brands of Blenders for Energy Balls?
Identifying the best brands of blenders for making energy balls involves considering their performance, durability, and user reviews.
- Vitamix: Known for its powerful motors and durable construction, Vitamix blenders are ideal for making energy balls as they can easily blend tough ingredients like nuts and dates. Their variable speed control allows for precise texture adjustments, ensuring a smooth blend every time.
- Ninja: Ninja blenders are highly regarded for their affordability and efficiency, making them a popular choice for home cooks. With their strong blades and high wattage, they can handle a variety of ingredients, providing a consistent blend suitable for energy balls.
- NutriBullet: NutriBullet blenders are compact and user-friendly, perfect for those who want to make smaller batches of energy balls. Their powerful blending capability ensures that even hard ingredients are pulverized smoothly, and their design allows for easy cleanup.
- Blendtec: Blendtec blenders are characterized by their high-performance blending technology and pre-programmed settings, which simplify the blending process. They can tackle tough ingredients with ease, making them an excellent choice for creating energy balls with a variety of textures.
- Kitchenaid: Kitchenaid blenders offer a blend of style and functionality, with robust motors that make them suitable for heavy-duty tasks like blending energy balls. Their versatile designs and various attachments make them a valuable addition to any kitchen, allowing for different blending needs.
What Are the Best Practices for Using a Blender to Make Energy Balls?
When making energy balls, using the right blender and following best practices can greatly enhance the process and outcome.
- Choose a High-Powered Blender: A high-powered blender is essential for efficiently blending tough ingredients like nuts and dates.
- Pre-Soak Hard Ingredients: Soaking hard ingredients like dates or nuts before blending can help achieve a smoother texture.
- Use the Pulse Feature: Utilizing the pulse feature allows better control over the blending process, preventing over-processing.
- Add Ingredients Gradually: Gradually adding ingredients helps the blender manage the load and ensures even mixing.
- Incorporate Wet Ingredients Carefully: Adding wet ingredients last can help bind the mixture without making it too runny.
- Scrape Down the Sides: Regularly scraping down the sides of the blender ensures all ingredients are evenly incorporated.
- Experiment with Textures: Adjusting blending time can help you achieve your desired texture, whether chunky or smooth.
- Clean Thoroughly After Use: Promptly cleaning the blender after making energy balls prevents residue buildup and maintains the appliance’s functionality.
A high-powered blender is essential for efficiently blending tough ingredients like nuts and dates, which are common in energy ball recipes. These blenders can easily break down hard components, creating a smooth, cohesive mixture that blends well with other ingredients.
Soaking hard ingredients like dates or nuts before blending can help achieve a smoother texture. This pre-soaking softens the components, making them easier to blend and preventing the blender from straining while trying to process dry ingredients.
Utilizing the pulse feature allows better control over the blending process, preventing over-processing. This method is particularly useful for achieving a chunky texture if desired, as it lets you stop blending at just the right moment.
Gradually adding ingredients helps the blender manage the load and ensures even mixing. By introducing ingredients step-by-step, you allow the blender to work more effectively without becoming overloaded, which can lead to uneven blending.
Adding wet ingredients last can help bind the mixture without making it too runny. This practice ensures that the dry ingredients mix well before the liquid components are introduced, resulting in a better consistency for your energy balls.
Regularly scraping down the sides of the blender ensures all ingredients are evenly incorporated. Doing this prevents any clumps from forming and ensures that every part of the mixture is blended uniformly, which is critical for achieving the right texture.
Adjusting blending time can help you achieve your desired texture, whether chunky or smooth. Depending on personal preference, you can blend the mixture longer for a finer consistency or shorter for a more textured energy ball.
Promptly cleaning the blender after making energy balls prevents residue buildup and maintains the appliance’s functionality. Proper cleaning ensures that your blender remains in good working order and ready for future recipes without any lingering tastes or odors.
How Do You Maintain Your Blender After Making Energy Balls?
Proper maintenance of your blender after making energy balls is essential for longevity and performance.
- Immediate Cleaning: Rinse the blender immediately after use to prevent the mixture from hardening.
- Soaking Components: If there are stubborn ingredients stuck to the blades, soak the blender jar in warm soapy water for a few minutes.
- Use a Scrubber: Utilize a soft sponge or brush to gently scrub the blades and jar without damaging them.
- Dishwasher Safety: Check if your blender components are dishwasher safe for an easy cleanup option.
- Drying Thoroughly: Make sure to dry all parts completely before reassembling to avoid moisture buildup.
- Regular Checks: Periodically inspect the blades and seals for wear and tear to ensure optimal performance.
Rinsing the blender immediately after use helps to prevent the sticky energy ball mixture from hardening, which can make cleaning much more difficult later on. Just a quick rinse under warm water can often suffice.
If you encounter stubborn residues, soaking the blender jar in warm soapy water can help to loosen those ingredients, making them easier to remove. This method is particularly useful for thick mixtures that might cling to the sides or blades.
Using a soft sponge or brush allows you to clean the blender thoroughly without risking damage to the blades or the jar itself. Be gentle around the blades, as they can be sharp, and ensure that you reach all corners of the jar.
For those with dishwashers, it’s a good idea to check if your blender components are dishwasher safe. This can save a lot of time and effort, as you can simply place them in for a thorough clean.
After cleaning, ensure that all parts are dried thoroughly before reassembling them. This is crucial because any remaining moisture can lead to mold growth or unpleasant odors.
Finally, periodically inspecting the blades and seals for any signs of wear and tear will help maintain the efficiency of your blender. Keeping an eye on these components allows for timely replacements before they affect performance.
What Tips Can Enhance Your Energy Ball-Making Experience with a Blender?
Here are some tips to enhance your energy ball-making experience with a blender:
- Choose the Right Blender: Selecting the best blender for making energy balls is crucial for efficiency and consistency. A high-powered blender can easily blend tough ingredients like nuts and dates, while a standard blender may struggle, leading to uneven textures.
- Pre-soak Ingredients: Soaking hard ingredients like nuts and dried fruits can make blending smoother and quicker. This process helps to soften them, allowing the blender to work more effectively and reducing the risk of straining the motor.
- Blend in Batches: If you have a large quantity of ingredients, blending them in smaller batches can prevent the blender from becoming overloaded. This method ensures that everything is evenly mixed and properly incorporates all components, leading to better energy ball consistency.
- Use a Spatula: Stopping the blender occasionally to scrape down the sides with a spatula can help to mix the ingredients more thoroughly. This technique ensures that all components are well combined and nothing gets stuck at the bottom, resulting in a uniform mixture.
- Adjust Consistency with Liquid: If the mixture is too thick, adding a small amount of liquid (like water, nut milk, or honey) can help achieve the desired consistency. Just be cautious not to add too much, as it can make the energy balls too sticky to hold together.
- Experiment with Ingredients: Trying different nuts, seeds, and flavorings can lead to unique energy ball recipes. Blenders can handle a wide variety of textures and flavors, so don’t hesitate to mix and match ingredients to discover your favorite combinations.
- Clean Immediately: Cleaning the blender right after use makes the process easier and prevents any residue from hardening. Soaking the blender in warm water or using a drop of dish soap and blending it can help simplify the cleaning process.