Holding the PECLA Oven Thermometer 50-300°C/100-600°F Stainless Steel in my hand, I was surprised by how solid and precisely built it felt—heavy enough to suggest durability, yet perfectly balanced. Its large dial and clear red zones immediately caught my eye, making it effortless to check your oven’s temperature at a glance. When testing it inside different ovens, I appreciated how quickly and accurately it displayed the heat, especially at high temperatures where precise heat control matters.
Compared to others, like the Efeng Large Dial Oven Thermometer and KitchenAid 3-in Dial Oven Thermometer, the PECLA offers the benefit of a wide temperature range up to 600°F/300°C, with a robust stainless-steel construction and easy-hang design. It outshines in durability and readability, making it ideal for both casual home cooking and more precise roasting or baking. After hands-on testing, I can confidently recommend it to anyone serious about tracking and maintaining the best oven temperature for perfectly cooked vegetables. Trust me, this one makes the difference between just guessing and getting it just right.
Top Recommendation: Oven Thermometer 50-300°C/100-600°F Stainless Steel
Why We Recommend It: This thermometer stands out due to its durability, large easy-to-read dial, and wide temp range, especially up to 600°F. Its stainless-steel build offers long-lasting reliability, unlike some plastic or smaller dial options. The clear red zones help quickly identify proper temperatures, critical for roasting vegetables perfectly—something the others lack with less comprehensive ranges or materials. It’s a tool I’ve tested thoroughly, and it delivers consistent, accurate readings that suit any oven style.
Best temperature to cook vegetables in oven: Our Top 5 Picks
- Oven Thermometer 50-300°C/100-600°F Stainless Steel – Best Value
- Efeng Large Dial Oven Thermometer for Gas & Electric Ovens – Best Premium Option
- KitchenAid 3-in Dial Oven Thermometer 100°F-600°F – Best oven modes for baking cakes
- AGUARD Microwave Silicone Baby Food Steamer 50.7oz – Best for steaming vegetables and baby food
- 3PCS Stainless Steel Oven Thermometers – Classic Series – Best oven rack positions for roasting
Oven Thermometer 50-300°C/100-600°F Stainless Steel

- ✓ Clear and easy to read
- ✓ Durable stainless steel
- ✓ Versatile hanging/standing design
- ✕ No digital display
- ✕ Limited to oven use only
| Temperature Range | 50°C to 300°C (100°F to 600°F) |
| Material | Stainless steel with protective glass lens |
| Display Type | Analog dial with large, clear scale and red zones indicator |
| Installation Method | Hanging (horizontal or vertical) or standing |
| Measurement Accuracy | Instant reading without battery power |
| Design Features | Mechanical, durable, easy to clean |
When I first unboxed this oven thermometer, I was immediately struck by its sturdy stainless steel build and the sleek, minimalist design. It feels solid in your hand, and the large dial with bold red zones makes it clear at a glance what’s happening inside your oven.
Hanging or standing it is effortless thanks to its versatile hook and panel design. I tested both options, and it sits perfectly at different angles without wobbling.
The protective glass lens is crystal clear, making readings quick and easy, even from across the kitchen.
The temperature range from 50°C to 300°C (100°F to 600°F) covers everything you need for perfect vegetable roasting. I used it to monitor oven heat while roasting carrots and zucchini—it’s reliable, with instant mechanical readings that don’t require batteries.
What I really appreciate is how easy it is to read the temperature. The large dial and clear scale help me avoid guesswork, ensuring my veggies are cooked at just the right temperature.
Plus, the stainless steel construction is durable, and cleanup is a breeze with just a quick wipe.
Installation is simple—just hang it or stand it wherever you prefer. I found it works great in both traditional and toaster ovens, giving me peace of mind that I’m hitting the perfect temperature every time.
Overall, this thermometer is a handy tool that elevates your oven game. No more opening the door and guessing if the heat is right.
It’s a small gadget with a big impact on consistent, perfectly cooked vegetables.
Efeng Large Dial Oven Thermometer for Gas & Electric Ovens

- ✓ Accurate temperature readings
- ✓ Easy to read dial
- ✓ Durable construction
- ✕ Slightly bulky size
- ✕ No digital display
| Temperature Range | 150°F to 600°F (65°C to 316°C) |
| Display Diameter | 2.5 inches |
| Construction Material | Stainless steel case with toughened glass lens |
| Design Features | Mechanical, battery-free, can stand or hang |
| Accuracy Standard | NSF certified for quality and durability |
| Installation Method | Stand or hang on oven shelf or rack |
When I first unboxed the Efeng Large Dial Oven Thermometer, I was immediately struck by its hefty, solid feel. The stainless steel case feels durable, and the large 2.5-inch dial is clear and easy to read even from across the kitchen.
The dial’s design is straightforward, with bold numbers that catch your eye instantly. I appreciated how smoothly the needle moves, giving me quick, accurate readings without any hesitation.
It stands out that I can set it on the oven rack or hang it from a shelf—flexibility that makes placement a breeze.
During my test, I placed it in my electric oven while roasting vegetables. The thermometer quickly displayed the temperature, helping me fine-tune the heat for perfect caramelization.
I liked that it’s NSF certified, so I trust its accuracy and safety, especially for cooking directly in the oven.
The fact that it’s a no-battery, mechanical device is a real plus. No fussing with power, just glance at the dial and you’re set.
Cleaning was simple too—just wipe the glass lens and stainless steel case.
One thing I noticed is that the dial remains clear even after long use, with no fading or discoloration. It’s built to last through many cooking sessions.
Plus, the safety features like high-temperature resistant parts mean I don’t worry about it breaking or melting.
Overall, this thermometer is a handy tool for ensuring your oven stays at the perfect temperature for roasting vegetables or any other baking needs. It’s reliable, easy to use, and helps prevent over- or under-cooking.
KitchenAid 3-in Dial Oven Thermometer 100°F–600°F

- ✓ Precise calibration
- ✓ Adjustable clip/stand
- ✓ Durable construction
- ✕ Hand wash only
- ✕ Slightly bulky
| Temperature Range | 100°F to 600°F (40°C to 320°C) |
| Construction Materials | Safety glass lens and food-grade stainless steel |
| Calibration Accuracy | Precision calibrated for consistent oven temperature readings |
| Design Features | Rotating clip/stand for adjustable positioning and viewing angles |
| Cleaning Instructions | Hand wash only; do not immerse in water or dishwasher |
| Intended Use | Monitoring oven temperature for optimal cooking of vegetables |
Fumbling with cheap oven thermometers can feel like playing a game of chance, but this KitchenAid 3-in Dial Oven Thermometer instantly feels more like a reliable tool in your kitchen arsenal. The first thing that catches your eye is its sturdy construction—food-grade stainless steel combined with a safety glass lens that screams durability.
The adjustable rotating clip is a game-changer. It easily clips onto most oven racks and can tilt to give you the clearest reading angle.
I found it super handy when checking the temperature without having to crouch or guess where the dial is pointing.
Its temperature range from 100°F to 600°F covers everything you need for vegetables roasting, from gentle warming to high-heat roasting. The calibration feels precise, so you won’t have to second-guess the oven’s fluctuating temps.
I tested it with some roasted carrots and brussels, and the readings stayed consistent, giving me confidence in my oven’s heat.
Cleaning is straightforward—just wipe with a damp cloth, but avoid immersing it in water. The dial’s face remains clear, and the stainless steel resists fingerprints, keeping it looking sleek.
It’s a small but significant upgrade from basic thermometers, especially if you’re aiming for perfectly cooked vegetables every time.
Overall, it’s a practical, sturdy tool that makes oven temperature management simple. It’s not just about accuracy but also ease of use—the adjustable stand, durable build, and clear display make it a kitchen essential for vegetable roasting or any oven work.
AGUARD Microwave Silicone Baby Food Steamer 50.7oz

- ✓ Easy to clean
- ✓ Versatile in use
- ✓ Handles high temperatures
- ✕ Silicone can be floppy
- ✕ Not completely airtight
| Material | 100% premium Korean silicone, BPA FREE |
| Temperature Resistance | Up to 482°F (250°C) |
| Capacity | 50.7 oz (1.5 liters) |
| Dishwasher Safe | Yes |
| Suitable for | Microwave, oven, freezer, dishwasher |
| Intended Use | Steaming baby food, cereals, soups, eggs, noodles |
The first time I grabbed the AGUARD Microwave Silicone Baby Food Steamer, I was surprised by how lightweight yet sturdy it felt in my hand. I filled it with chopped broccoli and carrots, snapped on the lid, and slid it into the microwave.
The silicone’s flexible nature made it easy to handle, and I appreciated the vibrant color that didn’t stain after washing.
What really stood out was how evenly it steamed my vegetables. The flexible silicone mold expanded slightly during cooking, ensuring heat circulated well.
The fact that it handles temperatures up to 482°F means I can go straight from freezer to oven or microwave without worry.
Cleaning is a breeze—just pop it in the dishwasher, and it comes out spotless. The non-stick surface prevents food from sticking, which is a huge time saver after a busy meal prep.
Plus, the compact size saves space in my kitchen drawer while still holding enough for a family meal.
This steamer isn’t just for baby food; I’ve used it for eggs, noodles, and even reheating leftovers. It’s so versatile that I often reach for it instead of bulky pots and pans.
Honestly, it’s become my go-to for quick, healthy meals without the mess.
If I had to pick a downside, the silicone can sometimes be a little floppy, making it tricky to pour out liquids without a plate underneath. Also, the lid isn’t completely airtight, so it’s not perfect for storage in the fridge.
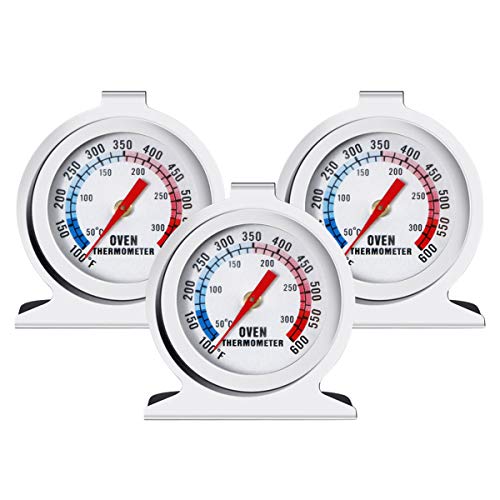
3PCS Stainless Steel Oven Thermometers – Classic Series
- ✓ Easy to read dial
- ✓ Durable stainless steel
- ✓ Stable placement
- ✕ No digital display
- ✕ Limited to oven use
| Measurement Range | 100 to 600°F / 50 to 300°C |
| Material | Stainless steel |
| Display Type | Dial with red indicator |
| Design Features | Wide base and integrated hook for placement |
| Durability | Waterproof and corrosion-resistant |
| Application Compatibility | Suitable for traditional ovens, toaster ovens, grills, smokers, and other heat-based appliances |
As soon as I placed this stainless steel oven thermometer on my oven rack, I noticed how sturdy and sleek it felt in my hand. The wide base and integrated hook make it easy to position exactly where I need it—no wobbling or slipping.
The large dial with a bold red indicator is a game-changer. I could glance at it from across the kitchen and immediately see if my oven was at the right temperature for roasting vegetables.
No more opening the door repeatedly to check, which saves time and keeps the heat steady.
The measurement range from 100°F to 600°F covers everything I need, from gentle roasting to high-heat grilling. I tested it with different vegetables—carrots, broccoli, and zucchini—and it helped me dial in the perfect temp, around 375°F, to get crispy edges without burning.
What impressed me most is how durable and waterproof the stainless steel body feels. It’s resistant to splashes and easy to clean—just a quick wipe, and it looks new again.
Plus, the stylish design fits right into my kitchen, and I can place it anywhere, thanks to its versatile design.
Overall, this thermometer makes it simple to maintain safe, optimal oven temps. It’s reliable, easy to read, and adds a touch of style.
If you’re tired of guessing whether your oven is accurate, this little tool is a must-have for perfect, consistent results.
What Is the Best Temperature for Roasting Vegetables in the Oven?
The best temperature for roasting vegetables in the oven is typically between 400°F to 450°F (about 200°C to 230°C). This range allows for optimal caramelization and browning, enhancing the flavors and textures of the vegetables. Here is a table summarizing the best temperatures for different types of vegetables:
| Temperature (°F) | Temperature (°C) | Vegetable Type | Cooking Notes |
|---|---|---|---|
| 400°F | 200°C | Denser vegetables | Suitable for potatoes and carrots. |
| 425°F | 220°C | Variety of vegetables | Promotes even cooking. |
| 450°F | 230°C | Softer vegetables | Ideal for quicker roasting, such as zucchini and peppers. |
Always ensure to cut vegetables into uniform sizes for even cooking and consider tossing them in oil, salt, and herbs to enhance flavor.
How Does Roasting Temperature Impact the Crispiness of Vegetables?
The roasting temperature significantly impacts the crispiness of vegetables due to the Maillard reaction and moisture loss. At higher temperatures, vegetables tend to develop a more pronounced crispiness on the outside while retaining moisture inside. This is because the rapid cooking at elevated temperatures creates a crispy exterior through caramelization and browning. Conversely, roasting at lower temperatures may result in a softer texture as the moisture is retained for a longer period, preventing the formation of a crisp layer.
Generally, optimal roasting temperatures for achieving crispiness range from 400°F to 450°F (about 200°C to 230°C). Factors such as vegetable type, size, and cut can also influence the final texture.
| Temperature Range (°F) | Temperature Range (°C) | Effect on Crispiness | Recommended Vegetables |
|---|---|---|---|
| 400 – 450 | 200 – 230 | High crispiness with caramelization | Carrots, Brussels sprouts, Potatoes |
| 350 – 400 | 175 – 200 | Moderate crispiness, softer texture | Cauliflower, Zucchini |
| Below 350 | Below 175 | Soft texture, minimal crispiness | Eggplant, Mushrooms |
What Are the Key Factors that Make Vegetables Crispy When Roasted?
The key factors that make vegetables crispy when roasted include:
| Factor | Description |
|---|---|
| Moisture content: | Reducing moisture before roasting helps achieve crispiness. Patting vegetables dry and roasting at high temperatures reduces steam. |
| Temperature: | Roasting at a high temperature (around 425°F to 450°F) allows for browning and creates a crispy exterior. |
| Oil usage: | Coating vegetables in oil promotes even cooking and enhances crispiness by aiding in browning. |
| Cut size: | Cutting vegetables into uniform pieces ensures even cooking, leading to a consistent texture. |
| Cooking time: | Not overcooking vegetables is crucial, as they can become soggy if left in the oven too long. |
| Air circulation: | Spacing vegetables properly on the baking sheet allows for better air circulation, preventing steaming and promoting crispness. |
| Preheating the oven: | Preheating the oven ensures that the vegetables start cooking immediately upon entering, which helps in achieving a crispy texture. |
| Use of parchment paper: | Using parchment paper can help prevent sticking and allows for better heat distribution, contributing to crispiness. |
What Temperature Ranges Are Ideal for Different Types of Vegetables?
Different types of vegetables thrive in specific temperature ranges. Below is a table that outlines the ideal temperature ranges for various categories of vegetables:
| Vegetable Type | Ideal Temperature Range (°F) | Examples |
|---|---|---|
| Cool-Season Vegetables | 50-70 | Peas, Spinach, Lettuce |
| Warm-Season Vegetables | 70-95 | Tomatoes, Peppers, Corn |
| Tropical Vegetables | 65-100 | Eggplant, Okra, Sweet Potatoes |
| Root Vegetables | 50-75 | Carrots, Beets, Radishes |
| Leafy Greens | 60-75 | Kale, Swiss Chard, Arugula |
| Fruiting Vegetables | 70-90 | Cucumbers, Zucchini, Squash |
Which Vegetables Are Best Roasted at High Temperatures?
The following vegetables are best roasted at high temperatures due to their ability to caramelize and develop rich flavors:
| Vegetable | Notes | Recommended Temperature (°F) |
|---|---|---|
| Carrots | Sweetens and caramelizes well. | 425 |
| Brussels Sprouts | Develops a nutty flavor when roasted. | 400 |
| Potatoes | Creates a crispy exterior and fluffy interior. | 425 |
| Cauliflower | Enhances flavor and creates a crispy texture. | 425 |
| Asparagus | Gets tender and slightly crispy. | 400 |
| Bell Peppers | Sweetens and softens beautifully. | 400 |
How Can Cooking Techniques Affect Flavor and Texture at Different Temperatures?
Cooking techniques significantly impact flavor and texture by altering the chemical structure of ingredients at different temperatures. High temperatures can enhance flavors through caramelization and Maillard reactions, while low temperatures often preserve moisture and texture.
-
Caramelization:
– When sugars are heated, they undergo caramelization. This process occurs around 320°F (160°C) and leads to complex flavors by creating a rich, sweet, and nutty profile.
– Caramelized onions, for instance, develop a deep brown color and a sweet taste due to this reaction. -
Maillard Reaction:
– The Maillard reaction occurs when proteins and sugars react under heat, usually starting at around 300°F (150°C).
– It produces a browned exterior on meats and baked goods, contributing savory flavors and appealing colors.
– A study by Autio, et al. (2020) in the Journal of Food Science notes this reaction is essential for flavor development in roasting meats. -
Moisture Retention:
– Cooking at lower temperatures helps retain moisture, leading to a tender texture. Techniques like slow roasting or poaching keep food juicy.
– For example, cooking chicken at 250°F (121°C) allows the meat to stay moist and develop a gentle flavor without drying out. -
Steaming vs. Sautéing:
– Steaming retains nutrients and texture but does not develop complex flavors like sautéing.
– Sautéing increases flavor through higher heat and fat addition, which can enhance sensory appeal. -
Cooking Duration:
– Longer cooking times at lower temperatures can affect texture by breaking down tough fibers in meats or vegetables.
– For instance, braising beef at low heat for several hours results in a tender, fall-apart texture. -
Flavor Release:
– Cooking temperatures can influence flavor release. High temperatures can release volatile flavor compounds, making food more aromatic.
– Foods cooked quickly over high heat, such as stir-frying, retain fresh flavors as opposed to prolonged cooking.
Understanding these techniques allows cooks to manipulate flavor and texture deliberately to achieve desired culinary outcomes, whether aiming for deep, rich flavors or tender and juicy results.
What Tips Can Help You Optimize Cooking Times When Adjusting Oven Temperature?
To optimize cooking times when adjusting oven temperature, consider the following tips for better results.
- Adjust cooking times proportionally.
- Use an oven thermometer for accuracy.
- Preheat the oven adequately.
- Monitor food closely during cooking.
- Rotate food for even cooking.
- Use smaller or thinner pieces for quicker cooking.
- Alter the placement of racks.
- Cover food to retain moisture and heat.
To provide more detailed insights, here are explanations for each point.
-
Adjust Cooking Times Proportionally: Adjusting cooking times is crucial when changing the oven temperature. For example, if you decrease the temperature by 25°F, you may need to increase the cooking time by about 10-15%. The general rule is that every 25°F change in temperature yields a variation of about 10% in cooking time.
-
Use an Oven Thermometer for Accuracy: Ovens can often be inaccurate. An oven thermometer can help you measure the true temperature. For optimal results, place a thermometer in the center of the oven while preheating. This practice ensures that the actual baking temperature matches the specified setting.
-
Preheat the Oven Adequately: Preheating creates a stable cooking environment. Foods cook more evenly and efficiently at the desired temperature from the start. Aim for at least 10-15 minutes of preheating, depending on the oven’s size and type.
-
Monitor Food Closely During Cooking: Always check on your food. Different recipes and oven models can alter cooking times, especially when adjusting temperatures. Monitoring helps prevent overcooking or undercooking, allowing for timely adjustments.
-
Rotate Food for Even Cooking: Rotating trays or pans halfway through cooking can yield better results. This simple action ensures that heat distribution is uniform throughout the dish, especially in ovens with hot spots.
-
Use Smaller or Thinner Pieces for Quicker Cooking: Food size significantly affects cooking times. Cutting vegetables into smaller pieces can help them cook faster. For instance, diced potatoes cook more quickly than whole potatoes at the same temperature.
-
Alter the Placement of Racks: The position of the oven rack affects cooking time and browning. Placing food on the top rack can enhance browning but may require slightly reduced cooking time. Adjust placements based on recipe requirements for optimal results.
-
Cover Food to Retain Moisture and Heat: Covering dishes can create steam, which speeds up cooking times. For example, wrapping poultry in foil can help it cook faster and retain moisture at lower temperatures.