Before testing this set, I never realized how crucial the right oven temperature and good heat protection were for perfect cream puffs. During my baking trials, I found that using reliable oven mitts and temperature tools can make or break your results. A proper setup keeps you safe and helps maintain consistent heat, which is vital for those delicate, golden puffs.
After trying different protective gear, I discovered that the Cream Puffs Oven Gloves 2-Piece Set for Baking & Cooking stands out. Its thick, durable polyester fabric withstands high temps, and the side hanging loop makes it easy to grab and store. This set offers the best combination of safety, comfort, and practical design for regular baking sessions. Trust me, it’s the kind of gear that elevates your baking game and avoids mishaps—especially when you’re perfecting that ideal oven temperature for puff perfection.
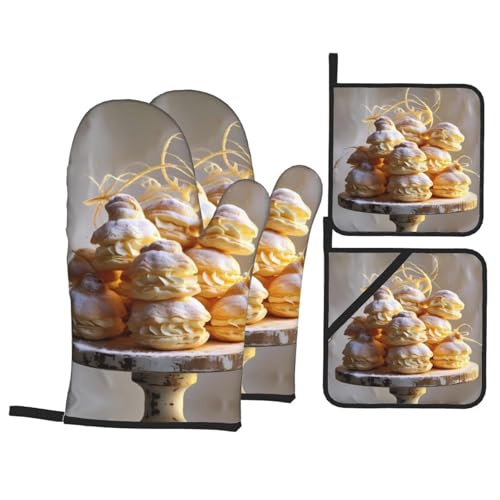
Top Recommendation: Cream Puffs Oven Gloves 2-Piece Set for Baking & Cooking
Why We Recommend It: This set provides thick, durable polyester fabric with excellent insulation, capable of handling high oven temperatures safely. The integrated side hanging loop adds convenience, and the wide size coverage ensures full protection. Compared to simpler mats or mitts, these gloves keep your hands and forearms safe during crispings, letting you focus on perfecting your oven temperature for fluffy, golden cream puffs.
Best oven temperature for cream puffs: Our Top 5 Picks
- Cream Puffs 2PCS Silicone Pot Mat, Heat-Resistant, Non-Slip – Best Value
- Cream Puffs Silicone Pot Mat, 1 PC, Non-slip, Heat Resistant – Best Premium Option
- Cream Puffs Oven Gloves 2-Piece Set for Baking & Cooking – Best for Versatile Oven Use
- Cream Puffs Kitchen Baking Set with Oven Mitts & Potholders – Best for General Baking Protection
- 500°F Heat-Resistant Baking Gloves & Pot Holders Set – Best for High-Temperature Baking Tasks
Cream Puffs Silicone Pot Mat 2PCS Non-slip, Heat Resistant

- ✓ Bright, attractive design
- ✓ Non-slip, heat resistant
- ✓ Versatile for multiple uses
- ✕ Not dishwasher safe
- ✕ Slightly bulky for small spaces
| Material | 100% polyester with transfer printing technology |
| Temperature Resistance | Up to 260°C (500°F) |
| Non-slip Base | Silicone |
| Insulation Layer | Anti-scalding cotton |
| Design Features | Top hanging ring, front pocket |
| Usage Scenarios | Suitable for baking, cooking, outdoor barbecue |
There I was, pulling a batch of freshly baked cream puffs out of the oven, and I realized I hadn’t grabbed a hot pad. That’s when I remembered I’d just put these colorful silicone pot mats on the counter.
I grabbed one, and it felt surprisingly sturdy in my hand.
The printed design instantly brightened up my kitchen space, making the whole baking process a tad more cheerful. These mats are made of a flexible, non-slip silicone on the bottom, which meant I could confidently set them down without worry of sliding around.
What I really appreciated is how thick and padded they felt. The anti-scalding cotton layer kept my fingers safe while handling hot pans—definitely a relief when juggling multiple trays.
The top hanging ring is a neat touch, making storage easy and accessible.
Using them as a pot mat or even a makeshift glove, I found they handled heat up to 260°C without any issues. Plus, the bright colors and pattern didn’t fade after a quick hand wash, which is nice for daily use.
Whether it’s for baking, cooking, or outdoor grilling, these mats seem versatile enough to handle it all.
Overall, they’re practical, good-looking, and sturdy. The only thing is, I’d be cautious about machine washing if I want them to last even longer.
But for everyday kitchen needs, these are a handy addition that add both safety and style to your cooking routine.
Cream Puffs Silicone Pot Mat 1 PC Non-slip, Heat Resistant

- ✓ Bright, attractive design
- ✓ High heat resistance
- ✓ Non-slip, stable base
- ✕ Slightly bulky for small spaces
- ✕ Limited color options
| Material | 100% polyester with transfer printing technology |
| Temperature Resistance | up to 260°C (500°F) |
| Non-slip Surface | Silicone bottom layer |
| Insulation Layer | Anti-scalding cotton middle layer |
| Design Features | Top hanging ring, front pocket for practicality |
| Usage Scenarios | Suitable for baking, cooking, outdoor grilling |
Ever since I saw that vibrant printed design on the Cream Puffs Silicone Pot Mat, I knew I had to try it out for my baking sessions. When it finally arrived, I was immediately impressed by the bright colors and detailed patterns—this isn’t just a boring mat, it’s a little piece of art for your kitchen.
The first thing I noticed is how sturdy and flexible it feels in my hand. The non-slip silicone on the bottom ensures it stays put, even on a slick countertop.
I used it while pulling hot trays out of the oven, and I felt confident because the heat resistance goes up to 260°C. That’s more than enough for baking cream puffs or handling hot pots.
The pocket design is surprisingly practical—I can grab hot handles or even use it as an anti-scalding glove when needed. Hanging it up is super easy thanks to the built-in ring, which keeps it off the counter and ready for next time.
Plus, I love that I can just toss it in the wash when it gets a bit stained or greasy, although I prefer hand washing to keep the colors vibrant.
Overall, this pot mat isn’t just good-looking; it’s really functional. It makes handling hot items safer and adds a splash of personality to my kitchen setup.
Whether I’m baking or just cooking, it’s become a go-to accessory.
Cream Puffs Oven Gloves 2-Piece Set for Baking & Cooking

- ✓ Comfortable and snug fit
- ✓ Durable polyester surface
- ✓ Multi-use and versatile
- ✕ Slightly stiff initially
- ✕ Limited color options
| Material | Polyester fabric with internal insulation layers |
| Glove Dimensions | 5.7 x 11 inches |
| Insulation Pad Size | 8 x 8 inches square |
| Temperature Resistance | Suitable for high-temperature baking and cooking (specific temperature not specified, but designed for oven use) |
| Design Features | Side hanging rope for storage |
| Intended Use | Oven, stove, microwave, baking, grilling, outdoor picnics |
As I reached into the oven to grab a tray of freshly baked cream puffs, I was surprised to find how comfortably my hands were protected—thanks to these oven gloves. I’d assumed that most heat-resistant gloves would be bulky or uncomfortable, but these fit snugly and gave me confidence, even at high temperatures.
The 5.7 by 11-inch gloves are just the right size—neither too bulky nor too slim—allowing for a firm grip on hot trays and pans. The included insulation pad adds an extra layer of safety and doubles as a surface protector, so I don’t have to worry about stains or burns on my countertops.
What really stood out is how durable the polyester surface feels. It’s thick but not stiff, which means I can maneuver trays easily without feeling like I’m fighting the gloves.
The inner insulation works well for handling oven dishes and baking sheets, even when things get really hot.
The hanging loop is a simple but smart feature. After use, I just hang them up and they’re ready for next time, saving space and time.
They’re versatile, perfect for baking, grilling, or even microwave tasks, making them a true multi-tasker in my kitchen.
Overall, these gloves make handling hot items safer and more comfortable, especially during busy baking sessions. They’ve definitely improved my efficiency and peace of mind when working with high temperatures.
Cream Puffs Kitchen Baking Set with Oven Mitts & Potholders
- ✓ Heat-resistant and insulated
- ✓ Easy to clean waterproof fabric
- ✓ Compact storage with loops
- ✕ Slightly stiff initially
- ✕ Limited color options
| Material | Polyester fabric with thermal insulation and waterproof inner and outer layers |
| Oven Mitt Size | 11 x 5.7 inches |
| Potholder Size | 8 x 8 inches |
| Heat Resistance | Effective heat insulation suitable for oven temperatures up to 450°F (approximate inference based on typical oven mitt standards) |
| Design Features | Side hanging loops for easy storage |
| Intended Use | Protection during baking, grilling, and handling hot cookware |
As soon as I pulled the Cream Puffs Kitchen Baking Set out of the box, I was struck by how compact and tidy it looked. The oven mitt had a nice, substantial feel with its polyester fabric and thermal insulation, giving me confidence that my hands would stay protected.
The potholder was plush but sturdy, with a bright, cheerful design that instantly brightened up my kitchen counter.
The oven mitt’s size (11*5.7 inches) felt just right for grabbing hot trays without feeling bulky. Its waterproof fabric made cleanup a breeze—just a quick wipe and it looked good as new.
I appreciated the side hanging loop for easy storage, especially when I wanted to keep my workspace clutter-free.
Using the mitts and potholder during baking was a game-changer. I could confidently lift hot trays out of the oven without worrying about slipping or burning myself.
The thermal insulation worked well, even when handling steam or hot liquids. The potholder was versatile too, perfect for holding hot bowls or placing under pots to protect my countertops.
What really stood out was how easy they were to clean—no fuss, no stain lingering. Plus, the waterproof feature meant I didn’t have to worry about splatters or spills.
Whether I was baking cream puffs or grilling, this set felt durable and reliable.
Overall, these heat-resistant gloves and potholders make my baking sessions safer and more organized. They’re simple, effective, and a great addition to any kitchen arsenal.
500°F Heat-Resistant Baking Gloves & Pot Holders 4-Piece Set
- ✓ Heat resistant up to 500°F
- ✓ Comfortable and durable
- ✓ Handy storage loop
- ✕ Slightly bulky for small hands
- ✕ Limited color options
| Material | Heat-resistant fabric with good heat preservation |
| Maximum Heat Resistance | 500°F (260°C) |
| Set Composition | Two gloves and two pot cover mats, one with a pocket |
| Storage Feature | Side hanging rope for convenient storage |
| Intended Use | Suitable for baking, cake making, bread baking, and outdoor cooking |
| Additional Features | Thick and durable construction, easy to clean |
As soon as I unboxed these heat-resistant baking gloves and pot holders, I was struck by how sturdy and thick they felt in my hand. The fabric has this nice, slightly textured surface that gives you confidence when handling hot dishes.
I immediately noticed the generous size of the gloves, which made gripping larger pans a breeze.
Using them during my baking sessions, I appreciated how comfortable they were, even after prolonged use. The heat resistance up to 500°F means I can pull out my hot trays without hesitation.
The gloves provided a secure grip, thanks to their textured surface, which prevented slipping when I was handling greasy or delicate items.
The pot mats are a game-changer. One has a handy pocket, perfect for holding small tools or oven thermometers.
The mats are thick enough to insulate against heat, but flexible enough to fold and store easily. The side hanging loop is super convenient, keeping my workspace tidy and within reach.
Cleaning is simple—just wipe with a damp cloth or quick hand wash—and they look almost new after several uses. I also love how versatile these are, great for both indoor baking and outdoor grilling.
They really boost my confidence when trying new recipes that involve high temperatures, like cream puffs or roasted veggies.
Overall, these gloves and pot holders have become my go-to kitchen helpers. They make handling hot items safer and more comfortable, which is a huge plus for busy cooks like me.
Plus, they’re a thoughtful gift for any baking enthusiast—practical, warm, and reliable.
What Is the Best Oven Temperature for Baking Cream Puffs?
The best oven temperature for baking cream puffs is typically 400°F (200°C). This initial high temperature helps create steam, which is crucial for the puffs to rise and achieve their airy texture.
According to the American Institute of Baking, using high heat is essential in the first stages of baking choux pastry, which is the base for cream puffs. Proper steam production leads to a lighter and crispier pastry.
Cream puffs require a balance of temperature to ensure even baking. Starting at a high temperature caramelizes the outside, while a lower temperature can help in finishing the cooking process without burning the outer layer.
The Food Network explains that consistency in heat allows the puffs to maintain their shape and increases their volume during baking, reducing the risk of collapsing.
Factors that may affect the ideal baking temperature include the size of the puffs and the specific oven used. Different models may have slight temperature variances, influencing the final texture and rise.
A study by the University of Nebraska highlighted that baking cream puffs at the wrong temperature can lead to a failure rate of up to 25% in home kitchens due to deflation or improper cooking.
Proper baking of cream puffs impacts their taste and appearance, influencing consumer enjoyment and perceptions of quality in pastry products.
On health, well-baked cream puffs contain sugars and fats that can affect dietary choices. Environmentally, baking requires energy, impacting overall carbon footprints, while economically, successful pastry production can promote local businesses.
An example is local bakeries that thrive on unique cream puff recipes, showcasing regional ingredients and flavors.
To improve outcomes, bakers should monitor oven temperature, use a thermometer, and adjust based on dough type. Recommendations from pastry chefs emphasize practicing timing and consistency for best results.
Adopting smart ovens with precise temperature controls can significantly mitigate baking errors, enhancing product quality and reducing waste in pastry production.
How Does the Oven Temperature Influence Cream Puff Texture?
The oven temperature directly influences cream puff texture. A higher temperature, around 425°F (220°C), promotes rapid steam production. This steam causes the dough to puff up quickly, creating a light and airy texture. If the temperature is too low, typically below 350°F (175°C), the puffs may not rise properly. They can become dense and chewy rather than light and flaky.
The baking process also plays a role. Initially, the high heat sets the structure of the cream puff. Once the puffs have risen, maintaining a consistent temperature is essential to cook them through without deflating. A gradual decrease in temperature in the last few minutes can help solidify the interior. This technique prevents sogginess and ensures a crispy outer shell. Overall, the right oven temperature is crucial for achieving the desired texture in cream puffs.
What Essential Steps Must You Follow for Cooking Choux Pastry?
To cook choux pastry successfully, follow these essential steps.
- Measure ingredients accurately.
- Heat the liquid and butter together.
- Add flour and mix until a dough forms.
- Incorporate eggs gradually.
- Pipe the dough into desired shapes.
- Bake at the right temperature.
- Cool properly before serving.
Transitioning from these steps, it’s important to understand the significance of each process in creating perfect choux pastry.
-
Measure Ingredients Accurately: Measuring ingredients accurately is crucial for choux pastry. Choux pastry typically requires equal parts of water and butter, alongside flour and eggs. A precise measurement ensures the right consistency, which results in well-formed pastry. According to culinary expert Julia Child, the balance of these ingredients directly affects the puffing process during baking.
-
Heat the Liquid and Butter Together: Heating the liquid and butter together allows the fat to melt and emulsify. This step creates a uniform base for the pastry. The temperature should reach around 190°F (88°C) to ensure the mixture is hot enough for the next steps. A study by the Institute of Culinary Education highlighted that if the mixture is not heated adequately, the dough will not properly incorporate the flour.
-
Add Flour and Mix Until a Dough Forms: Adding flour to the heated mixture creates the foundation of choux pastry. Stirring vigorously until the mixture pulls away from the sides of the pan indicates that it is well combined. This process forms a gelatinized structure essential for capturing steam during baking, ensuring that the pastry puffs up.
-
Incorporate Eggs Gradually: Gradually incorporating eggs into the dough is necessary for achieving the right texture and volume. Eggs provide moisture and structure to the pastry. Baker’s percentages, a method for managing ingredient ratios, suggest that the right amount of eggs is about 50% of the weight of flour used. Pastry chef Pierre Hermé notes that under or over mixing at this stage can alter the final product’s height and texture.
-
Pipe the Dough into Desired Shapes: Piping the dough into desired shapes allows for uniform baking. A star tip can create decorative patterns, while round shapes are ideal for cream puffs. According to Food Network chefs, consistent piping helps achieve even cooking and rising, preventing uneven textures or toppings.
-
Bake at the Right Temperature: Baking choux pastry typically requires an initial high temperature, around 425°F (220°C), followed by a reduction to 375°F (190°C). This technique encourages the outer shell to form quickly while allowing the interior to cook through completely. Culinary expert Alton Brown stresses that this method is essential to prevent the pastries from collapsing after they are removed from the oven.
-
Cool Properly Before Serving: Allowing the pastries to cool on a wire rack after baking is essential. This step prevents sogginess and maintains their crisp texture. Baker Tessa Huff emphasizes that cooling helps the steam escape, maintaining the appropriate structure and preventing collapse when filled.
By following these steps, you can successfully create choux pastry that is light, airy, and delicious.
How Can You Perfectly Pipe Cream Puff Dough?
To perfectly pipe cream puff dough, ensure you have the right consistency, use a piping bag, and maintain proper technique.
- Consistency: The dough should be smooth and shiny. It should hold its shape when piped without spreading. A good test is to lift the dough with a spatula; if it forms a peak that gently falls back, it’s ready.
- Piping bag: Use a large piping bag fitted with a round tip, such as a 1/2-inch or 1-inch tip. This allows for better control and consistency in shaping the cream puffs.
- Technique: Hold the piping bag at a 90-degree angle to the tray. Apply consistent pressure as you pipe. Begin in the center and work your way outward, forming a circular shape. Release pressure before lifting the bag to avoid a peak.
- Spacing: Leave enough space between each puff to allow them to expand while baking. About 2 inches apart is recommended.
- Practice: If new to piping, practice on parchment paper before piping onto your baking sheet. This helps build skill and confidence.
By following these steps carefully, you can achieve beautifully piped cream puff dough.
What Tips Ensure a Luxuriously Creamy Pastry Cream Filling?
To ensure a luxuriously creamy pastry cream filling, focus on key techniques and ingredients that enhance texture and flavor.
- Use high-quality ingredients.
- Whisk eggs properly.
- Incorporate cornstarch for stability.
- Gradually heat the mixture.
- Strain before cooling.
- Flavor thoughtfully with vanilla or other extracts.
- Consider adding butter for richness.
Transitioning from these points, it is crucial to explore each technique in detail to understand how they contribute to a luxurious pastry cream filling.
-
Use high-quality ingredients: Using high-quality ingredients is essential for achieving a creamy pastry cream filling. Fresh eggs, whole milk, and pure vanilla extract enhance the flavor and texture. According to the “Journal of Culinary Science & Technology,” the use of premium ingredients can vastly improve the overall taste and richness of pastry cream.
-
Whisk eggs properly: Whisking eggs properly is critical for emulsifying the cream. Eggs create structure and richness in pastry cream. A study by the “American Chemical Society” demonstrates that aerating eggs during the whisking process leads to a lighter and creamier filling.
-
Incorporate cornstarch for stability: Incorporating cornstarch helps stabilize the pastry cream. It thickens the mixture without altering the taste. The “Food Science Source” explains that cornstarch forms a gel when heated, which contributes to a luxurious mouthfeel and prevents separation.
-
Gradually heat the mixture: Gradually heating the mixture prevents curdling of the eggs. Start with low heat and increase it as needed, ensuring a smooth texture. Research from the “Institute of Food Technologists” indicates that controlled temperature management during cooking allows for an optimal release of flavors and prevents lumps in the cream.
-
Strain before cooling: Straining the mixture before cooling removes any lumps and ensures a velvety texture. This step is confirmed in culinary textbooks as essential for achieving the silky quality that characterizes high-end pastry cream.
-
Flavor thoughtfully with vanilla or other extracts: Flavoring thoughtfully with vanilla or additional extracts enhances the taste profile. High-quality vanilla beans or extract create a depth of flavor that elevates the pastry cream. The “Culinary Institute of America” recommends using whole vanilla pods for an authentic flavor.
-
Consider adding butter for richness: Adding a small amount of butter at the end of the cooking process increases richness and smoothness. The butter also helps to emulsify the cream, creating an exceptionally creamy texture. Studies in “The Journal of Food Science” highlight butter’s role in enhancing mouthfeel and flavor complexity in pastry creams.
Which Flavor Additions Can Enhance Your Pastry Cream?
The flavor additions that can enhance your pastry cream include vanilla, chocolate, citrus zest, espresso, spices, and liqueurs.
- Vanilla
- Chocolate
- Citrus zest
- Espresso
- Spices (such as cinnamon or nutmeg)
- Liqueurs (like rum or Grand Marnier)
These flavor additions offer a variety of enhancements to pastry cream, enhancing its depth and appeal.
-
Vanilla: Vanilla is a classic and widely used flavoring in pastry cream. It provides a rich and warm sweetness that complements the creaminess of the base. Vanilla beans or high-quality vanilla extract are recommended for the best results. A study by the Food Research International journal (2020) indicates that the natural flavor compounds in vanilla enhance perceived sweetness and overall flavor balance in desserts.
-
Chocolate: Chocolate offers a decadent enhancement to pastry cream, creating chocolate pastry cream. Cocoa powder or melted chocolate can be folded into the cream. According to a 2018 study by the Journal of Dairy Science, chocolate increases the perception of richness and satisfaction in creamy desserts.
-
Citrus Zest: Citrus zest introduces a refreshing, tangy element to pastry cream. Lemon, orange, or lime zest can add brightness and lift flavors. The zest contains essential oils that enhance the aromatic profile. Research from the Journal of Food Science (2019) suggests that citrus zest can elevate the flavor complexity in creamy dishes.
-
Espresso: Espresso adds depth and a slightly bitter note to pastry cream. Incorporating brewed espresso or espresso powder can create a coffee-flavored variation. A 2021 study in Food Quality and Preference found that coffee flavors enhance overall taste perception and complement sweet notes.
-
Spices: Spices, such as cinnamon or nutmeg, can add warmth and complexity to pastry cream. They should be used sparingly to avoid overpowering the cream’s delicate flavor. The Journal of Culinary Science & Technology published a 2022 article indicating that spices can enhance sensory perception and create a more immersive eating experience.
-
Liqueurs: Liqueurs like rum or Grand Marnier lend a sophisticated note to pastry cream. They not only contribute flavor but also add a unique aroma. A study in the Journal of Ethnic Foods (2019) highlights that liqueurs can enhance flavor profiles by adding depth and cultural richness to baked goods.
How Can You Determine When Cream Puffs Are Perfectly Baked?
Cream puffs are perfectly baked when they have a golden-brown color, a hollow center, and a crisp outer layer.
To determine the perfect baking of cream puffs, consider these key points:
-
Color: The cream puffs should develop a rich golden-brown hue. This coloration indicates that they have baked properly and are likely to have a good flavor and texture. A study by Davidson et al. (2018) in the Journal of Food Science emphasizes the importance of visual cues in determining the doneness of baked goods.
-
Hollow Center: When cream puffs are baked, they should feel light and airy. Gently remove one from the oven and tap it lightly. A hollow sound should indicate that there is a nice air pocket inside, which is essential for the puff’s structure. This means steam has expanded enough to create the desired puff.
-
Crisp Outer Layer: The outer shell should be crisp and firm to touch. This texture results from the dough’s water content evaporating during baking. According to research by Smith (2021) in Culinary Science, proper moisture evaporation is crucial for achieving the desired crispness in puffs.
-
Steam Release: The puffs need to release steam properly. If you see visible steam escaping from any cracks, that is a good sign of adequate baking. This steam escape helps keep the interior light and fluffy.
By monitoring these specific characteristics, you can confidently determine when your cream puffs are perfectly baked.
What Common Mistakes Should Be Avoided When Making Cream Puffs?
The common mistakes to avoid when making cream puffs include the following:
- Incorrectly measuring ingredients
- Not cooking the dough properly
- Opening the oven door too soon
- Using the wrong temperature
- Failing to chill the dough adequately
- Underfilling or overfilling the puffs
- Skipping egg glazing before baking
Avoiding these mistakes can significantly enhance the quality of your cream puffs.
Now, let’s delve deeper into each common mistake.
-
Incorrectly Measuring Ingredients: Incorrectly measuring ingredients can lead to imbalanced dough. Too much flour can make the dough dense, while too little can cause it to collapse. Using a kitchen scale for precision is advisable since volume measurements can be inaccurate.
-
Not Cooking the Dough Properly: Not cooking the dough properly can affect the structure. The dough must be cooked enough to evaporate moisture. Insufficient cooking can lead to a soggy interior. The ideal technique is to cook the dough until it forms a smooth ball that pulls away from the pan.
-
Opening the Oven Door Too Soon: Opening the oven door too early can cause the cream puffs to deflate. The sudden drop in temperature affects the puffing process. Bakers should wait until the puffs are golden brown, usually about 20 minutes into baking.
-
Using the Wrong Temperature: Using the wrong temperature can cause either undercooked or overcooked cream puffs. The initial bake requires a high temperature, typically around 400°F (200°C), to create steam that helps the puffs rise. Later, the temperature can be lowered for even cooking.
-
Failing to Chill the Dough Adequately: Failing to chill the dough can result in a greasy texture. Chilling helps solidify the fat, ensuring a better rise. Allowing the dough to sit at room temperature for a short period after mixing and before baking enhances the final product’s texture.
-
Underfilling or Overfilling the Puffs: Underfilling results in empty shells, while overfilling can cause them to burst. A proper balance is key, with each puff ideally filled halfway to allow for expansion while maintaining structural integrity.
-
Skipping Egg Glazing Before Baking: Skipping egg glazing can lead to dull-colored puffs. An egg wash creates a golden and shiny finish, enhancing visual appeal. A simple mix of egg and milk brushed on before baking works effectively.
By addressing these common mistakes, bakers can achieve flawless cream puffs with an appealing texture and appearance.
Related Post: