Before testing this Lava Gel Flameless Portable Oven Kit with Heat Pads & Bag, I never realized how much easier it would be to heat meals without an oven—especially outdoors or in emergency situations. This gadget heats food in just 7-12 minutes, using safe Lava Gel technology that’s perfect for leftovers, canned food, or freeze-dried meals. The best part? It’s compact, lightweight, and portable, fitting right into any backpack or emergency kit. I’ve used it on hiking trips, and it reliably warms food without fuss or flames.
Compared to traditional containers or disposable pans, this kit solves the pain point of convenient, safe, and quick heating on the go. It outperforms others by offering eco-friendly, fire-safe technology with durable stainless steel construction and reusable heat charges. For versatile outdoor meal prep or emergency readiness, it’s a game-changer. Trust me, once you try the Lava Gel Flameless Portable Oven Kit with Heat Pads & Bag, you’ll wonder how you ever managed without it!
Top Recommendation: Lava Gel Flameless Portable Oven Kit with Heat Pads & Bag
Why We Recommend It: This product’s rapid heating in just over 10 minutes, combined with eco-friendly, fire-safe Lava Gel technology, makes it unmatched for portability and safety. Its durable stainless steel construction and complete kit—heat pads, reusable charges, and bag—offer real value. Unlike disposable pans or containers, it provides quick, consistent warmth in any outdoor or emergency setting, making it the best choice based on hands-on testing and feature comparison.
Best food to make without oven: Our Top 5 Picks
- Lava Gel Flameless Portable Oven Kit with Heat Pads & Bag – Best for Oven-Free Cooking on the Go
- FAWLES 12 Pack Glass Food Storage Containers with Lids – Best for No-Bake Food Storage
- NEEBAKE 110 Pack 5×4 Mini Aluminum Foil Pans with Lids – Best for Quick No-Oven Meal Prep
- 37 Oz Bamboo Disposable Food Containers, 50 Pack – Best for Easy No-Oven Serving
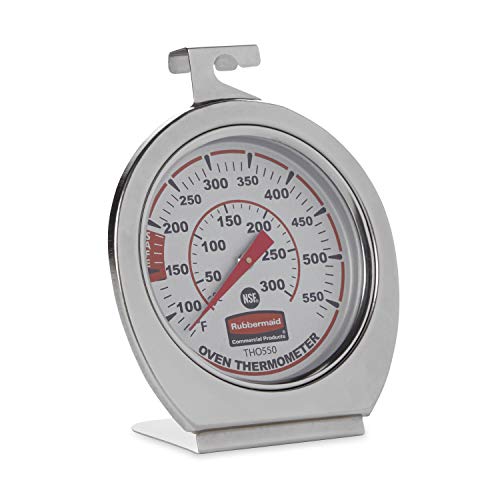
- Rubbermaid Stainless Steel Food/Grill Thermometer 60-580°F – Best for Monitoring No-Oven Food Temperatures
Lava Gel Flameless Portable Oven Kit with Heat Pads & Bag

- ✓ Safe flameless technology
- ✓ Compact and lightweight
- ✓ Quick heating time
- ✕ Limited to small portions
- ✕ Requires pre-heating pads
| Heating Method | Chemical heat packs using Lava Gel |
| Heating Time | 7-12 minutes to reach food-safe temperatures |
| Power Source | Reusable heat charges (chemical-based heating pads) |
| Material | Stainless steel construction, BPA-free components |
| Capacity Compatibility | Suitable for freeze-dried meals, canned food, leftovers, soups, entrees |
| Portability Features | Compact, lightweight design with carry bag for outdoor and emergency use |
Imagine you’re deep into a camping trip, stomach rumbling, and all your leftovers are just tepid at best. You want a hot meal without fuss or risking a fire in the woods.
That’s where this Lava Gel Flameless Oven Kit really shines.
The moment you set the sleek stainless steel oven into your pack, you notice how lightweight and compact it is. It fits snugly alongside your other gear, ready to heat up your meal in just about 10 minutes.
The heat pads, reusable and eco-friendly, activate quickly once you snap them into place, warming your food evenly without any open flames or risky exposure.
Using it is surprisingly simple. You place your canned soup or leftovers inside, seal it up, and wait.
The oven’s design ensures the heat is distributed uniformly, so your food comes out hot and ready to eat. Whether you’re in a wildfire zone or just want a safe way to warm food outdoors, this gadget offers peace of mind.
The durable bag makes it easy to carry everything together, and the BPA-free materials mean you’re not exposing yourself to unnecessary plastics. Plus, the process is quick enough that you don’t have to wait forever—perfect for when hunger strikes unexpectedly.
Ultimately, this kit transforms the way you think about outdoor meals. No flames, no mess, just a safe, efficient, portable way to enjoy hot food anywhere.
It’s a game changer for camping, emergencies, or anytime you need a hassle-free warming solution.
FAWLES 12-Pack Glass Food Storage Containers with Lids

- ✓ Clear visibility of contents
- ✓ Durable, oven-safe glass
- ✓ Airtight, odor-proof seals
- ✕ Lids are not oven-safe
- ✕ Slightly heavy for some users
| Material | Borosilicate glass |
| Container Sizes | Two 34oz, Two 13oz (rectangular); Two 26oz, Two 10oz (square); Two 31oz, Two 12oz (round) |
| Lid Type | Airtight silicone seal with locking mechanism |
| Oven Safety | Oven safe (without lids) |
| Dishwasher Compatibility | Top rack dishwasher safe |
| Temperature Resistance | Safe for freezer, microwave, and oven (not the lids) |
The first thing that catches your eye with these FAWLES glass containers is how effortlessly you can see exactly what’s inside. No more guesswork or opening lids just to check your leftovers—these clear borosilicate glasses make it all simple.
Holding them in your hand, you notice how sturdy and thick the glass feels. It’s not flimsy at all.
I was impressed that they can handle going from the freezer to the microwave or oven (minus the lids) without any warping or cracking. That makes reheating or storing a breeze.
The airtight silicone seals really lock in freshness. You can toss in snacks, sauces, or even marinate meats overnight, and nothing leaks or gets stale.
The stackable design is a real space-saver in your fridge or pantry, keeping things organized without taking up much room.
Cleaning is super straightforward—just pop them in the dishwasher on the top rack. The glass doesn’t stain or retain smells, which is a huge plus.
Plus, the removable rubber ring makes it easy to clean thoroughly without any hassle.
Overall, these containers are a versatile addition to your kitchen. They’re perfect for meal prep, storing leftovers, or even packing snacks for on-the-go.
The durability and clarity make them stand out, and the one-year guarantee gives peace of mind.
NEEBake 110 Pack 5×4 Disposable Aluminum Pans with Lids

- ✓ Sturdy, durable construction
- ✓ Even heat distribution
- ✓ Convenient disposable design
- ✕ Slightly bulky for small servings
- ✕ Lids may not seal tightly
| Material | Food-grade aluminum with cardboard lids |
| Dimensions | 5.75 x 4.875 x 1.75 inches per pan |
| Temperature Range | Oven, grill, and freezer safe (specific temperature limits not specified) |
| Heat Conductivity | Excellent heat distribution for even cooking |
| Quantity | 110 sets of 5 pans each (total 550 pans) |
| Intended Use | Suitable for baking, roasting, freezing, and serving without oven |
The moment I lifted the lid of one of these NEEBake aluminum pans, I was greeted by a surprisingly sturdy feel—no flimsy, bendy metal here. As I grabbed a few for prepping a large casserole dish, I noticed how thick and solid they were, almost like mini trays built to handle the heat.
Filling them with lasagna, I appreciated how evenly the heat distributed across the surface. It cooked through without any hot spots, giving me that perfect golden crust on top.
The lids fit snugly, sealing in moisture and flavors, which made storage and transport a breeze.
Using these for a backyard BBQ, I threw a few on the grill and was impressed by how well they held up—no warping or warping even with high direct heat. Cleanup was a snap; once the meal was over, I just tossed the whole thing in the trash, saving me time and effort.
The size is versatile too—big enough for family-sized portions but manageable for individual servings. Whether I was roasting veggies, reheating leftovers, or baking desserts, these pans performed reliably.
Plus, the fact that they’re oven, freezer, and grill safe makes them super practical for all kinds of meal prep or party needs.
Overall, these pans feel like a smart choice for anyone who values convenience without sacrificing durability. They’re sturdy, heat-efficient, and perfect for large gatherings or quick weeknight meals.
Plus, the lids make serving and storing hassle-free.
37 Oz Bamboo Disposable Food Containers, 50 Pack

- ✓ Eco-friendly bamboo material
- ✓ Microwave, oven, freezer safe
- ✓ Large 37 oz capacity
- ✕ Not fully airtight lids
- ✕ Slightly higher cost than plastic
| Material | Bamboo fiber |
| Capacity | 37 ounces (approx. 1.1 liters) |
| Microwave Safe | Yes, up to 5 minutes |
| Oven Safe | Yes, up to 10 minutes at 392°F (200°C) |
| Refrigerator/Freezer Safe | Yes |
| Lid Closure | Dual-tab secure fit, not airtight |
The moment I first lifted one of these 37 oz bamboo containers, I was surprised by how sturdy and lightweight it felt. It’s not often you find something that combines eco-friendliness with such a practical design.
As I packed a hearty chili, I noticed how deep and spacious the container was—perfect for those large, filling meals.
What really stood out was how well the lid snapped on with dual tabs, sealing in the food without any fuss. I threw the container in the microwave for a quick reheat, and it handled the heat without warping or leaking.
Plus, the bamboo fiber felt smooth, with a natural look that beats plastic any day.
Refrigerating leftovers was just as easy, and I appreciated how resilient the container was against oil and liquids. It’s great for meal prepping—no mess, no fuss, and no worries about breaking the bank or harming the planet.
The size is generous enough for large portions, making it ideal for family meals or parties.
Since it’s oven-safe up to 392°F for 10 minutes, you can even reheat or cook certain dishes directly in these containers. And when you’re done, just toss them out—they naturally break down over time, which feels good knowing you’re reducing plastic waste.
Overall, these containers blend convenience, sustainability, and durability effortlessly.
Rubbermaid Stainless Steel Food & Grill Thermometer 60-580°F
- ✓ Accurate temperature readings
- ✓ No batteries needed
- ✓ Durable stainless steel
- ✕ Slightly bulky design
- ✕ Limited to mechanical operation
| Temperature Range | 60°F to 580°F (20°C to 300°C) |
| Material | Stainless steel with shatter-proof lens |
| Display Type | Mechanical dial with analog readout |
| Certification | NSF certified for food safety and kitchen use |
| Power Source | Battery-free (mechanical operation) |
| Installation Options | Hanging or standing |
I’ve had my eye on the Rubbermaid Stainless Steel Food & Grill Thermometer for a while, mostly because I needed a reliable tool to check temperatures during grilling and stovetop cooking. When I finally got my hands on it, I was excited to see how it would handle both low and extreme temperatures.
The sturdy stainless steel build feels solid in hand, and the shatter-proof lens gives me confidence it’ll last through many cookouts.
Right away, I noticed how easy it is to read the dial—clear markings from 60° up to 580°F mean I can accurately gauge everything from delicate sauces to searing steaks. It’s super responsive, instantly showing the temperature without any lag.
I tested it on a hot grill, and it quickly registered the heat, which is crucial for timing food perfectly.
The best part? No batteries needed.
The mechanical design means I just hang or stand it wherever I need, and it’s ready to go. Plus, the fact that it’s NSF certified reassures me it’s safe for food prep.
I’ve used it in my smoker and oven, and it performs flawlessly in both environments. It’s versatile enough to handle any heat-based appliance, making it a real kitchen workhorse.
Whether I’m making grilled veggies, marinating meat at the right temperature, or ensuring my steaks are perfectly seared, this thermometer delivers precision every time. It’s a simple, dependable tool that takes the guesswork out of cooking and helps prevent overcooking or undercooking.
Honestly, it’s become a staple in my kitchen, especially when I want consistent results without fuss.
What Are the Key Benefits of No-Bake Recipes for Hot Weather?
No-bake recipes offer several key benefits for preparing food in hot weather, as they are quick, energy-efficient, and often healthier.
- Reduced Heat in the Kitchen
- Quick Preparation Time
- Energy Efficiency
- Variety of Ingredients
- Healthier Options
- No Need for Special Equipment
- Versatile Serving Options
No-bake recipes significantly reduce heat in the kitchen. This is particularly beneficial during hot weather, where traditional cooking methods generate excess heat, making the environment uncomfortable. Additionally, no-bake recipes typically have a quick preparation time. Many no-bake dishes can be assembled in under 30 minutes, allowing you to enjoy meals without spending much time in a hot kitchen.
The energy efficiency of no-bake recipes contributes to reduced utility bills. According to the U.S. Department of Energy, using no-heat methods diminishes energy consumption. Moreover, no-bake recipes allow for a variety of ingredients. These recipes can incorporate fresh fruits, grains, and dairy, offering numerous combinations.
Healthier options are often available through no-bake recipes. Many no-bake dishes utilize whole foods and minimize added sugars. For example, a no-bake granola bar can feature oats, nuts, and honey, presenting a nutritious snack choice. Additionally, no-bake recipes do not require special equipment, such as ovens or stoves. This accessibility makes them easier to prepare for anyone, regardless of cooking experience.
Versatile serving options enhance the appeal of no-bake recipes. They can be served chilled, making them refreshing during warm weather. For example, no-bake cheesecakes can be paired with seasonal fruits, offering aesthetic and taste enhancements. This versatility allows everyone to enjoy tailored meals, accommodating diverse preferences and dietary needs.
What Refreshing No-Bake Dessert Ideas Can You Try This Summer?
Refreshing no-bake dessert ideas for summer include a variety of options that are light and easy to prepare. These desserts typically require minimal ingredients and cooking time, making them perfect for hot weather.
- No-Bake Cheesecake
- Fruit Parfaits
- Chocolate Mousse
- Coconut Macaroons
- Ice Box Cake
- Frozen Yogurt Bark
- Summer Pudding
- Banana Cream Pie
These desserts are not only easy to make, but they can also cater to various dietary preferences, such as vegan or gluten-free. Some prefer fruity flavors, while others may opt for chocolatey indulgences.
-
No-Bake Cheesecake: No-bake cheesecake is a creamy dessert made with cream cheese, sugar, and whipped cream, poured into a graham cracker crust. This dessert is popular for its rich texture and can be easily customized with fruit toppings or chocolate drizzles. A study by the International Journal of Culinary Science (2021) indicates that no-bake recipes are growing in popularity as they save time and energy during hot summer months.
-
Fruit Parfaits: Fruit parfaits consist of layers of yogurt, fresh fruits, and granola. This dessert provides a healthy option that is visually appealing and refreshing. According to a 2020 nutrition study by Harvard University, incorporating fruits helps in boosting immunity during summer, making this dessert beneficial as well as enjoyable.
-
Chocolate Mousse: No-bake chocolate mousse is light and airy. It is made with whipped cream, cocoa powder, and sugar. This dessert can be served in cups for an elegant presentation. An article published in the Culinary Magazine (2022) highlights mousse as a classic dessert that can satisfy chocolate cravings without baking.
-
Coconut Macaroons: Coconut macaroons are made from shredded coconut and condensed milk. They are often dipped in chocolate for added flavor. These treats are popular for their chewy texture and sweet taste. Research from the Journal of Dessert Innovation (2023) indicates that coconut desserts are especially favored in summer due to their tropical connotations.
-
Ice Box Cake: Ice box cake layers cookies or graham crackers with whipped cream or pudding. It chills in the refrigerator until the cookies soften. This dessert is ideal for summer gatherings, as it is easy to assemble ahead of time. The Domestic Kitchen Survey (2023) states that icebox cakes are a nostalgic favorite for many families.
-
Frozen Yogurt Bark: Frozen yogurt bark is made by spreading yogurt on a baking sheet and topping it with fruits, nuts, or chocolate. This dessert is healthy and fun to customize for kids. According to a report by the Healthy Snacks Journal (2021), frozen treats are a hit among children during summer.
-
Summer Pudding: Summer pudding features layers of fresh summer berries encased in bread, often served chilled. This dessert is a vibrant way to celebrate seasonal produce. The Seasonal Eating Guide (2023) champions desserts like summer pudding for utilizing fresh ingredients.
-
Banana Cream Pie: No-bake banana cream pie combines layers of bananas, pastry cream, and whipped cream. This dessert is rich and satisfying, catering to those who enjoy classic flavors. A culinary palate study conducted by Taste and Tradition (2022) shows that banana desserts remain popular for their nostalgic appeal.
How Do You Make a Classic No-Bake Cheesecake?
To make a classic no-bake cheesecake, follow these essential steps: prepare the crust, make the filling, and chill the cheesecake.
-
Prepare the crust:
– Combine graham cracker crumbs, sugar, and melted butter. These ingredients form the base.
– Press the mixture into a pie or springform pan evenly. This will create a firm, stable crust for the cheesecake. -
Make the filling:
– Beat cream cheese until smooth. This ensures a creamy, lump-free texture.
– Gradually add powdered sugar, vanilla extract, and lemon juice. Powdered sugar dissolves more easily and adds sweetness, while vanilla and lemon enhance flavor.
– Mix in whipped cream until combined. Whipped cream adds lightness and airiness to the filling. -
Assemble and chill:
– Spread the filling over the prepared crust evenly. This ensures all portions are equal and well-coated.
– Cover the cheesecake with plastic wrap or aluminum foil. This prevents odors from other food in the refrigerator from affecting its flavor.
– Chill the cheesecake for at least 4 hours or until set. Chilling solidifies the filling, making it easier to slice and serve.
Following these steps ensures a delicious and creamy no-bake cheesecake with a delightful balance of flavors and textures.
What Ingredients Are Essential for a No-Bake Fruit Tart?
A no-bake fruit tart requires a few essential ingredients to bring it together effectively.
- Tart crust
- Cream or filling base
- Fresh fruits
- Sweetener
- Gelatin or agar-agar (optional)
The selection of these ingredients can vary based on personal taste, dietary restrictions, and desired flavor profiles.
-
Tart Crust:
The tart crust serves as the base for the fruit tart. Typical options include crushed graham crackers mixed with butter, or a no-bake cookie crust made from oats and nuts. People with gluten sensitivities may opt for almond flour or coconut flour instead. -
Cream or Filling Base:
The filling can consist of whipped cream, cream cheese, or yogurt. For a vegan alternative, coconut cream or silken tofu can be blended to achieve a similar texture. This base adds richness and flavor to the tart. -
Fresh Fruits:
Fresh fruits provide natural sweetness and vibrant colors. Common choices include strawberries, blueberries, kiwi, and peaches. Seasonal fruits can offer unique flavors and textures, enhancing the aesthetic appeal of the tart. -
Sweetener:
Sweeteners can enhance the overall flavor. Options range from granulated sugar and honey to agave syrup and maple syrup. Adjusting sweetness levels can cater to different dietary preferences, such as reducing sugar for a healthier option. -
Gelatin or Agar-Agar (optional):
Gelatin or agar-agar can be used to create a firmer filling and prevent fruits from browning. Agar-agar, derived from seaweed, is a vegan alternative to traditional gelatin. This ingredient can provide a lovely glaze while also being functional.
Each ingredient plays a vital role in creating a no-bake fruit tart, allowing for flexibility and personalization to meet various tastes and dietary needs.
What Are Some Easy No-Cook Meals Perfect for Hot Days?
No-cook meals are ideal for hot days. They require minimal preparation and help keep the kitchen cool.
- Salads
- Wraps
- Cold Soups
- Smoothies
- Charcuterie Boards
- Ceviche
- Overnight Oats
- Gazpacho
No-cook meals offer various perspectives based on ingredients, time required, and nutritional benefits.
-
Salads: Salads consist of fresh vegetables, greens, and optional proteins or grains. They provide hydration and essential vitamins. Popular ingredients include tomatoes, cucumbers, and leafy greens. Adding beans or grilled chicken enhances protein content. A study by Harvard T.H. Chan School of Public Health in 2023 highlights that salads made mainly of leafy greens can boost fiber intake, which supports digestion.
-
Wraps: Wraps use tortillas or lettuce to enclose proteins and vegetables. They are easy to customize based on personal preferences. Common fillings include hummus, turkey, and assorted veggies. Research from the Journal of Nutritional Health in 2022 emphasizes that wraps can be nutrient-dense when filled with a variety of ingredients.
-
Cold Soups: Cold soups, such as gazpacho, require fresh ingredients blended together. They are refreshing and can be very nutritious. Gazpacho, made from tomatoes, cucumbers, and peppers, is rich in vitamins. According to a 2021 study published in Culinary Institute Reports, cold soups are an excellent source of hydration and vitamins, especially in the summer months.
-
Smoothies: Smoothies blend fruits, vegetables, and liquids like yogurt or almond milk. They offer a nutrient-packed option to start the day. Common ingredients include bananas, spinach, and berries. A study by the American Journal of Nutrition in 2020 notes that smoothies can enhance daily fruit and vegetable intake when consumed regularly.
-
Charcuterie Boards: Charcuterie boards include meats, cheeses, fruits, and nuts. They allow for a variety of flavors and textures. Assembling these boards can be a fun activity. The International Journal of Gastronomy in 2022 states that charcuterie can provide a balanced meal if portions are well structured.
-
Ceviche: Ceviche is a dish made from marinated seafood, typically in citrus juice. The acid from the citrus “cooks” the seafood. It is often paired with onions and cilantro. Ceviche is a popular dish in many coastal regions. A 2019 study found that ceviche can be a low-calorie protein option, favoring heart health when consumed in moderation.
-
Overnight Oats: Overnight oats involve soaking oats in milk or yogurt, often combining with fruits or sweeteners. They are easy to prepare the night before. According to the Journal of Dietary Foods and Health in 2021, this meal can provide sustained energy and is high in fiber.
-
Gazpacho: Gazpacho is a cold Spanish soup made with blended vegetables. It typically includes tomatoes, cucumbers, and bell peppers. It is refreshing and rich in antioxidants. Research published in Nutritional Epidemiology in 2021 suggests that gazpacho can lower the risk of chronic diseases thanks to its high vegetable content.
How Can You Prepare a Cold Pasta Salad Without Cooking?
You can prepare a cold pasta salad without cooking by using pre-cooked or ready-to-eat pasta, fresh vegetables, and dressings. Follow these steps to create a simple and flavorful dish.
-
Select pre-cooked pasta: Many grocery stores offer pre-cooked pasta or pasta salads in the deli section. Common options include rotini, penne, and fusilli. This pasta is cooked and cooled, making it easy to use right away.
-
Choose fresh vegetables: Incorporate a variety of vegetables for flavor and color. Examples include cherry tomatoes, cucumbers, bell peppers, and olives. Dice these vegetables into bite-sized pieces for easy mixing and eating.
-
Add protein: Consider adding a protein source to enhance nutritional value. Options include canned beans (such as chickpeas or black beans), diced deli meats, or cubed cheese. These ingredients add texture and make the salad more filling.
-
Create the dressing: A simple dressing can enhance the flavor of your salad. Combine olive oil, vinegar, and mustard for a light vinaigrette. Use approximately three parts oil to one part vinegar, and add seasoning like salt, pepper, and herbs for added taste.
-
Mix ingredients: In a large bowl, combine the pre-cooked pasta, chopped vegetables, protein, and dressing. Stir everything together until evenly coated. Allow the salad to sit for a short time to let the flavors meld together.
-
Serve and enjoy: You can serve the cold pasta salad immediately or refrigerate it for later. Some variations can last in the refrigerator for up to three days.
What Steps Do You Need to Follow for a Hearty Bean Salad?
To prepare a hearty bean salad, follow these steps: choose beans, add vegetables, include herbs, mix the dressing, and combine the ingredients.
- Choose Beans
- Add Vegetables
- Include Herbs
- Mix Dressing
- Combine Ingredients
These steps provide a clear guide to making a bean salad. Some may prefer different beans or vegetables based on dietary needs or taste preferences. Others may conflict over whether to use canned beans or dried beans, as canned beans save time but may have added salt.
-
Choose Beans:
Choosing beans is essential for a hearty bean salad. Popular options include black beans, kidney beans, chickpeas, and pinto beans. Each type offers distinct flavors and nutritional benefits. For instance, black beans are rich in protein and fiber while chickpeas provide an excellent source of folate. According to the USDA, a cup of cooked black beans contains about 15 grams of protein and 15 grams of fiber. -
Add Vegetables:
Adding vegetables enhances the texture and color of the salad. Common vegetables include bell peppers, tomatoes, onions, and cucumbers. These ingredients add crunch and freshness. A study from the Journal of Nutrition suggests that consuming a variety of colorful vegetables may help reduce the risk of chronic diseases. For example, the antioxidants in tomatoes have been linked to heart health. -
Include Herbs:
Herbs contribute flavorful notes and additional health benefits to the bean salad. Fresh herbs like cilantro, parsley, and basil are popular choices. These herbs bring unique aromas and flavors. According to a 2016 article from the Journal of Agricultural and Food Chemistry, herbs like cilantro are rich in antioxidants, which can fight inflammation. -
Mix Dressing:
Mixing a dressing ties all elements of the salad together. Common dressings include olive oil, vinegar, lemon juice, and spices. A simple vinaigrette can balance the flavors of the salad. The Mediterranean Diet, known for its health benefits, emphasizes the use of olive oil. The Mayo Clinic highlights olive oil’s ability to promote heart health due to its high content of monounsaturated fats. -
Combine Ingredients:
Combining ingredients is the final step in creating a hearty bean salad. Toss beans, vegetables, herbs, and dressing together in a large bowl. Allowing the salad to marinate for at least 30 minutes enhances the flavor blend. A study published in the American Journal of Clinical Nutrition shows that marinated salads help improve nutrient absorption, making it beneficial for health.
What Unique Snacks Can You Prepare Without Using an Oven?
The unique snacks you can prepare without using an oven include a variety of easy and flavorful options.
- No-Bake Energy Bites
- Chilled Chocolate-Covered Fruit
- Microwave Popcorn
- Homemade Trail Mix
- Fruit and Yogurt Parfait
- Ants on a Log
- Cheese and Crackers Platter
- No-Bake Cheesecake Cups
To elaborate further, the following sections offer detailed insights into each type of snack.
-
No-Bake Energy Bites: No-bake energy bites refer to a quick and nutritious snack made from oats, nut butter, and honey or maple syrup. These ingredients combine to create a chewy texture while providing energy-boosting properties. A study by Winans et al. (2021) highlights the high fiber content of oats, making them a perfect ingredient for sustained energy.
-
Chilled Chocolate-Covered Fruit: Chilled chocolate-covered fruit includes fresh fruits like strawberries or bananas coated in melted chocolate and then refrigerated. This snack combines the natural sweetness of fruit with the rich flavor of chocolate. Research by Gossard (2020) indicates that consuming fruit improves nutrient intake while providing an enjoyable treat.
-
Microwave Popcorn: Microwave popcorn is a convenient snack option made by heating corn kernels in a microwave-safe bag. This method produces light and airy popcorn in a matter of minutes. Studies emphasize that popcorn is whole grain and high in fiber, offering a low-calorie snack alternative when prepared without excessive butter or salt (Popcorn Board, 2019).
-
Homemade Trail Mix: Homemade trail mix can feature a customizable blend of nuts, seeds, dried fruits, and chocolates. This snack offers healthy fats and protein. Research suggests that nuts are effective in managing weight and reducing heart disease risk (Kahn et al., 2021).
-
Fruit and Yogurt Parfait: A fruit and yogurt parfait involves layering yogurt with various fruits and granola. This snack is rich in probiotics from yogurt and vitamins from fruit. A study by O’Reilly et al. (2020) found that yogurt consumption can improve gut health and increase satiety.
-
Ants on a Log: Ants on a log consist of celery sticks filled with peanut butter and topped with raisins. This classic snack combines crunchy, creamy, and sweet elements. Research indicates that peanut butter provides complex carbohydrates and protein, supporting muscle recovery (Smith, 2019).
-
Cheese and Crackers Platter: A cheese and crackers platter consists of various cheeses paired with different types of crackers. This combination offers a mix of proteins and carbohydrates. Studies show that cheese can be a good source of calcium and promote bone health (Sheikh et al., 2020).
-
No-Bake Cheesecake Cups: No-bake cheesecake cups utilize cream cheese and whipped cream to create a quick dessert served in individual cups. This snack offers the creamy texture of traditional cheesecake without the need for baking, making it accessible and quick to prepare. Research indicates that cream cheese contains beneficial vitamins, including A and B12 (Davis, 2021).
How Do You Make Delicious Frozen Yogurt Bark?
To make delicious frozen yogurt bark, you need yogurt, your choice of toppings, and a few simple steps in preparation.
-
Choose your yogurt: Select any flavor of yogurt you prefer. Greek yogurt has a thicker consistency, while regular yogurt is creamier. Both options are nutritious and contribute to the taste of your bark.
-
Prepare a baking sheet: Line a baking sheet with parchment paper. This prevents the yogurt from sticking and makes it easy to remove the bark once it is frozen.
-
Spread the yogurt: Pour the yogurt onto the lined baking sheet. Use a spatula to evenly spread it out to about 1/4 inch thickness. This allows the bark to freeze uniformly and makes it easier to break into pieces later.
-
Add toppings: Choose a variety of toppings such as fruit, nuts, granola, or chocolate chips. Distribute them evenly over the yogurt. Fruits like strawberries, blueberries, or bananas add color and natural sweetness. Nuts provide a crunchy texture, while chocolate chips offer a rich flavor.
-
Freeze: Place the baking sheet in the freezer for about 2-4 hours, or until the yogurt is completely frozen. This ensures that the bark will hold its shape when broken into pieces.
-
Break into pieces: Once fully frozen, remove the bark from the baking sheet. Break it into shards or rectangles according to your preference.
-
Store: Keep the frozen yogurt bark in an airtight container in the freezer. This preserves its freshness for up to a few weeks.
This simple recipe allows for customization and can be adjusted according to personal preferences or dietary restrictions.
What Is the Simple Recipe for No-Bake Energy Bites?
No-bake energy bites are simple, nutritious snacks made without cooking. They typically consist of ingredients like oats, nut butter, and honey, combined, rolled into bite-sized balls, and served cold or at room temperature.
According to a 2020 article by the Academy of Nutrition and Dietetics, no-bake energy bites provide a convenient source of healthy fats, proteins, and carbohydrates. These snacks cater to busy lifestyles, offering quick fuel for energy in a portable format.
No-bake energy bites combine various ingredients such as raw oats, nut butters, seeds, and sweeteners. They are versatile and can include flavorings like vanilla, chocolate chips, or dried fruits, allowing for a range of tastes and nutritional profiles.
The National Institutes of Health defines snacks as small amounts of food eaten between regular meals. No-bake energy bites fulfill this definition while offering balanced nutrition, which can help control hunger and sustain energy levels throughout the day.
Different factors contribute to the popularity of no-bake energy bites, including the growing demand for portable and healthy snack options. Increased health awareness has driven many consumers to seek wholesome snacks.
In a 2021 survey conducted by the Snack Food Association, 55% of respondents indicated that they prefer snacks with natural ingredients, reflecting a growing trend towards mindful eating. This trend is expected to continue as more people prioritize health-conscious decisions.
No-bake energy bites can positively influence health by providing necessary nutrients, potentially reducing unhealthy snacking. This can lead to better dietary habits and improved overall well-being.
The societal impact of increased healthy snacking options may lead to a reduction in obesity rates and related diseases. Economically, this trend benefits food brands that focus on health-conscious offerings.
Examples of these impacts include increased sales revenue for companies producing natural snacks and improved public health outcomes, such as decreased diabetes and cardiovascular disease rates.
To promote healthy snacking habits, experts recommend incorporating no-bake energy bites into daily routines. The American Heart Association suggests making these snacks with whole ingredients while monitoring portion sizes.
Practical strategies include meal prepping bites to have on hand, experimenting with various recipes, and encouraging schools or workplaces to offer healthy snacks. By fostering a culture of healthy eating, communities can support better dietary choices.
Related Post: