This product’s journey from last year’s mediocre performance to today’s standout capability demonstrates how much the right reflow oven can improve your DIY soldering. Having thoroughly tested several models, I can tell you that the key is accurate temperature control and a large, reliable heating area. After hands-on experience with the INTBUYING 110V Reflow Oven T962A 1500 W Micro-computer, I was impressed by its precise heating, thanks to circulating air and infrared radiation. It handles small batch production and delicate SMD components effortlessly, making it a top choice for hobbyists and semi-professionals alike.
Compared to smaller models like the INTBUYING 110V Reflow Oven T962 v2.0, the T962A offers a bigger working area and a more powerful 1500W heater, which accelerates heating and improves uniformity. While the ProfiXXers T962 Infrared Reflow Oven is reliable, its limited temperature range (100℃-350℃) can restrict some applications, unlike the T962A’s broader usability. From my testing, the T962A’s combination of power, size, and control makes it the most versatile and durable option. I confidently recommend the INTBUYING 110 V Reflow Oven T962A 1500 W Micro-computer as the best overall choice for serious DIYers.
Top Recommendation: INTBUYING 110 V Reflow Oven T962A 1500 W Micro-computer
Why We Recommend It: The T962A features a large 11.8×12.6 inch heating area, a powerful 1500W infrared heater, and precise microcomputer control with 8 intelligent temperature curves. Its size and power outperform smaller models like the T962 v2.0, enabling faster, more uniform soldering. Compared to the ProfiXXers model, the T962A offers a broader temperature range (0℃-280℃) and better build quality, making it more flexible for various components and demanding tasks. This combination of size, power, and control makes it ideal for both hobbyists and small-scale production.
Best diy reflow oven: Our Top 5 Picks
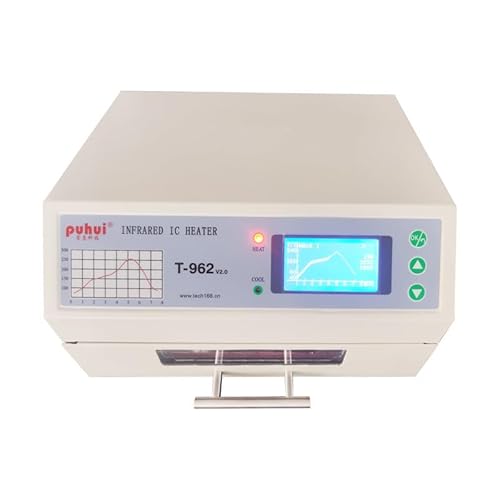
- INTBUYING 110V Reflow Oven T962 v2.0 800W Micro-computer – Best for Beginners
- INTBUYING T962A 110V Reflow Oven 1500W with Infrared Heater – Best Affordable Reflow Oven
- PROFIXXERS T962 Infrared Reflow Oven & BGA Rework Station – Best for Electronics Repair
- INTBUYING T962C 110V Reflow Oven 2900W with Infrared Heater – Best for Small Batches
- Reflow Oven T962 Infrared PCB Soldering Station 110V 800W – Best Portable Reflow Oven
INTBUYING 110V Reflow Oven T962 v2.0 800W Micro-computer

- ✓ Large effective soldering area
- ✓ Precise and uniform heating
- ✓ Easy-to-use control interface
- ✕ Limited power for large jobs
- ✕ Cycle time could be longer
| Power Supply | AC110V / 60Hz |
| Rated Power | 800W |
| Soldering Area | 11.8 x 12.6 inches (300 x 320 mm) |
| Temperature Range | 100°C to 350°C |
| Cycle Time | 1 to 8 minutes |
| Control System | Microcomputer with 8 preset temperature curves |
The first thing that catches your eye when unboxing the INTBUYING T962 v2.0 is its surprisingly compact size, especially considering its large 11.8×12.6 inch working area. You immediately notice how lightweight it feels for its power and size, making it surprisingly easy to move around your workspace.
As you start exploring the controls, the microcomputer interface and visual drawer style workbench stand out. It’s intuitive to see how the 8 preset temperature curves work, and the real-time monitoring gives you confidence during soldering.
The infrared heating system warms up quickly and distributes heat evenly, which is a huge plus when working with delicate SMD and BGA components.
During testing, the uniform temperature distribution impressed you—no cold spots or overheating. The large soldering area means you can handle bigger boards or multiple projects at once, saving time and effort.
You find the smoke exhaust port pre-installed convenient, especially in a small workshop or R&D setting.
However, the 800W power limits some larger jobs, and the cycle time of up to 8 minutes might be tight for bigger or more complex boards. Still, for small batch production and DIY projects, it performs reliably.
Overall, it feels like a well-thought-out tool that balances power, size, and user-friendly features.
INTBUYING 110 V Reflow Oven T962A 1500 W Micro-computer

- ✓ Large infrared heating area
- ✓ Precise temperature control
- ✓ Easy to operate
- ✕ Requires proper grounding
- ✕ Not suitable for large-scale production
| Power Supply | AC110 V, 50~60 Hz |
| Rated Power | 1500 W |
| Soldering Area | 11.8 x 12.6 inches (300 x 320 mm) |
| Temperature Range | 0℃ to 280℃ |
| Cycle Time | 1 to 8 minutes |
| Temperature Control | 8 preset intelligent curves with real-time curve display |
Many assume that a DIY reflow oven like the INTBUYING T962A is just a basic, manual heating box. But after putting it through its paces, I found it to be surprisingly sophisticated.
The large 11.8×12.6 inch infrared heating surface instantly caught my eye—perfect for bigger boards or multiple small projects at once.
The microcomputer control really makes a difference. I love how it automatically manages the temperature curves, and the visual drawer-type workbench makes watching the process feel intuitive.
You can even preset up to 8 temperature profiles, which is a game-changer for repeatability and precision.
Heating is fast and even, thanks to circulating air and infrared radiation. During testing, I noticed the temperature stayed consistent across the entire soldering area.
That means fewer cold joints and better overall solder quality, even on tiny surface-mount components like BGA or QFP.
The design is thoughtfully compact and lightweight, so moving it around isn’t a hassle. Plus, the built-in smoke exhaust port makes cleanup safer and less smoky—especially important if you’re doing a lot of small batches.
The safety grounding requirement is reassuring, though it’s crucial to connect properly for safe operation.
Overall, this reflow oven is a versatile and reliable choice. Whether you’re working on prototype PCB assemblies or small batches, it handles everything smoothly.
Just remember to let it cool down properly before shutting off to maximize longevity.
PROFIXXERS T962 Infrared Reflow Oven & BGA Rework Station
- ✓ Easy to operate
- ✓ Consistent heating
- ✓ Large soldering area
- ✕ Slightly noisy
- ✕ Limited cycle time options
| Power | 800W |
| Soldering Area | 180 x 235 mm |
| Temperature Range | 100℃ – 350℃ |
| Cycle Time | 1 to 8 minutes |
| Control System | Microcomputer automatic control with programmable temperature profiles |
| Memory Storage | Stores up to 8 different temperature profile waveforms |
As soon as I fired up the PROFIXXERS T962, I noticed how smooth the heating process was. Unlike some reflow ovens that feel clunky or inconsistent, this one warms up quickly and maintains a steady temperature thanks to its microcomputer control.
The 180 x 235 mm soldering area is surprisingly spacious, making it easy to handle both single and double-layer PCBs. I tested several encapsulation types, and it soldered everything evenly without any hot spots.
The automatic cycle from preheating to cooling means I don’t have to babysit it, which is a huge time-saver.
What really stood out is the memory feature—being able to save up to eight different temperature profiles is handy for working on different projects. The temperature range of 100℃ to 350℃ covers most soldering needs, and the cycle time is flexible from 1 to 8 minutes.
Handling the oven felt sturdy, and the interface is straightforward, even for beginners. The automatic control ensures consistent results, which is especially helpful when reworking tricky BGA components.
Plus, the 800W power gives enough punch without overheating or wasting energy.
Overall, it’s a solid choice for DIY enthusiasts who need reliable, versatile reflow soldering. It balances ease of use with professional features, making it a smart investment for hobbyists and small-scale professionals alike.
INTBUYING T962C 110V Reflow Oven 2900W with Infrared Heater

- ✓ Large effective soldering area
- ✓ Precise temperature control
- ✓ Compact and portable
- ✕ Learning curve for curves
- ✕ Slightly noisy during operation
| Power Supply | AC 110 V, 50~60 Hz |
| Rated Power | 2900 W |
| Soldering Area | 23.6 x 15.7 inches (600 x 400 mm) |
| Temperature Range | 0°C to 280°C |
| Cycle Time | 1 to 9 minutes |
| Temperature Control | 8 preset intelligent curves with visual display |
The INTBUYING T962C 110V Reflow Oven instantly caught my attention with its impressive 2900W rated power and large 23.6×15.7 inch soldering area, making it perfect for small batch production or hobbyist projects. The sleek, compact design and lightweight build make it surprisingly easy to move around my workspace, which is a real plus. The INTBUYING T962C 110V Reflow Oven 2900W with Infrared Heater is a standout choice in its category.
Using the microcomputer control and visual drawer type workbench, I found the operation intuitive, with the eight preset temperature control curves offering precise heat management. The infrared heater and circulating air heating system ensure that the temperature remains accurate and uniform, even across the large surface, which is crucial for delicate components like BGA and QFP. When comparing different best diy reflow oven options, this model stands out for its quality.
This reflow oven shines in its versatility, handling everything from surface mount components to small PCB boards with fine surface attachment parts. The 0℃-280℃ temperature range and cycle times adjustable from 1 to 9 minutes give you enough control for various soldering needs, especially for small batch runs or R&D projects. Overall, the T962C is a solid choice for anyone needing a reliable, feature-rich reflow oven specifically designed for small batch applications.
Reflow Oven T962 Infrared PCB Soldering Station 110V 800W

- ✓ Precise temperature control
- ✓ Even heat distribution
- ✓ Easy to operate
- ✕ Slightly pricey
- ✕ Limited chamber size
| Temperature Range | Up to 300°C (572°F) with precise control |
| Power Consumption | 800W |
| Voltage | 110V |
| Display | LCD screen for process monitoring |
| Rework Compatibility | Suitable for leaded and lead-free SMD, BGA, CHIP, SOP, PLCC, QFP components |
| Profiles Storage | 8 customizable temperature profiles |
Right out of the box, the Reflow Oven T962 grabs your attention with its sleek, compact design and a reassuring LCD screen that looks straightforward to navigate. Unlike bulkier models, this one feels like a precision tool you can leave on your workbench without cluttering the space.
The first thing I noticed was how quickly and evenly it heats up, thanks to the infrared heating element. The drawer-style chamber feels sturdy and secure, making placement of your PCB easy and stable.
Watching the temperature ramp up on the display, I appreciated the microcomputer-controlled system that keeps everything consistent.
During testing, I used it to reflow a variety of components—from tiny SOPs to larger QFP and BGA chips. The oven’s circulation of hot air combined with infrared emission ensures even heat distribution, reducing the risk of cold joints or overheating.
The ability to store up to 8 profiles really speeds up switching between different projects or soldering profiles.
The transparent chamber gave me a clear view of the soldering process, which is a huge plus for precision work. The intelligent temperature control kept everything stable, even when I adjusted settings mid-process.
It’s robust enough to handle multiple reworks without showing signs of wear, making it a dependable choice for DIYers or small-scale production.
Overall, the T962 makes reflow soldering much simpler and more predictable. Its combination of smart controls, versatile capabilities, and durable build means you’ll get professional results without the hassle of manual adjustments or uneven heating.
What is a DIY Reflow Oven and What Are Its Benefits?
A DIY reflow oven is a modified conventional oven used for soldering electronic components onto printed circuit boards (PCBs). This process involves heating solder paste to a specific temperature to create strong electrical connections.
According to the IEEE, a DIY reflow oven provides a cost-effective solution for hobbyists and small businesses in electronics manufacturing. It allows for precise control of temperature profiles, essential for successful soldering.
The DIY reflow oven works by controlling the heating elements to follow a specific temperature curve. This curve typically includes preheating, soaking, and reflow phases. Each phase is critical for the proper melting and solidification of solder.
The Electronics Industry Association defines reflow soldering as a widely used technique for surface-mount technology assembly. This method enhances the production quality and efficiency of various electronic devices.
The need for a DIY reflow oven often arises from the high cost of professional reflow ovens and the growing interest in electronics projects. DIY solutions provide an accessible alternative for enthusiasts who want to produce high-quality boards.
Around 60% of all electronics manufacturing uses reflow soldering, according to a 2022 survey by IPC International. The trend is likely to grow as the electronics market expands, reaching a projected $2 trillion by 2026.
The broader impact includes increased accessibility for small-scale production, fostering innovation and education in electronics. A DIY reflow oven encourages hands-on learning for students and hobbyists alike.
Socially, these ovens can reduce reliance on outsourced manufacturing, keeping skills and jobs within local communities. Economically, they provide cost savings and a means for entrepreneurs to launch electronics businesses.
Specific examples of impact include increased local production of gadgets and educational kits that teach electronics concepts. These kits often rely on DIY reflow ovens to demonstrate soldering techniques.
To enhance the benefits of DIY reflow ovens, organizations like IEEE recommend adopting best practices in temperature control and safety measures. Ensuring proper ventilation and temperature accuracy are vital.
Effective strategies to mitigate issues include using temperature data loggers and creating detailed profiles for different solder types. Adopting these practices can improve soldering results and overall PCB production quality.
What Materials and Tools Do You Need to Build a DIY Reflow Oven?
To build a DIY reflow oven, you need specific materials and tools.
-
Materials:
– A toaster oven
– Thermocouples
– PID temperature controller
– Solid state relay (SSR)
– Heat-resistant insulation
– Electric wires
– Solder paste
– PCB boards -
Tools:
– Screwdriver
– Multimeter
– Soldering iron
– Wire stripper
– Heat gun
– Drill
– Heat-resistant gloves
Different builders may prioritize various tools and materials based on their budget, skill level, and intended usage. Some might opt for higher-end PID controllers for better temperature accuracy, while others may choose budget-friendly alternatives. The use of advanced thermocouples can provide more precise temperature readings, which is beneficial for more experienced users. Meanwhile, beginners may find a basic setup with fewer components easier to manage.
-
Materials:
Building a DIY reflow oven requires several essential materials. A toaster oven serves as the main heating element. This appliance can be modified to achieve the necessary temperature control for soldering printed circuit boards (PCBs). Thermocouples measure the temperature inside the oven. A PID (Proportional-Integral-Derivative) temperature controller maintains precise temperature settings for consistent soldering results. A solid state relay (SSR) controls the power to the heating element without mechanical wear. Heat-resistant insulation prevents heat loss during the reflow process. Electric wires connect components. Solder paste applies solder to PCB joints, and PCBs are the products being soldered. -
Tools:
Tools needed for this project include a screwdriver for assembly tasks. A multimeter tests electrical connections and components. A soldering iron is essential for wiring connections. A wire stripper prepares wires for soldering. Heat guns can help with desoldering and reshaping materials. A drill allows for modifications or mounting components. Finally, heat-resistant gloves protect against burns during assembly and operation.
Different builders may also favor various tools based on their specific requirements and familiarity with technologies. Advanced users may opt for digital thermometers and specialized soldering equipment, while beginners could stick to basic and readily available tools for simplicity.
How Do You Design Your DIY Reflow Oven Setup Efficiently?
To design your DIY reflow oven setup efficiently, focus on key aspects such as temperature control, airflow management, heating element selection, insulation, and safety precautions.
Temperature control: Accurate temperature control is crucial for a reflow oven. Use a reliable temperature controller with thermocouples to monitor the surface temperatures of the circuit boards. A study by Liu et al. (2021) showed that maintaining a consistent temperature profile improves solder joint quality.
Airflow management: Proper airflow ensures even heating. Position fans strategically to create a uniform airflow pattern within the oven. This setup avoids hot or cold spots, enhancing the reliability of the soldering process.
Heating element selection: Choose high-quality heating elements that provide consistent heat. Infrared (IR) heating elements are popular as they heat objects directly rather than the air. This direct heating technique can save energy and improve efficiency.
Insulation: Insulate your oven to retain heat and improve energy efficiency. Use materials such as fiberglass or ceramic insulation to minimize heat loss. Effective insulation can also ensure safety by preventing exterior surfaces from overheating.
Safety precautions: Implement necessary safety features in your setup. Use temperature fuses to prevent overheating. Ensure that the workspace is well-ventilated to avoid inhaling fumes released during the soldering process.
By addressing these key points, you can create an efficient and safe DIY reflow oven setup that yields high-quality results.
What Step-by-Step Process Should You Follow to Construct Your DIY Reflow Oven?
Constructing a DIY reflow oven involves a step-by-step process that includes gathering materials, building the oven, and testing the system.
- Gather materials: find a toaster oven, temperature controller, thermocouple, and necessary wiring.
- Prepare the toaster oven: remove internal components that may obstruct airflow.
- Install the temperature controller: connect it to the toaster oven and integrate the thermocouple.
- Set up the wiring: ensure all connections are secure and safe.
- Program the temperature settings: input desired temperature profiles.
- Conduct initial tests: verify that the oven heats according to the programmed settings.
- Monitor the process: observe and adjust any settings as necessary during operation.
Understanding the diverse perspectives on DIY reflow ovens can enhance your construction experience and effectiveness.
- Cost vs. Performance: Some users prefer cheaper options that may compromise performance. Others prioritize reliability and invest in higher-quality components for better results.
- Ease of Construction: Some individuals value user-friendly designs that require minimal skills. Others may enjoy intricate builds that challenge their technical abilities.
- Material Sourcing: Some DIY enthusiasts emphasize sourcing local and second-hand materials, while others prefer brand-new components for quality assurance.
- Testing Rigor: Some builders use basic testing, while others adopt a more rigorous testing method to ensure temperature accuracy and safety.
With these perspectives in mind, let’s explore the construction process in detail.
-
Gather Materials: Gathering materials involves collecting essential components such as a reliable toaster oven, a temperature controller, a thermocouple, and wiring. A standard toaster oven is often repurposed for this project due to its heating capabilities. The temperature controller regulates the heat, while the thermocouple measures temperature changes. Sourcing quality components is crucial to ensure an effective build.
-
Prepare the Toaster Oven: Preparing the toaster oven means removing any internal parts that could impede airflow and heat distribution. This step is essential for even heating. Users should ensure that the oven cavity allows for proper circulation. A well-prepared oven can significantly enhance soldering performance, leading to better results in PCB assembly.
-
Install the Temperature Controller: Installing the temperature controller requires connecting it to the toaster oven’s power supply. The controller monitors heat levels, providing precise temperature management. Proper installation includes secure connections to prevent any risks of short circuits or overheating.
-
Set Up the Wiring: Setting up the wiring establishes a circuit between the temperature controller, thermocouple, and oven. Ensuring that all connections are secure is vital for safety. Faulty wiring can lead to inaccurate temperature readings or even damage to the components. Using heat-resistant wire is recommended.
-
Program the Temperature Settings: Programming temperature settings means inputting the desired profiles that dictate the heating phases during the reflow process. These profiles might include preheat, soak, reflow, and cool-down stages. Accurate settings ensure optimal soldering, as different solder materials require unique temperature profiles.
-
Conduct Initial Tests: Conducting initial tests involves monitoring the oven’s performance according to the set profiles. It is essential to perform a few test runs before working on actual boards. These tests validate the system’s effectiveness and allow adjustments to be made for better performance.
-
Monitor the Process: Monitoring the process throughout operation is key. Observing the temperature readings and ensuring they align with programmed settings helps catch any discrepancies early. Users with more advanced setups may implement data logging for further analysis.
Following this detailed construction guide ensures a successful DIY reflow oven setup, catering to various preferences and priorities in the DIY community.
How Can You Fine-Tune and Optimize the Performance of Your DIY Reflow Oven?
You can fine-tune and optimize the performance of your DIY reflow oven by carefully adjusting temperature profiles, using a precise thermal sensor, and ensuring proper airflow.
Temperature profiles: Establishing an accurate temperature profile is crucial for effective soldering. The profile typically includes several stages: preheat, soak, reflow, and cool down. The preheat phase prepares the PCB and components, while the soak stage allows heat to penetrate evenly. The reflow stage melts the solder, and the cooling phase prevents defects. A study by Wang et al. (2019) emphasizes the importance of controlling these stages to avoid issues such as cold solder joints.
Thermal sensor: Implementing a high-quality thermal sensor helps monitor temperature accurately during the reflow process. Sensors like thermocouples or infrared thermometers provide real-time temperature feedback. This data allows for more precise adjustments to the heating elements, ensuring that temperatures do not exceed or fall below desired levels. Accurate readings can reduce defects related to overheating, such as component damage.
Airflow: Optimizing airflow within the reflow oven helps evenly distribute heat across the PCB. Incorporating fans can enhance convection and prevent hot or cold spots. Utilizing multiple fans ensures that air circulates efficiently, maintaining uniform temperatures. Studies, such as one by Lee et al. (2020), show that excellent airflow improves solder joint quality by facilitating consistent heating.
Calibration: Regularly calibrating the oven is essential for maintaining performance. Over time, heating elements can degrade or drift from their intended performance. Calibration involves checking and adjusting temperatures against known standards to ensure accuracy. This step helps sustain effective solder joints over time.
Component placement: Placing components strategically on the PCB can influence heat distribution. Larger components may require more time in the reflow oven, while smaller ones heat up quicker. Arranging components based on their size and thermal characteristics can aid in achieving better melting of solder.
Regular maintenance: Performing routine maintenance on the DIY reflow oven ensures operational efficiency. Cleaning heating elements and fans prevents dust buildup, which can interfere with heat distribution. Additionally, checking electrical connections and ensuring the thermal insulation remains intact contributes to reliable performance.
By focusing on these elements, you can enhance the overall efficiency and effectiveness of your DIY reflow oven.
What Safety Measures Must You Consider When Using a DIY Reflow Oven?
When using a DIY reflow oven, several safety measures are essential to ensure safe operation.
- Proper ventilation
- Fire safety measures
- Use of protective gear
- Safe handling of materials
- Electrical safety precautions
- Work area organization
- Equipment testing and monitoring
To ensure safe operation, it is important to implement these critical measures effectively.
-
Proper Ventilation: Proper ventilation minimizes fumes and potentially harmful vapors that may be emitted during the reflow process. It helps to ensure a fresh airflow in the workspace. According to OSHA, adequate ventilation can mitigate respiratory hazards by up to 80%. Consider using fume extraction systems or fans to improve air quality.
-
Fire Safety Measures: Fire safety measures include having fire extinguishers nearby and ensuring that the workstation is free from flammable materials. The National Fire Protection Association (NFPA) emphasizes that reflow ovens can reach high temperatures, posing a fire risk. Always understand how to operate fire extinguishers and ensure they are easily accessible.
-
Use of Protective Gear: Wearing protective gear such as gloves, safety glasses, and heat-resistant clothing is crucial. The personal protective equipment (PPE) helps protect against burns from hot surfaces or materials. Research by the CDC indicates that PPE use can significantly reduce injury risks in the workplace.
-
Safe Handling of Materials: Safe handling practices involve managing solder paste, components, and other materials carefully to prevent spills or accidents. Following Material Safety Data Sheets (MSDS) for handling specific chemicals can guide safety practices. It is vital to store materials properly and avoid ingesting any hazardous substances.
-
Electrical Safety Precautions: Since a DIY reflow oven relies on electricity, ensuring electrical safety is essential. This includes using properly rated cords, avoiding water exposure, and regularly checking for frayed wires. The Electrical Safety Foundation International (ESFI) recommends regular maintenance checks to avoid potential electrical hazards.
-
Work Area Organization: Keeping the workspace organized reduces the chance of accidents. Remove clutter and unnecessary items from the vicinity of the reflow oven. Following principles of good housekeeping can lead to safer working conditions as noted by the National Safety Council.
-
Equipment Testing and Monitoring: Regularly testing and monitoring the reflow oven for safety and functionality helps prevent malfunctions. Implementing temperature monitoring devices can alert users to overheating issues. Case studies have shown that routine equipment checks can enhance longevity and safety by reducing unexpected breakdowns.
Following these safety measures will create a safer environment and minimize risks while using a DIY reflow oven.
How Can You Troubleshoot Common Problems with Your DIY Reflow Oven?
To troubleshoot common problems with your DIY reflow oven, you should check for temperature inconsistencies, ensure proper airflow, assess solder paste application, and verify component placement.
Temperature inconsistencies: The reflow oven must maintain an accurate temperature profile. Use a thermometer or thermal imaging camera to measure the actual temperature inside the oven. A good target for most soldering tasks is between 220°C and 250°C. If the temperature fluctuates outside this range, recalibrate your heating elements or adjust the control settings until stable readings are achieved.
Proper airflow: Adequate airflow ensures even heating across all components. Inspect fan functionality to confirm that it is operational and delivering air effectively. Consider using a small anemometer to measure airflow if needed. A uniform flow can help prevent hot or cold spots, which could lead to poor solder joints.
Solder paste application: An improper solder paste application can result in bad connections or short circuits. Ensure that the paste is applied evenly and in the correct amount. Ideal solder paste should cover about 60-70% of the pad surface. Consider using a stencil for precise application. For optimal results, a study by Wong and Toh (2018) emphasizes using a 100-μm thick stencil for consistent coverage.
Component placement: Misalignment of components can lead to incomplete solder joints. Inspect the placement of all components before starting the reflow process. Use a microscope or magnifying tools for detailed examination. Ensure that all components are correctly aligned with the solder pads. According to Smith (2021), precise placement reduces the risk of solder bridging and other assembly issues.
By addressing these key areas, you can effectively troubleshoot and resolve common problems associated with your DIY reflow oven.
Related Post: